
Having trouble locating the microphone on your device? Don’t worry, we’ve got you covered. In this simple guide, we’ll walk you through the steps to find the microphone location in Device Manager.
Device Manager is an essential tool in Windows operating systems that allows you to view and control the hardware devices connected to your computer. By accessing Device Manager, you can easily locate and manage various hardware components, including your microphone.
To find the microphone location in Device Manager, follow these steps:
- Open Device Manager by right-clicking on the Start button and selecting “Device Manager” from the menu that appears.
- In the Device Manager window, expand the “Audio inputs and outputs” category by clicking on the arrow next to it.
- Look for the “Microphone” or “Recording device” option in the expanded list. It may also be labeled with the manufacturer’s name or model number.
- Once you’ve located the microphone, you can right-click on it and select “Properties” to view additional information or make changes to its settings.
By following these simple steps, you’ll be able to easily find the microphone location in Device Manager and access its properties. This can be particularly useful if you’re experiencing issues with your microphone or need to troubleshoot any problems.
Note: It’s important to ensure that your microphone is properly connected to your device and has the necessary drivers installed. If you’re still unable to locate it in Device Manager, you may need to check your hardware connections or update your audio drivers.
So, next time you’re struggling to find the microphone location in Device Manager, just remember these simple steps and you’ll be able to easily locate and manage your microphone.
What is Device Manager?
Device Manager is a built-in Windows utility that allows you to manage and control hardware devices connected to your computer. It provides a graphical interface that lists all the hardware devices installed on your PC, such as the keyboard, mouse, network adapter, display adapter, and so on.
With Device Manager, you can view detailed information about each device, update drivers, enable or disable devices, troubleshoot hardware problems, and more. It is a powerful tool for managing the hardware components of your computer.
Device Manager can be accessed in several ways:
- Right-click on the Start button and select “Device Manager” from the context menu
- Press the Windows key + X and select “Device Manager” from the menu
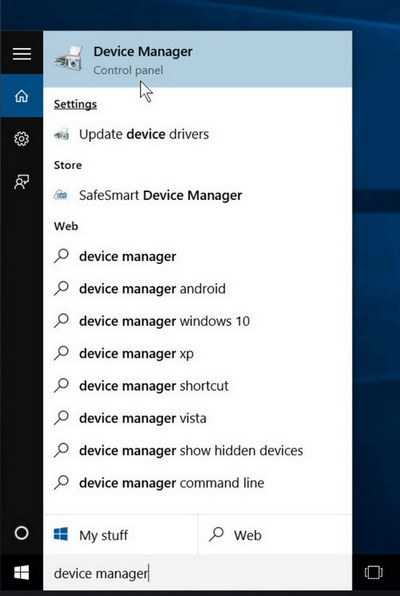
- Type “Device Manager” in the search bar and select it from the search results
Once you open Device Manager, you will see a hierarchical list of device categories, with each category containing the specific devices. You can expand or collapse the categories to view the devices within them.
| Symbol | Description |
|---|---|
| + | Expand a category to show the devices it contains |
| – | Collapse a category to hide the devices it contains |
By selecting a device, you can access its properties, update its drivers, disable or enable it, uninstall it, and perform other actions. Device Manager is a handy tool for troubleshooting hardware issues, as it provides information about driver conflicts, hardware errors, and other problems that may arise.
Overall, Device Manager is an essential utility for managing and maintaining the hardware devices of your computer. It allows you to keep your drivers up to date, troubleshoot issues, and ensure that all your hardware components are functioning properly.
The importance of finding the microphone location
The microphone location plays a crucial role in the overall performance and functionality of your recording or communication device. Whether you are using a computer, smartphone, or any other device with a microphone, it is essential to know where the microphone is located.
Here are a few reasons why finding the microphone location is important:
- Optimal sound quality: The microphone’s position can significantly affect the sound quality of your recordings or voice calls. By knowing where the microphone is located, you can adjust your positioning or adjust the device to capture the best possible audio.
- Noise reduction: Understanding the microphone’s location allows you to minimize unwanted background noise. By positioning yourself or your device in the right way, you can reduce ambient sounds and amplify your intended audio source.
- Troubleshooting: If you are experiencing microphone-related issues, such as low volume or distorted sound, knowing the microphone’s location can help you identify potential problems. You can check for physical obstructions or software settings that might be affecting the microphone’s performance.
- Accessory compatibility: Some devices, like headphones or headsets, come with built-in microphones. Knowing the microphone’s location on these accessories helps you position them correctly for clear communication or recording.
- Proper device handling: Understanding the microphone’s location avoids accidental obstructions or damage. You can avoid covering or blocking the microphone while handling or using the device, ensuring smooth and uninterrupted audio capture.
Finding the microphone location is essential for optimizing audio quality, troubleshooting issues, and ensuring compatibility with accessories. It empowers you to make necessary adjustments and improve your overall microphone experience. By carefully considering the microphone location, you can enhance the sound clarity and communication capabilities of your device.
Accessing Device Manager
Device Manager is a Windows tool that allows you to manage and troubleshoot the hardware devices installed on your computer. To open Device Manager, follow these steps:
- Press the Windows key + X on your keyboard to open the Power User Menu.
- Select Device Manager from the list of options. A new window will open.
Alternatively, you can also access Device Manager through the Control Panel:
- Click on the Start button and type “Control Panel” in the search box.
- Open the Control Panel from the search results.
- Click on the System and Security category.
- Under the System heading, click on Device Manager. The Device Manager window will appear.
Once you have opened Device Manager, you will see a list of all the hardware devices installed on your computer. You can expand each category to view the devices under it. Look for the Sound, video, and game controllers category to find the microphone device.
If you’re having trouble locating the microphone or any other device in Device Manager, try updating the drivers or checking for any disabled or hidden devices. Sometimes, the microphone may appear as a hidden device that needs to be enabled in order to work properly.
Locating the microphone in Device Manager
Device Manager is a built-in Windows tool that allows you to manage and troubleshoot the hardware devices connected to your computer. If you need to locate the microphone in Device Manager, follow these simple steps:
- Open Device Manager by right-clicking on the “Start” button and selecting “Device Manager” from the menu.
- In the Device Manager window, expand the “Audio inputs and outputs” category by clicking on the arrow next to it.
- You should see a list of audio devices, including your microphone. Look for a device with a name that includes “Microphone” or “Mic”.
- If you can’t find the microphone in the “Audio inputs and outputs” category, expand the “Sound, video, and game controllers” category instead and look for the microphone there.
- Once you locate the microphone, you can right-click on it and select “Properties” to view more information about the device.
Device Manager is a useful tool for troubleshooting microphone-related issues, such as driver problems or incorrect settings. If you encounter any problems with your microphone, you can try updating the drivers, checking the device properties, or disabling and re-enabling the microphone.
Remember to always check the manufacturer’s website for the latest drivers and support information for your specific microphone model, as different microphones may have different settings or requirements.
Troubleshooting common microphone location issues
In Device Manager, the location of the microphone may vary depending on the specific computer system and operating system being used. However, there are some common issues that users may encounter when trying to locate their microphone in Device Manager. This troubleshooting guide will help you find the microphone location and resolve any related issues.
1. Check device categories
When navigating through Device Manager, check the different device categories to locate the microphone. Expand the “Audio inputs and outputs” or “Sound, video and game controllers” categories to find the microphone entry.
2. Ensure microphone is connected
If the microphone is not showing up in Device Manager, make sure it is properly connected to your computer. Check the physical connection and ensure it is securely plugged into the appropriate port.
3. Update or reinstall drivers
If the microphone is not listed or has a yellow exclamation mark next to it in Device Manager, the drivers may be outdated or corrupted. Right-click on the microphone entry and select “Update driver” or “Uninstall device”. If you choose to uninstall, restart your computer and the drivers should automatically reinstall. If not, download and install the latest drivers from the manufacturer’s website.
4. Check for disabled devices
Sometimes, the microphone may be disabled in Device Manager. Right-click anywhere in the Device Manager window and select “Show disabled devices”. If the microphone appears as disabled, right-click on it and select “Enable”.
5. Verify microphone settings
In some cases, the microphone may be listed correctly in Device Manager but still not functioning properly. Open the “Sound” settings from the control panel or system tray, and ensure that the correct microphone is selected as the default recording device. Adjust the microphone volume levels and test it using the built-in sound recorder or a third-party recording application.
6. Test with another application
If the microphone is still not working, try using it with a different application or software. This will help determine if the issue is specific to a particular application or system-wide.
7. Contact technical support
If you have tried all the above troubleshooting steps and the microphone is still not functioning or you cannot locate it in Device Manager, it is recommended to contact the technical support of your computer manufacturer or microphone manufacturer for further assistance.
- Check device categories
- Ensure microphone is connected
- Update or reinstall drivers
- Check for disabled devices
- Verify microphone settings
- Test with another application
- Contact technical support
Updating microphone drivers in Device Manager
Updating your microphone drivers in Device Manager can help resolve any issues you may be experiencing with your microphone. Here’s how you can do it:
- Open Device Manager by pressing the Windows key and searching for “Device Manager”.
- Click on “Device Manager” from the search results to open it.
- In Device Manager, locate the “Sound, video and game controllers” category and expand it by clicking on the arrow next to it.
- Right-click on the microphone device and select “Update driver”.
- Choose the option to search automatically for updated driver software.
- Wait for Windows to search for the latest driver updates for your microphone.
- If Windows finds an updated driver, follow the on-screen instructions to install it.
- If Windows does not find an updated driver, you can try visiting the manufacturer’s website for your microphone and downloading the latest driver from there.
After updating the microphone drivers, restart your computer to apply the changes. Check if the microphone is now working properly.