
Do you want to make your cursor invisible? Whether you’re looking to pull a prank on a friend or simply want to give your computer a sleek and minimalistic look, making your cursor disappear is a fun and easy way to do it. In this tutorial, we’ll guide you through the quick and simple steps to hide your cursor in no time.
Step 1: Access your computer’s settings
To start, you’ll need to access your computer’s settings. Depending on your operating system, this might be located in different places. For Windows users, you can usually find the settings in the “Control Panel” or by searching for “Mouse Settings” in the search bar. Mac users can access their settings through the “System Preferences” and then selecting “Trackpad” or “Mouse.”
Step 2: Locate the cursor settings
Once you’ve accessed the settings, look for the option related to the cursor. It may be labeled as “Cursor,” “Pointer,” or something similar. Click on this option to open the cursor settings menu.
Step 3: Adjust the cursor visibility
In the cursor settings menu, you should be able to find a slider or checkbox that controls the visibility of your cursor. Simply adjust this setting to make your cursor invisible. Some settings may require you to select a specific invisible cursor image from a list.
Note: Keep in mind that your cursor will still be functional even if it’s invisible. You can still click, drag, and interact with objects on your screen as usual.
Step 4: Save your changes
Once you’ve adjusted the cursor visibility to your liking, don’t forget to save your changes. Look for a “Save” or “Apply” button in the settings menu, and click on it to ensure that your new cursor settings are applied.
That’s it! You’ve successfully made your cursor invisible. Enjoy the new look of your computer screen, and have fun surprising your friends with the hidden cursor trick. If you ever want to bring back your visible cursor, simply revisit the cursor settings menu and adjust the visibility settings accordingly.
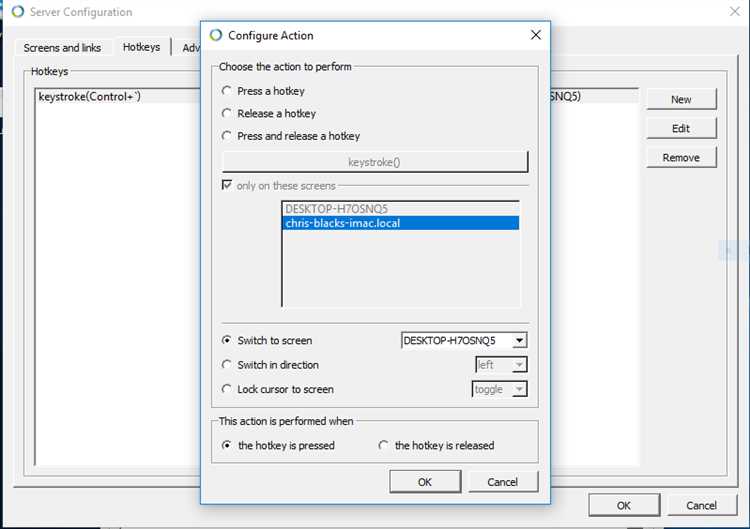
Step 1: Disable Cursor Visibility in Operating System Settings
To make your cursor invisible, you can start by disabling its visibility in your operating system settings. The exact steps may vary depending on the operating system you are using, but here are some general guidelines:
- First, open the “Settings” or “Control Panel” on your computer.
- Look for the “Mouse” or “Mouse and Trackpad” option and click on it.
- Within the mouse settings, you should see an option for cursor visibility or pointer settings.
- Select the option to hide or disable the cursor visibility.
- Save your changes and exit the settings.
Note that the specific steps may differ for Windows, macOS, or Linux operating systems. However, most operating systems provide a way to customize mouse settings, including cursor visibility.
Step 2: Use Third-Party Cursor Hiding Software
If the built-in methods of hiding the cursor are not sufficient for your needs, you can use third-party software specifically designed for this purpose. These software applications provide additional options and customization features that allow you to hide your cursor in different ways.
Here are some popular third-party cursor hiding software:
- CursorFX: CursorFX is a software application that enables you to create and customize cursors on your Windows computer. It also provides an option to hide the cursor completely if desired.
- CursorHide: CursorHide is a lightweight software that allows you to hide the cursor with a single click. It runs in the background and provides a simple and quick way to make your cursor invisible.
- Cursor Hider: Cursor Hider is a simple software application that lets you hide the cursor automatically after a specified period of inactivity. It also provides options to hide the cursor on specific windows or applications.
- AutoHideMouseCursor: AutoHideMouseCursor is a small and portable software that automatically hides the cursor after a certain number of seconds of inactivity. It can also reappear when you move the mouse.
Before using any third-party cursor hiding software, make sure to download it from a trusted source and scan it for any malware or viruses. It’s also a good idea to read user reviews and check the software’s compatibility with your operating system.
Step 3: Modify Cursor Properties in CSS
Once you have created a separate stylesheet file and linked it to your HTML document, you can start modifying the cursor properties using CSS.
To make the cursor invisible, you will need to target the element or elements on which you want to hide the cursor. This can be done by selecting the element’s class or ID or by using a more generic selector, such as targeting all elements on the page.
Here is an example of how you can modify the cursor properties to make it invisible:
/* Targeting all elements on the page */
* {
cursor: none;
}
In the above CSS code, we are using the universal selector “*” to target all elements on the page. We then set the “cursor” property to “none”, which makes the cursor invisible for all elements.
If you only want to hide the cursor on a specific element, you can use its class or ID in the CSS selector like this:
/* Targeting a specific element with a class */
.my-element {
cursor: none;
}
/* Targeting a specific element with an ID */
#my-element {
cursor: none;
}
Remember to replace “my-element” with the actual class or ID name of the element you want to target.
Once you have modified the cursor properties in your CSS file, save the changes, and refresh your HTML document in the web browser to see the cursor become invisible.
Continue to the next step for additional modifications or to test the invisibility of the cursor on different elements.
Step 4: Create Custom Cursor Images
Creating custom cursor images can add a personal touch to your website and enhance the overall user experience. Here are some quick and easy steps to create your own custom cursor images:
- Choose an Image: Start by selecting an image that represents the cursor you want to create. This can be an icon, a logo, or any other image that you think would work well as a cursor.
- Edit the Image: Once you have chosen an image, use an image editing software like Photoshop or GIMP to edit and resize it to the desired cursor size. You can also adjust the image’s colors, add effects, or make any other modifications to suit your website’s design.
- Save the Image: After editing the image, save it in a format that supports transparency such as PNG or GIF. This is important as it allows the background of the cursor image to be transparent, so it can blend seamlessly with the website content.
- Create Cursor Files: Convert the edited image into cursor files using a cursor file converter. You can find various online tools or software that can easily convert your image into cursor files. Usually, cursor files have a .cur or .ani extension.
- Upload Cursor Files: Once you have created the cursor files, upload them to your website’s server. Make sure to remember the file paths or directories where the cursor files are located.
- Add CSS Code: Lastly, add CSS code to your website’s stylesheet to apply the custom cursor images. Use the URLs or file paths of the uploaded cursor files in the CSS code to specify which cursor image to use for different parts of your website.
By following these steps, you can easily create and apply custom cursor images to make your website stand out and provide a unique browsing experience for your users.
Step 5: Implement Cursor Hiding Using JavaScript

To make the cursor invisible on a web page, you can utilize JavaScript. JavaScript is a powerful programming language that can manipulate the behavior and appearance of elements on a web page. Here’s how you can implement cursor hiding using JavaScript:
- Create a new JavaScript file: Start by creating a new JavaScript file with a .js extension, such as hide-cursor.js.
- Link the JavaScript file: In the HTML file where you want to hide the cursor, add a script tag inside the head or body section and provide the path to the JavaScript file, like this:
<script src="path/to/hide-cursor.js"></script>. - Write the JavaScript code: Open the hide-cursor.js file and write the following JavaScript code:
// Select the body element |
var body = document.querySelector('body'); |
// Hide the cursor when the page loads |
body.style.cursor = 'none'; |
// Show the cursor when the user moves the mouse |
document.addEventListener('mousemove', function() { |
body.style.cursor = 'auto'; |
}); |
- Explanation of the JavaScript code:
document.querySelector('body');selects the body element of the page.body.style.cursor = 'none';hides the cursor by setting the cursor property of the body element to none.document.addEventListener('mousemove', function() {...});listens for the mousemove event and executes the provided function when the event occurs.body.style.cursor = 'auto';shows the cursor by setting the cursor property of the body element back to auto.
Once you have completed these steps, save your files and open the HTML file in a web browser. You should now observe that the cursor is initially hidden when the page loads, but reappears when you move the mouse.
Step 6: Use Cursor Hiding Plugins or Extensions
If you are not familiar with coding or prefer a more user-friendly approach, you can use cursor hiding plugins or extensions to make your cursor invisible. These plugins or extensions are available for different web browsers and can be easily installed and activated.
Here are some popular cursor hiding plugins or extensions for different web browsers:
- Cursor Eraser (Google Chrome): This plugin allows you to hide your cursor while you are browsing the web. Simply install the plugin from the Chrome Web Store and activate it when you want to make your cursor invisible.
- Cursor Hide (Mozilla Firefox): This extension provides a simple way to hide your cursor in Firefox. Install the extension from the Firefox Add-ons store and enable it whenever you want to hide your cursor.
- Cursor Invisible (Safari): This plugin is designed specifically for Safari users. Install it from the Safari Extensions Gallery and use it to hide your cursor when needed.
These cursor hiding plugins or extensions provide a convenient solution for those who don’t want to deal with code or want a quick and easy way to hide their cursor. However, keep in mind that these plugins or extensions may vary in terms of compatibility and features, so it’s important to choose one that suits your needs and works well with your web browser.
Step 7: Hide Cursor in Specific Applications or Websites
If you want to hide your cursor only in specific applications or websites, you can use additional tools or browser extensions. Here are some options you can try:
- Browser Extensions: Many browsers have extensions that allow you to customize your browsing experience, including hiding the cursor. Check the extension store for your specific browser and look for options that offer cursor hiding functionality.
- Third-Party Software: There are third-party software solutions available that can help you hide the cursor in specific applications. These tools often provide additional features and customization options for hiding the cursor.
- Application Settings: Some applications or websites provide built-in options to hide the cursor. Look for settings or preferences within the application or website itself to see if this feature is available.
When using these methods, make sure to follow the instructions provided by the specific tool or application. The steps may vary depending on the software or extension you choose, so be sure to read the documentation or help guides to ensure proper configuration.
By customizing your cursor settings, you can have more control over your browsing or application experience. Whether you want to hide the cursor temporarily or permanently, these steps should help you achieve your desired outcome.
Step 8: Restore Cursor Visibility
In some cases, you might want to restore the visibility of the cursor after making it invisible. This can be done by using the CSS cursor property and setting it to the desired cursor style.
To restore the cursor visibility, follow these steps:
- Open the CSS file or tag where you made the cursor invisible.
- Locate the CSS rule that hides the cursor. It might look something like this:
body {
cursor: none;
}
3. Remove or comment out the above CSS rule to restore the visibility of the cursor:
/* body {
cursor: none;
} */
4. Save the changes to the CSS file or update the HTML file if the styles are embedded.
Once this is done, the cursor will be visible again in the specified elements or throughout the webpage, depending on where the CSS rule was defined.
Remember to test your webpage across different browsers and devices to ensure the restored cursor visibility works as expected.
FAQ:
Is it possible to make my cursor invisible?
Yes, you can make your cursor invisible by following a few simple steps.
Why would I want to make my cursor invisible?
There could be several reasons why you might want to make your cursor invisible. It can help improve your focus while working on a specific task or project, make your screen less cluttered, or create a cleaner look.
Can I customize the invisible cursor?
No, unfortunately, you cannot customize the appearance of an invisible cursor. It will simply be transparent or completely hidden.
Will my cursor remain invisible after restarting my computer?
Yes, your cursor will remain invisible even after restarting your computer. The settings you change in the “Control Panel” are saved and applied each time your computer starts up.
How can I make my cursor visible again?
To make your cursor visible again, you can follow the same steps mentioned earlier and adjust the cursor size to a larger setting.
Does making my cursor invisible affect the functionality of my computer?
No, making your cursor invisible does not affect the functionality of your computer. It is simply a visual setting that hides the cursor, but all other functions and features of your computer will continue to work as normal.