
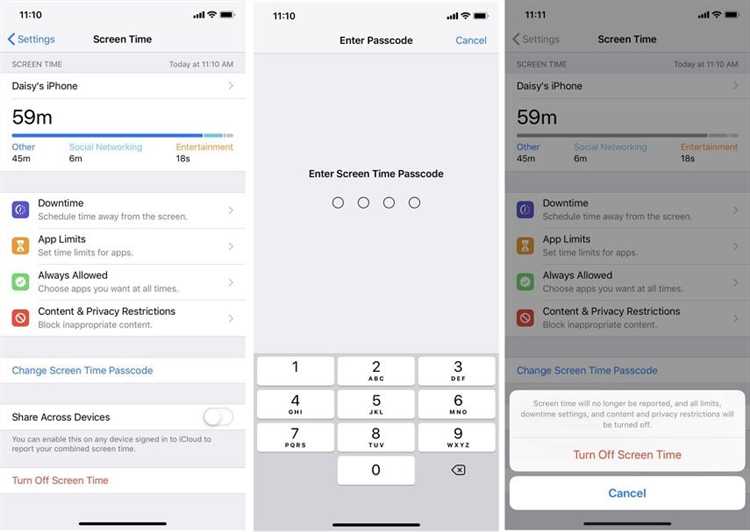
If you’re an Apple user, you know how important your Apple ID is. It’s the key that unlocks a world of apps, music, and other digital content. So, when your Apple ID suddenly becomes greyed out and unresponsive, it can be frustrating and worrisome. But don’t worry, there are some simple fixes you can try to get your Apple ID back in action.
First, try signing out and signing back in to your Apple ID. This simple step can often resolve the issue. To do this, go to “Settings” on your device, then tap on your Apple ID at the top of the screen. Scroll down and tap “Sign Out.” After that, sign back in with your Apple ID and password.
If signing out and signing back in doesn’t work, another troubleshooting tip is to reset your password. Sometimes, a greyed out Apple ID is caused by an incorrect password or a security issue. To reset your password, go to the Apple ID account page and click on “Forgot Apple ID or password.” Follow the prompts to create a new password and then try signing in again.
If the above steps don’t work, you may need to update your software. Outdated software can sometimes cause issues with your Apple ID. To update your software, go to “Settings” on your device, then tap on “General” and “Software Update.” If there is an update available, tap “Download and Install” and follow the on-screen instructions.
If none of these troubleshooting steps resolve the greyed out Apple ID issue, it’s possible that there is a problem with Apple’s servers. In this case, it’s best to contact Apple Support for further assistance. They can help you diagnose and fix any server-related issues that may be affecting your Apple ID.
In conclusion, a greyed out Apple ID can be frustrating, but there are several simple fixes you can try. Start by signing out and signing back in, resetting your password, and updating your software. If all else fails, reach out to Apple Support for help. With a little troubleshooting, you’ll have your Apple ID back up and running in no time.
Check Network Connection
If your Apple ID appears greyed out, it could be due to a poor network connection. Apple services require a stable internet connection to validate your Apple ID credentials. Here are a few troubleshooting steps to check your network connection:
- Ensure that your device is connected to a stable Wi-Fi or cellular network. If you’re using Wi-Fi, try restarting your router or moving closer to the access point to improve the signal.
- Test your internet connection by opening a web browser and visiting a website. If you encounter slow loading times or errors, it may indicate an issue with your network. Contact your internet service provider for further assistance.
- If you’re connected to a public Wi-Fi network, such as at a coffee shop or airport, try disconnecting and reconnecting to the network. These networks may have limitations or restrictions that could affect your Apple ID sign-in.
- Disable any network proxies or VPNs that may be enabled on your device. These can sometimes interfere with the communication between your device and Apple’s servers.
- Check if there are any ongoing outages or maintenance affecting Apple’s servers. You can visit Apple’s System Status page or check online forums for any reported issues.
By ensuring a stable network connection, you can eliminate one possible cause for your Apple ID being greyed out. If the issue persists, you can move on to other troubleshooting steps to resolve the problem.
Verify Apple ID Password
If your Apple ID is greyed out and you are unable to sign in to your account, the first troubleshooting step you should take is to verify your Apple ID password. Follow these steps to verify your Apple ID password:
- On your iPhone or iPad, go to the Settings app.
- Tap on your name at the top of the screen.
- Select “Password & Security”.
- Tap on “Change Password”.
- Enter your current password and then create a new password. Make sure to choose a secure password that meets Apple’s requirements.
- Once you have successfully changed your password, try signing in again with your new password.
If you are able to sign in with your new password, then the issue is resolved. However, if you are still experiencing a greyed out Apple ID, you may need to try some additional troubleshooting steps.
Remember to keep your Apple ID password secure and avoid using the same password for multiple accounts to protect your personal information.
Update Apple ID Settings
If your Apple ID is greyed out, one of the first troubleshooting steps you should try is updating your Apple ID settings. This can help refresh your account information and resolve any potential issues.
To update your Apple ID settings, follow these steps:
- Open the Settings app on your device.
- Scroll down and tap on your name/profile at the top of the screen.
- In the Apple ID menu, tap on “Password & Security”.
- Enter your passcode or authenticate with Face ID/Touch ID if prompted.
- Tap on “Change Password” to update your Apple ID password.
- Follow the on-screen instructions to complete the password change process.
- After changing your password, go back to the Apple ID menu.
- Tap on “Name, Phone Numbers, Email” to review and update your contact information.
- Make any necessary changes to your name, phone numbers, and email address.
- Tap on “Payment & Shipping” to review and update your billing and shipping information.
- Verify that your payment method and shipping address are correct.
- Close the Settings app and restart your device.
After updating your Apple ID settings, check if the greyed out issue has been resolved. If not, move on to the next troubleshooting step.
Note: It’s important to ensure that you have a stable internet connection before updating your Apple ID settings. Poor or interrupted connectivity can cause issues with accessing and updating your account information.
Enable Two-Factor Authentication
Two-factor authentication adds an extra layer of security to your Apple ID and helps prevent unauthorized access to your account. By enabling two-factor authentication, you will be required to provide an additional verification code in addition to your password whenever you sign in or make a purchase using your Apple ID.
To enable two-factor authentication for your Apple ID, follow these steps:
- Open the Settings app on your iPhone, iPad, or iPod touch.
- Tap on your name at the top of the screen.
- Select “Password & Security”.
- Tap on “Turn on Two-Factor Authentication”.
- Follow the on-screen instructions to complete the setup process.
Once two-factor authentication is enabled, you will receive a verification code on your trusted device whenever you sign in to your Apple ID from a new device. You will also be able to generate verification codes from trusted devices to use when signing in on devices without access to text messages or phone calls.
Enabling two-factor authentication is an effective way to secure your Apple ID and prevent unauthorized access. It is highly recommended that you enable this feature to protect your personal information and ensure the safety of your Apple ID account.
Reset Apple ID Security Questions
If you’ve forgotten your Apple ID security questions or don’t remember the answers you provided, don’t worry. You can easily reset your security questions and choose new ones to ensure the security of your Apple ID.
Here are the steps to reset your Apple ID security questions:
- Go to the Apple ID account page (appleid.apple.com) and sign in using your Apple ID and password.
- In the Security section, click on the “Change Questions” option.
- Answer the security questions that are currently set, even if you don’t remember them correctly. Click “Continue” once you have answered them.
- On the next screen, you will see the option to “Reset Your Security Questions”. Click on this option.
- Enter your Apple ID password and click “Continue” to verify your identity.
- Now, you can choose new security questions and provide answers for them. Make sure to select questions and answers that are memorable for you but not easily guessable by others.
- Click “Continue” to save your new security questions.
Once you have successfully reset your Apple ID security questions, they will be updated and ready to use. Remember to keep your security questions and answers in a safe place or use a password manager to ensure you can easily remember them in the future.
Resetting your security questions adds an additional layer of security to your Apple ID, helping protect your personal information and prevent unauthorized access to your account.
Contact Apple Support
If you have tried all the troubleshooting steps mentioned above and are still unable to fix the greyed-out Apple ID issue, it’s time to contact Apple Support for further assistance. They have a team of dedicated professionals who can help you resolve any technical issues related to your Apple ID.
There are a few ways to get in touch with Apple Support:
- Visit the Apple Support website and navigate to the Apple ID page. Here, you can find articles, FAQs, and troubleshooting guides that may help you solve your issue.
- Use the Apple Support app on your iOS device to chat with a support representative. This is a convenient option as you can communicate directly with a support representative right from your device.
- Call Apple Support directly by dialing the appropriate phone number for your country. This option allows you to speak with a support representative over the phone, who can guide you through the troubleshooting process.
- Schedule an appointment at an Apple Retail Store or an Apple Authorized Service Provider. This option is useful if you prefer an in-person interaction and need hands-on assistance with your Apple ID issue.
Before contacting Apple Support, it’s a good idea to gather all the necessary information related to your Apple ID and the troubleshooting steps you have already taken. This will help the support representative understand your issue better and provide appropriate solutions.
Remember to be patient and polite while communicating with the support team. They are there to help you, and by maintaining a respectful attitude, you can ensure a smoother and more effective resolution to your greyed-out Apple ID problem.
Check for System Updates
If your Apple ID is greyed out, it might be due to outdated system software. Apple frequently releases updates for its devices and operating systems to fix bugs and security vulnerabilities. To ensure that your device is running the latest software version:
- Go to Settings: On your iPhone or iPad, tap on the “Settings” app.
- Select General: Scroll down and tap on “General” in the settings menu.
- Check for Software Updates: Tap on “Software Update” to see if any updates are available.
- Download and Install Updates: If an update is available, tap on “Download” and then “Install” to update your device’s software.
Updating your device’s software may require a stable internet connection and sufficient battery life. It’s also recommended to backup your device before installing any updates to prevent potential data loss.
Reset iPhone Settings
If your Apple ID is greyed out on your iPhone, resetting the device settings can often help. Here’s how you can do it:
- Go to the “Settings” app on your iPhone’s home screen.
- Scroll down and tap on “General”.
- Scroll down again and tap on “Reset”.
- Choose “Reset All Settings”. This will not delete any of your data or media, but it will reset all settings including Wi-Fi passwords and customizations.
- Enter your passcode when prompted.
- Tap on “Reset All Settings” again to confirm.
- Your iPhone will restart and all settings will be reset to their default values.
After the reset, you will need to reconfigure your iPhone’s settings according to your preferences. This may include reconnecting to Wi-Fi networks, setting up Face ID or Touch ID, and adjusting display and accessibility settings.
Note that resetting all settings will not delete any of your apps, photos, or other personal data. However, it is always a good idea to have a recent backup of your iPhone before performing a reset, just in case.
If resetting the device settings doesn’t resolve the issue with the greyed out Apple ID, you may need to try other troubleshooting steps such as signing out and back into your Apple ID, updating your iOS software, or contacting Apple Support for further assistance.
FAQ:
Why is my Apple ID greyed out?
If your Apple ID is greyed out, it can mean that you are having issues with your account, such as a security breach or an expired payment method. You may need to update your account information or contact Apple support for further assistance.
How can I fix a greyed out Apple ID?
To fix a greyed out Apple ID, you can try signing out and signing back in to your Apple ID, resetting your password, checking your payment information, and ensuring that your device is connected to the internet. If the issue persists, you may need to contact Apple support for further troubleshooting.
Why can’t I sign in to my Apple ID?
If you are unable to sign in to your Apple ID, it could be due to various reasons such as entering incorrect login credentials, having a disabled account, or experiencing a connectivity issue. Make sure you have a stable internet connection and try resetting your password if necessary. If the problem continues, reach out to Apple support for assistance.
Why is my Apple ID disabled?
Your Apple ID may be disabled due to security reasons, such as multiple incorrect login attempts, suspicious activity, or a violation of Apple’s terms and conditions. To enable your Apple ID, you will need to verify your identity and follow the instructions provided by Apple, which may involve resetting your password or providing additional information for security purposes.