
As your iTunes library grows over time, it’s easy for your media folder to become cluttered with duplicate files, outdated tracks, and miscellaneous downloads. Clearing out your iTunes media folder can be a great way to free up space on your computer and ensure that your library remains organized. In this step-by-step guide, we’ll walk you through the process of clearing your iTunes media folder and keeping your library in top shape.
Step 1: Open iTunes and navigate to the “Preferences” menu by clicking on “iTunes” in the top left corner of the screen and selecting “Preferences” from the drop-down menu. Alternatively, you can use the shortcut “Command + ,” on a Mac or “Ctrl + ,” on a PC.
Step 2: In the “Preferences” menu, select the “Advanced” tab. Here, you’ll find the location of your iTunes media folder. Take note of this location, as you’ll need it in the next steps.
Step 3: Close iTunes and navigate to the location of your iTunes media folder. This is typically located in the “Music” folder on a Mac or in the “My Music” folder on a PC. Once you’ve located the folder, you can begin clearing out unwanted files.
Step 4: Start by deleting any duplicate files. Use a program or tool to find and remove duplicate tracks in your iTunes media folder. This will help minimize clutter and free up space on your computer.
Step 5: Next, go through your media folder and delete any outdated tracks or files that you no longer listen to or want in your library. This could include old podcasts, audiobooks, or music files that you’ve since replaced with higher quality versions.
Step 6: Consider moving large files, such as movies or TV shows, to an external hard drive or cloud storage service to free up space on your computer’s hard drive.
In conclusion, clearing out your iTunes media folder is an essential step in maintaining an organized and clutter-free library. By following this step-by-step guide, you can easily remove duplicate files, delete outdated tracks, and make space for new media. Remember to regularly clean your media folder to keep your iTunes library running smoothly.
Getting Started with iTunes
iTunes is a media player, media library, and mobile device management application developed by Apple Inc. It allows you to manage and play your audio and video files, as well as download and purchase media from the iTunes Store. Here are some steps to help you get started with iTunes:
- Download and Install iTunes: Visit the Apple website and download the latest version of iTunes for your operating system. Follow the on-screen instructions to install it on your computer.
- Set Up an iTunes Account: Launch iTunes and choose the “Create New Account” option to set up an iTunes Store account. You will need to provide your email address, create a password, and agree to the terms and conditions.
- Add Media to iTunes: To add your existing media files to iTunes, go to the “File” menu and select “Add File to Library” or “Add Folder to Library”. Browse your computer and select the files or folders you want to add. iTunes will import and organize them in your library.
- Sync Your Devices: Connect your iPhone, iPad, or iPod to your computer using a USB cable. Click on the device icon in the upper left corner of the iTunes window and navigate to the “Summary” tab. Choose the content you want to sync and click on the “Apply” button to transfer the selected media to your device.
- Browse and Download Media: Open the iTunes Store within iTunes and navigate through the various categories such as music, movies, TV shows, podcasts, and more. Click on the media you want to purchase or download, and follow the prompts to complete the transaction.
- Create Playlists: To create a playlist in iTunes, go to the “File” menu and select “New” followed by “Playlist”. Give your playlist a name, and then drag and drop songs from your library into the playlist. You can rearrange the order of the songs by dragging them up or down.
- Use iTunes Match: If you have an iTunes Match subscription, you can access your entire music library on all your devices by enabling iTunes Match in the iTunes preferences. This feature allows you to listen to your music without needing to physically sync your devices.
With these basic steps, you can start enjoying your audio and video content with iTunes. Take some time to explore the various features and settings available to customize your iTunes experience.
Locating Your iTunes Media Folder
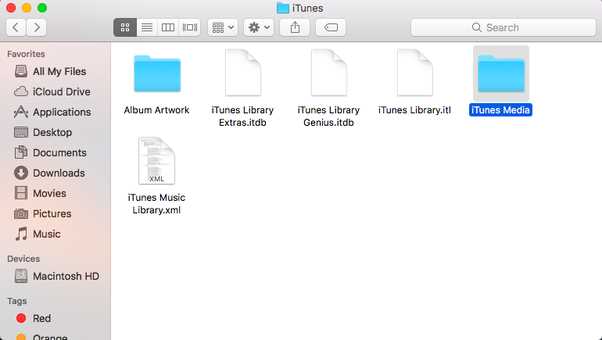
Your iTunes Media folder is where all of your music, movies, TV shows, podcasts, and other media files are stored on your computer. By default, iTunes stores your media files in a specific folder on your computer’s hard drive.
To locate your iTunes Media folder, follow these steps:
- Open iTunes: Launch the iTunes application on your computer. You can typically find it in your Applications folder (Mac) or in the Start menu (Windows).
- Access Preferences: Click on the “iTunes” menu (Mac) or the “Edit” menu (Windows) at the top of the screen, and then select “Preferences” from the drop-down menu. This will open the iTunes Preferences window.
- Navigate to the Advanced tab: In the iTunes Preferences window, click on the “Advanced” tab.
- Check the iTunes Media folder location: Look for the “iTunes Media folder location” section in the Advanced tab. Here, you will see the path to your iTunes Media folder.
By default, the iTunes Media folder location will be set to the “Music” folder on your computer. The exact path will vary depending on your operating system.
If you want to change the location of your iTunes Media folder, you can click on the “Change” button next to the iTunes Media folder location path. This will allow you to select a different folder on your computer where you want to store your media files.
Once you have located your iTunes Media folder, you can use this information to navigate to the folder in your computer’s file explorer or finder. From here, you can view, organize, or delete your media files as needed.
Backing Up Your iTunes Library
Creating regular backups of your iTunes library is essential to prevent data loss in case of system crashes, device failures, or accidental deletion. Here’s how you can back up your iTunes library:
- External Hard Drive: One of the most reliable methods is to use an external hard drive to store a copy of your iTunes library. Connect the external hard drive to your computer.
- Locate Your iTunes Library: Open iTunes and go to “Preferences” in the “Edit” menu (Windows) or the “iTunes” menu (Mac). Under the “Advanced” tab, you’ll find the location of your iTunes library folder.
- Copy Your iTunes Library: Navigate to the location of your iTunes library folder using File Explorer (Windows) or Finder (Mac). Select the iTunes folder, right-click, and choose “Copy”. Paste the copied folder onto the external hard drive.
- Verify the Backup: After the copying process is complete, open the copied iTunes folder on the external hard drive to ensure all your media files, including music, videos, and playlists, are present.
- Backup iTunes Preferences: In addition to your media files, it’s also important to back up your iTunes preferences, such as playlists, ratings, and settings. Open File Explorer (Windows) or Finder (Mac) and navigate to the location where iTunes preferences are stored. Copy the “iTunes Library.itl” file and any other related files to the external hard drive.
- Update Backup Regularly: Make it a habit to update your iTunes library backup regularly. You can either manually copy the new or modified files to the external hard drive or use backup software to automate the process.
Remember to keep your external hard drive in a safe place to protect it from physical damage or theft. It’s also a good idea to have an additional backup stored on a different device or cloud storage service for added security.
In conclusion, backing up your iTunes library ensures that you can restore your music, videos, playlists, and preferences in case of any unexpected events, allowing you to continue enjoying your media seamlessly.
Organizing Your iTunes Media Files
Organizing your iTunes media files is essential to keep your music, movies, TV shows, and other media content easily accessible and neatly arranged. Follow these steps to ensure your iTunes library is well-organized:
Step 1: Sort and Categorize Media Files
- Start by sorting your media files into different categories such as music, movies, TV shows, podcasts, audiobooks, and so on.
- Use iTunes’ built-in options to assign appropriate categories and tags to each file.
- Consider creating playlists based on genres, moods, or any other preference to further organize your media.
Step 2: Rename and Correct Metadata
- Rename your media files using a consistent naming convention, such as “Artist – Song Title” for music files or “Movie Title (Year)” for movies.
- Correct any incorrect or missing metadata, such as album artwork, artist names, movie titles, and so on.
- Use iTunes’ “Get Info” feature to edit and update the metadata for multiple files at once.
Step 3: Remove Duplicates
- Run a duplicate check in iTunes to identify and remove any duplicates in your library.
- Consider using third-party software or scripts to further automate the process of finding and removing duplicates.
Step 4: Backup Your Library
- Regularly back up your iTunes library to ensure your media files are safe in case of any data loss or system failure.
- Consider using external hard drives, cloud storage, or dedicated backup software for a secure and reliable backup solution.
Step 5: Maintain a Consistent Folder Structure
- Create a well-structured folder system outside of iTunes to keep your media files organized.
- Consider organizing your files by media type, such as creating separate folders for music, movies, TV shows, and so on.
- Within each media type folder, you can further categorize files based on genres, artists, or any other preference.
Step 6: Regularly Update and Clean Your Library
- Regularly update your iTunes library by adding new media files and removing any outdated or unwanted content.
- Clean up your library by deleting duplicate, incomplete, or low-quality files.
- Consider using iTunes’ “Consolidate Files” feature to ensure all media files are stored in a single location.
By following these steps, you can maintain a well-organized iTunes library, making it easier to find and enjoy your favorite media content.
Reviewing and Deleting Unwanted Media
Before clearing your iTunes media folder, it’s important to review and identify any unwanted media files that you no longer need. This way, you can ensure that you are only deleting the files that are truly unnecessary.
Follow these steps to review and delete unwanted media in iTunes:
- Open iTunes on your computer.
- Click on the “Library” tab located at the top-left corner of the iTunes window.
- From the sidebar on the left side of the window, select the type of media you want to review, such as “Music,” “Movies,” or “TV Shows.”
- Scroll through the list of media files and look for any that you no longer want to keep.
- To delete a single file, right-click on it and select “Delete from Library” from the drop-down menu.
- If you want to delete multiple files at once, hold down the “Ctrl” key (Windows) or the “Command” key (Mac) and click on the files you want to delete. Then, right-click on one of the selected files and choose “Delete from Library” from the menu.
- A prompt will appear asking if you want to move the selected files to the trash or keep them in the iTunes Media folder. Choose the option that suits your preference.
- If you chose to move the files to the trash, go to the trash on your computer and empty it to permanently delete the files from your system.
By reviewing and deleting unwanted media, you can declutter your iTunes library and free up valuable storage space on your computer.
Managing Duplicate Media Files
Having duplicate media files in your iTunes library can not only take up valuable storage space but also make it difficult to find and manage your music. Here are some steps you can take to efficiently manage and remove duplicate media files from your iTunes library:
- Scan your iTunes library: Use a reliable duplicate file finder software or an iTunes plugin to scan your library for duplicate media files. These tools can detect and list all duplicate files based on their file name, size, and other attributes.
- Review the duplicate files: Carefully review the list of duplicate files generated by the scanning tool. Pay special attention to file names, sizes, and locations to ensure that you don’t accidentally delete any important files.
- Select the duplicates to remove: Once you have reviewed the list, select the duplicate files that you want to remove. You can usually do this by checking a box next to each file or using a similar selection method provided by the tool.
- Delete the duplicate files: After selecting the duplicate files, use the tool’s delete or remove function to permanently delete them from your iTunes library. Make sure to double-check your selection before proceeding with the deletion process.
- Update your iTunes library: Once the duplicate files are deleted, it’s important to update your iTunes library to reflect the changes. You can do this by accessing the “File” menu in iTunes and selecting the “Library” option, followed by “Update Library.”
By following these steps, you can effectively manage and remove duplicate media files from your iTunes library, freeing up storage space and making it easier to organize and enjoy your music collection.
Moving Your iTunes Media Folder to a New Location
Occasionally, you may find the need to move your iTunes media folder to a different location on your computer, such as a different hard drive or external storage device. This can be useful for freeing up space on your primary drive or organizing your media library according to your preferences. Follow the steps below to successfully move your iTunes media folder:
- Open iTunes: Launch the iTunes application on your computer.
- Open Preferences: Click on the “iTunes” menu in the top-left corner of the screen (on a Mac) or the “Edit” menu in the top-left corner (on a Windows PC). From the drop-down menu, select “Preferences.”
- Go to the Advanced tab: In the Preferences window, click on the “Advanced” tab.
- Change the iTunes media folder location: Click on the “Change” button next to the “iTunes Media folder location” section. A new window will appear.
- Select a new location for your iTunes media folder: Navigate to the directory or drive where you want to move your iTunes media folder. Once you have selected the desired location, click “Select Folder” to confirm the new location.
- Move your iTunes media files: iTunes will ask if you want to move your existing files to the new location. Click “Yes” to proceed. The process may take some time depending on the size of your media library.
- Wait for iTunes to finish moving the files: Once the process completes, iTunes will automatically update the file paths to the new location.
- Confirm the move: To verify that your iTunes media folder has been successfully moved, click on “File” in the top-left corner of the iTunes window and select “Library” from the drop-down menu. Then click on “Organize Library” and check the box labeled “Consolidate files.”
- Update iTunes library: Finally, to ensure your iTunes library is up to date, go to the “File” menu, select “Library,” and click on “Update iCloud Music Library” if you have an active iCloud Music Library subscription.
By following these steps, you can easily move your iTunes media folder to a new location on your computer. Remember to update any file paths or settings in other applications that may reference your iTunes media folder to ensure everything continues to work smoothly.
Troubleshooting Common iTunes Media Folder Issues
While managing your iTunes media folder, you may encounter some common issues. This section will provide troubleshooting steps for these issues:
1. Cannot find the iTunes media folder location:
- Launch iTunes and go to “iTunes Preferences”.
- Click on the “Advanced” tab.
- Check the box next to “Keep iTunes Media folder organized” and click on the “Change” button.
- Select the desired location for your iTunes media folder and click on the “Open” button.
2. iTunes media files are missing or deleted:
- Check the trash or recycle bin on your computer for the missing files.
- If the files are not in the trash, restore them from a backup if you have one.
- If you don’t have a backup, you might need to redownload or reimport the missing files into iTunes.
3. iTunes media folder is not accessible:
- Ensure that you have the necessary access permissions to the iTunes media folder location.
- Run a disk utility or check your computer’s file system for errors.
- If the issue persists, move the iTunes media folder to a different location and update the folder location in iTunes preferences.
4. Duplicates in the iTunes media folder:
- In iTunes, go to “File > Library > Show Duplicate Items” to display the duplicates.
- Select the duplicates you want to remove and press “Delete” key.
- Confirm the deletion of the selected duplicates.
5. Unable to play media files in iTunes:
- Update iTunes to the latest version.
- Ensure that you have the necessary codecs or plugins installed to play the media files in iTunes.
- If the files still cannot be played, try converting them to a compatible format using a third-party media converter.
By following these troubleshooting steps, you should be able to resolve common issues related to your iTunes media folder.
FAQ:
What is the iTunes Media Folder?
The iTunes Media Folder is the location where iTunes stores all the media files, including music, movies, TV shows, podcasts, and more.
Why would I want to clear my iTunes Media Folder?
There could be several reasons why someone would want to clear their iTunes Media Folder. It could be to free up storage space on their computer, to organize their media files, or to remove any duplicate or unused files.
How can I find the iTunes Media Folder on my computer?
The location of the iTunes Media Folder depends on the operating system you are using. On Windows, it is typically located in the “Music” folder in your user directory. On macOS, it is located in the “Music” folder in your user directory. You can also find the location within iTunes by going to “iTunes > Preferences > Advanced” and looking for the “iTunes Media folder location” section.