
With the advent of modern technology, it’s now easier than ever to send and receive faxes right from your iPhone. Gone are the days of bulky fax machines and tedious processes. In this step-by-step guide, we’ll show you how to fax from your iPhone for free, making it simple and convenient to send important documents wherever you are.
The first thing you’ll need to do is download a fax app from the App Store. There are several apps available, but one of the most popular and highly-rated options is the Fax.Plus app. Once you’ve downloaded and installed the app on your iPhone, you’ll need to sign up for an account. Don’t worry – the basic plan is free, so you won’t have to spend a dime to send faxes.
Once you’ve signed up for an account, open the Fax.Plus app and follow the prompts to grant the necessary permissions. This will allow the app to access your contacts and files, making it easy to send faxes. To send a fax, simply tap on the “+” button within the app and select the document you want to send. You can choose files from your iPhone’s storage, iCloud, Dropbox, or any other compatible service.
After you’ve selected the document, you’ll need to enter the recipient’s fax number. You can manually enter the number or choose a contact from your phone’s address book. Once you’ve entered the recipient’s information, you can add a cover page if desired, or simply proceed to send the fax. The Fax.Plus app will then convert your document into a fax and send it to the recipient’s fax machine. You’ll receive a confirmation once the fax has been successfully sent.
With the ability to fax directly from your iPhone, you no longer need to search for a fax machine or rely on outdated technology. Sending faxes has never been easier or more convenient. Whether you’re a business professional, a student, or just need to send an important document, following this step-by-step guide will ensure you can send faxes from your iPhone quickly and for free.
Why Fax from iPhone?
Sending faxes from an iPhone has become increasingly popular due to its convenience and efficiency. Here are some reasons why you might consider faxing from your iPhone:
- Portability: With an iPhone, you can send faxes from anywhere, whether you’re in the office, at home, or on the go. This allows you to stay connected and productive no matter your location.
- Cost savings: Faxing from an iPhone eliminates the need for physical fax machines, paper, ink, and phone lines, resulting in cost savings for individuals and businesses.
- Eco-friendly: By faxing from your iPhone, you reduce paper usage, which helps to conserve natural resources and reduce waste. This makes it an environmentally friendly option compared to traditional faxing methods.
- Convenience: Faxing from an iPhone is quick and easy. You can send a fax in just a few taps on your device, without the need to scan or print any documents. This saves time and streamlines the faxing process.
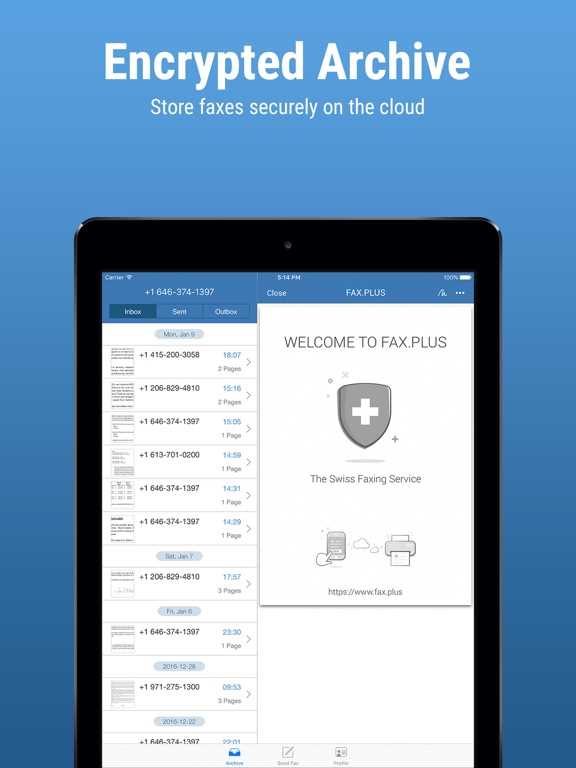
- Security: Many faxing apps and services provide encryption and security protocols to protect your sensitive information during transmission. This ensures that your faxes remain private and confidential.
- Integration: Faxing from an iPhone allows for seamless integration with other digital platforms and applications. You can easily import documents from your email, cloud storage, or other apps, making it convenient to send faxes directly from your iPhone.
In conclusion, faxing from an iPhone offers numerous advantages, including portability, cost savings, eco-friendliness, convenience, security, and integration with other digital tools. It’s a modern and efficient way to send faxes while on the go.
Benefits of Faxing from iPhone
There are several benefits of being able to send faxes directly from your iPhone. Here are some of the key advantages:
- Convenience: Faxing from your iPhone allows you to send important documents anytime, anywhere. You no longer need to find a physical fax machine or wait until you’re at the office to send a fax.
- Cost savings: Faxing from your iPhone eliminates the need for a physical fax machine, which can save money on equipment costs and maintenance. Additionally, you can send faxes for free or at a lower cost compared to traditional faxing methods.
- Time efficiency: Faxing from your iPhone is much faster compared to traditional faxing methods. You can compose and send a fax within minutes, without the need to print, scan, or physically transport documents.
- Eco-friendly: Faxing from your iPhone reduces paper waste. By sending faxes digitally, you help save trees and reduce your carbon footprint.
- Accessibility: Faxing from your iPhone allows you to access and send important documents from your mobile device. This is especially useful for businesses or professionals who frequently travel or work remotely.
In conclusion, faxing from your iPhone offers a multitude of benefits including convenience, cost savings, time efficiency, eco-friendliness, and accessibility. By utilizing faxing applications or services, you can streamline your document transmission process and enhance your productivity.
Step 1: Install a Fax App
Before you can start faxing from your iPhone, you’ll need to install a fax app. There are several options available in the App Store, so you’ll want to choose one that best fits your needs. Here are a few popular fax apps that you can consider:
- Fax App 1: This app allows you to send faxes directly from your iPhone. It has a user-friendly interface and offers a variety of features such as document scanning, fax scheduling, and fax tracking. It also supports multiple file formats, including PDF, Word, Excel, and more.
- Fax App 2: This app offers similar features to Fax App 1, but also includes additional options such as digital signatures and secure faxing. It has a high rating and positive reviews from users, making it a reliable choice for faxing from your iPhone.
- Fax App 3: If you’re looking for a free fax app, this is a great option. It allows you to send a limited number of faxes for free, and offers in-app purchases for additional fax credits. It also has a simple interface and supports popular file formats.
Once you’ve chosen a fax app, simply search for it in the App Store and follow the on-screen instructions to download and install it on your iPhone.
Step 2: Sign Up for a Free Fax Number
To send a fax from your iPhone, you’ll need a fax number. While traditional fax machines require dedicated phone lines, there are now online fax services that offer free fax numbers. Here’s how you can sign up for a free fax number:
- Research online fax service providers that offer free fax numbers. Some popular options include eFax, FaxZero, and MyFax.
- Visit the website of the online fax service provider you’ve chosen.
- Look for a section or page that allows you to sign up for a free account.
- Fill out the required information, which may include your name, email address, and desired fax number.
- Agree to the terms and conditions of the service provider.
- Submit your information and wait for a confirmation email from the service provider.
- Follow the instructions in the email to verify your account and activate your free fax number.
Once you’ve signed up for a free fax number, you’ll be able to use it to send and receive faxes from your iPhone using the online fax service provider’s mobile app or website.
Step 3: Scan or Upload Documents
Once you have installed a fax app on your iPhone, you can proceed to scan or upload the documents you want to fax. There are several ways you can accomplish this:
- Scan documents: If you have a physical document that needs to be faxed, you can use the built-in scanner in your fax app. Simply open the app, choose the scanning option, and align the document within the camera frame. The app will automatically capture the image and save it as a PDF file that can be faxed.
- Upload documents: If you have digital documents on your iPhone that need to be faxed, you can upload them directly from your device. Most fax apps have a “Upload” or “Add Document” option where you can select files from your phone’s gallery or file manager. Once you have selected the documents, they will be ready for faxing.
It is worth noting that some fax apps also support services like Dropbox, Google Drive, or iCloud, allowing you to easily access and upload documents from these cloud storage platforms.
Depending on the fax app you choose, you may also have the option to edit or annotate your documents before sending them. This can be useful if you need to sign the document or make any necessary changes before faxing.
Once you have scanned or uploaded the documents you want to fax, you are ready to move on to the next step, which involves entering the recipient’s fax number and sending the fax.
Step 4: Compose and Send the Fax
Once you have selected the files and entered the recipient’s fax number, it’s time to compose and send the fax. Follow these steps to complete this process:
- Compose Cover Page: You can choose to add a cover page to your fax by entering a title, subject, recipient, sender, and any additional notes you want to include. This cover page will be the first page of your fax.
- Review and Edit Documents: Before sending the fax, it’s important to review and edit the documents you have selected by tapping on each file. You can rearrange the pages or crop them if necessary.
- Add Additional Pages: If you need to include additional pages, you can tap on the “Add Pages” button and select the desired files. These pages will be added after the cover page.
- Preview your Fax: Once you are satisfied with the composition of your fax, you can preview it by tapping on the “Preview” button. This will show you how your fax will appear to the recipient.
- Send your Fax: Finally, you can send your fax by tapping on the “Send” button. The app will process your fax and send it to the recipient’s fax number. You may receive a confirmation message once the fax has been successfully sent.
It’s important to note that the process of sending a fax may vary slightly depending on the faxing app or service you are using. However, these general steps should help you compose and send a fax from your iPhone for free.
Step 5: Track and Manage Sent Faxes
After sending a fax from your iPhone using a free fax app, you may want to track and manage the faxes you have sent. This can be useful for keeping records, organizing your fax history, and monitoring the status of your sent faxes. Here are some steps to help you track and manage your sent faxes:
- Check the app’s “Sent” or “Outbox” folder: Open the fax app on your iPhone and look for a “Sent” or “Outbox” folder. This folder should contain a list of all the faxes you have sent. Tap on a fax to view its detailed information.
- View the delivery status: Within the detailed information for each sent fax, you should be able to find the delivery status. This status will indicate whether the fax has been successfully delivered or if there was an error during transmission. Some apps may also provide additional details, such as the recipient’s fax machine number and the date and time of delivery.
- Resend or delete a fax: If a sent fax failed to deliver or if you want to resend it, the app should provide options to resend or delete the fax. Simply follow the app’s instructions to take the desired action.
- Archive or save sent faxes: If you want to keep a record of your sent faxes for future reference, the app may offer options to archive or save them. This can help you easily retrieve and view your fax history whenever needed.
- Export or share sent faxes: Some fax apps allow you to export or share your sent faxes. This can be useful if you want to save them to your cloud storage, email them to yourself or someone else, or print them for physical documentation purposes.
- Organize sent faxes: Depending on the app, you may have the option to organize your sent faxes into folders or categories. This can help you keep track of faxes related to specific projects, clients, or purposes.
By following these steps, you can effectively track and manage your sent faxes using a free fax app on your iPhone. Take advantage of the features and functionalities offered by the app to streamline your faxing process and stay organized with your fax communications.
FAQ:
Can I send a fax from my iPhone for free?
Yes, you can send faxes from your iPhone for free by using certain apps like Fax.Plus or eFax.
What apps can I use to fax from my iPhone?
There are several apps available that allow you to send faxes from your iPhone for free. Some popular options include Fax.Plus, eFax, Genius Fax, and MyFax.
Do I need a fax machine to send faxes from my iPhone?
No, you do not need a fax machine to send faxes from your iPhone. You can simply use a fax app on your iPhone to send faxes digitally.
How do I send a fax from my iPhone using Fax.Plus?
To send a fax using Fax.Plus on your iPhone, you need to download and install the Fax.Plus app from the App Store. Then, open the app, sign in or create a new account, and follow the prompts to send a fax. You can attach documents from your phone’s storage or use the camera to scan and send a fax.
Is it safe to send a fax from my iPhone?
Yes, it is safe to send a fax from your iPhone using reputable fax apps. These apps use encryption and secure transmission protocols to protect your documents and information during the faxing process.
Are there any limitations to sending faxes from an iPhone for free?
While sending faxes from an iPhone for free is convenient, there may be limitations. For example, free plans often have a capped number of pages you can send per month, and there may be restrictions on the types of files you can attach. Some apps also display ads or include watermarks on free faxes. Upgrading to a paid plan can remove these limitations.