
If you own an iPad and want to take your experience to the next level, mastering the Apple Pencil is a must. This innovative tool allows you to interact with your iPad like never before, offering a precise and natural way to navigate, draw, and take notes. Whether you’re an artist, a student, or simply someone who loves using their iPad, learning how to control it with a pencil can revolutionize your workflow and creativity.
The Apple Pencil features advanced technology that enables it to detect pressure, tilt, and angle, providing a responsive and realistic drawing experience. With its pixel-perfect precision, you can create detailed artworks, annotate documents, or sketch out ideas with unparalleled accuracy. By learning how to harness the power of the Apple Pencil, you can unlock a world of creative possibilities.
In addition to drawing and sketching, the Apple Pencil is an excellent tool for taking notes. With apps like Evernote, GoodNotes, and Notability, you can easily write and organize your thoughts, annotate PDFs, and even convert your handwritten notes into text. Whether you’re in a meeting, a lecture, or simply jotting down ideas, using an Apple Pencil can make the process faster and more efficient.
Controlling your iPad with a pencil is not just limited to drawing and note-taking. You can also use it to navigate through your device, making it easier than ever to scroll, swipe, and tap with precision. Whether you’re browsing the web, reading a book, or editing a video, the Apple Pencil allows for a more immersive and enjoyable user experience.
Mastering the Apple Pencil is a game-changer for any iPad user. Whether you’re an artist, a student, or a professional, this versatile tool can enhance your creativity, productivity, and overall iPad experience. So grab your Apple Pencil and start exploring the endless possibilities.
Getting Started
Controlling your iPad with a pencil can be a convenient and efficient way to navigate and interact with your device. Whether you’re drawing, taking notes, or simply scrolling through apps, the iPad pencil offers a precise and comfortable experience.
To get started using your iPad pencil, follow these steps:
- Check compatibility: Not all iPad models support the use of a pencil. Make sure your iPad is compatible with an Apple Pencil before purchasing one.
- Charge your Apple Pencil: Before you begin using your pencil, make sure it’s fully charged. Connect the pencil to your iPad’s Lightning port or use a wireless charging method, depending on your pencil model.
- Pair your Apple Pencil: If you’re using an Apple Pencil 2nd generation, you can pair it with your iPad wirelessly by attaching it magnetically to the side of your iPad. If you’re using an older model, connect it to your iPad’s Lightning port to establish a connection.
- Adjust settings: Go to your iPad’s Settings app and navigate to the Apple Pencil settings to customize various features, such as double-tap functionality and palm rejection.
- Start using your Apple Pencil: Once your pencil is charged, paired, and settings are adjusted, you can start using it as a tool for various tasks. Experiment with different apps and features to make the most of your pencil.
Remember to periodically charge your Apple Pencil and keep it clean to ensure optimal performance. With these steps, you’ll be well on your way to controlling your iPad with precision and ease using an Apple Pencil.
Setting Up Your iPad and Pencil
Before you can start using your iPad and Pencil together, you’ll need to go through a simple setup process. Here’s what you need to do:
- Make sure your iPad is charged or connected to a power source.
- Turn on your iPad by pressing the power button on the side or top of the device.
- Unlock your iPad by entering your passcode or using Touch ID or Face ID.
- Ensure that Bluetooth is enabled on your iPad. You can do this by going to “Settings” > “Bluetooth” and toggling the switch to the on position.
- Remove the cap from your Apple Pencil.
- Plug the Lightning connector on the end of the Apple Pencil into the Lightning port on the bottom of your iPad.
- Follow the on-screen instructions that will appear on your iPad to complete the setup process for your Apple Pencil.
Once the setup is complete, your iPad will recognize your Apple Pencil and you’ll be able to use it to navigate, draw, take notes, and perform other actions on your device.
It’s worth noting that not all iPad models are compatible with the Apple Pencil. Make sure to check the Apple website or your iPad’s specifications to confirm if your device supports the use of an Apple Pencil.
Using Your Pencil
Once you have paired your Apple Pencil with your iPad, you are now ready to start using it to control your device. Here are some tips and tricks to help you make the most out of your Pencil:
-
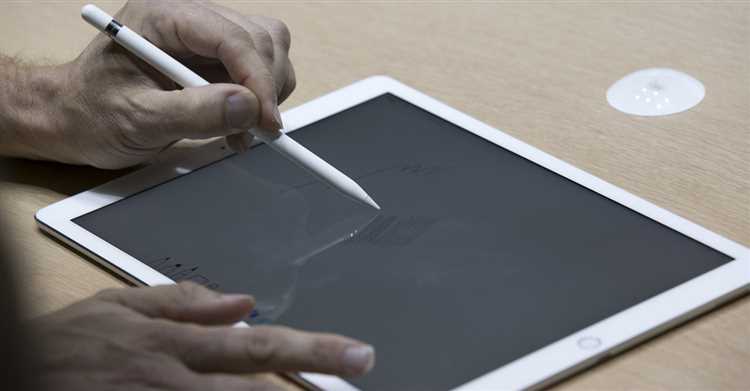
Writing and Drawing: The Apple Pencil allows you to write and draw on your iPad just like you would with a traditional pencil on paper. Simply hold the Pencil like you would hold a regular pen or pencil and start writing or drawing on the screen. You can adjust the thickness and shading of your lines by applying different pressure on the Pencil.
-
Gestures: The Pencil also supports various gestures that can help you interact with your iPad more efficiently. For example, you can double-tap on the side of the Pencil to switch between the currently active tool and the eraser. You can also use the Pencil to swipe, scroll, and navigate through menus and apps.
-
Editing and Markup: The Apple Pencil is particularly useful when it comes to editing and marking up documents, images, and PDF files. With the Pencil, you can highlight text, underline important points, add notes, and make drawings directly on the content. This makes it easy to collaborate with others or make annotations for future reference.
-
Precision and Control: One of the major advantages of using the Apple Pencil is the increased precision and control it offers compared to using your fingers. The Pencil has a fine tip that allows you to make precise selections, tap on small buttons or icons, and perform tasks that require more accuracy. This can be especially useful when working on detailed design or artwork.
-
Pairing with Apps: Many apps have been optimized to work seamlessly with the Apple Pencil. These apps often provide additional features and tools that are specifically designed for use with the Pencil. Whether you are taking notes, creating a digital masterpiece, or editing videos, look for apps that offer Pencil integration to enhance your productivity and creativity.
Remember, the Apple Pencil is not limited to just writing or drawing. It can be a powerful tool for controlling your iPad and enhancing your overall user experience. Experiment with different apps and explore the possibilities to discover new ways to use your Pencil effectively.
Exploring the Different Functions of the Pencil
The Apple Pencil for iPad is a versatile and powerful tool that goes beyond just writing and drawing on the screen. It offers several functions and features that enhance your overall iPad experience. Let’s explore some of its different functions:
- Writing and Drawing: The primary function of the Pencil is to provide a smooth and precise writing and drawing experience on your iPad. With its pressure and tilt sensitivity, you can create fine lines, thicker strokes, and even shading, making it ideal for artists, designers, and note-takers.
- Markup and Annotation: The Pencil can be used to easily mark up documents, screenshots, and images. You can highlight text, draw shapes, add arrows, and write notes directly on the screen. This feature is particularly useful for students, professionals, or anyone who needs to annotate documents and provide feedback.
- Navigation and Gestures: The Pencil can function as a navigational tool, allowing you to scroll, swipe, and tap on the iPad screen. This can be handy for quickly navigating through web pages, documents, or apps without the need to use your fingers.
- Quick Access to Tools: When using certain apps, the Pencil can bring up a context-sensitive tool palette that provides quick access to various tools and options. For example, in drawing apps, you may see different brush options or color palettes, while in note-taking apps, you may have access to highlighters and erasers.
- Gestural Shortcuts: The Pencil supports several gestures that can be used to perform actions quickly. For example, double-tapping on the Pencil can switch between the current tool and the eraser, making it easy to correct mistakes. These gestures can be customized in the iPad settings to suit your preferences.
- Handwriting Recognition: The iPad has built-in handwriting recognition capabilities, which means you can handwrite text using the Pencil, and it will be converted into typed text. This can be handy for taking notes or writing longer documents, especially for those who prefer handwriting over typing.
- Pressure Sensitivity: The Pencil’s pressure sensitivity allows for varying line thickness and opacity, depending on how hard you press on the screen. This feature is useful for artists who want to replicate the feel of traditional drawing tools or for anyone who wants precise control over their strokes.
Overall, the Apple Pencil offers a range of functions and features that make it a valuable accessory for iPad users. Whether you’re an artist, student, or professional, the Pencil can enhance your creative and productivity capabilities on the iPad.
Customizing Your Pencil
When using your Apple Pencil with your iPad, you can customize its behavior to suit your preferences. Here are some ways you can make your pencil work exactly the way you want:
- Adjusting the Double-Tap Gesture: By default, double-tapping the Apple Pencil activates the eraser tool. However, you can customize this gesture to switch between tools or perform other actions. To do this, open the Settings app on your iPad, select “Apple Pencil,” and then choose your preferred double-tap option.
- Changing the Drawing Tools: The Apple Pencil supports different drawing tools in various apps. You can customize these tools in compatible apps to include different brushes, colors, and effects. Look for the brush or tools menu in the app you are using to make these changes.
- Adjusting the Pressure Sensitivity: Some drawing apps allow you to adjust the pressure sensitivity of the Apple Pencil. This feature enables you to control the thickness or opacity of the lines you draw based on how hard you press the pencil on the screen. Go to the settings of the specific app to customize this feature.
- Customizing Side Buttons: The second-generation Apple Pencil features touch-sensitive side buttons that can be programmed to perform specific actions. These buttons can be customized based on your preferences. Open the Settings app, select “Apple Pencil,” and then choose the functionality you desire for each button.
- Using Gestures: In addition to the double-tap gesture, you can also use other finger gestures to perform actions while using the Apple Pencil. For example, you can swipe up from the bottom of the screen with your finger to access the Dock or swipe down from the top right corner to access the Control Center. Familiarize yourself with these gestures to enhance your overall iPad experience.
By customizing your Apple Pencil, you can make it work exactly the way you want and enjoy a more personalized drawing and writing experience on your iPad. Explore the settings of your iPad and compatible apps to unlock the full potential of your Apple Pencil.
Personalizing the Settings for Your Pencil
When using an Apple Pencil with your iPad, you can personalize its settings to enhance your drawing, note-taking, and navigation experience. The Apple Pencil settings can be accessed in the iPad’s Settings app, where you can adjust various options according to your preferences.
To customize the settings for your Apple Pencil, follow these steps:
- Open the Settings app on your iPad.
- Scroll down and tap on “Apple Pencil”.
- You will see a list of options that you can adjust:
- Double-Tap: This setting allows you to assign a specific action to the double-tap gesture on the Apple Pencil. You can choose from various options like switching between tools, opening the eraser, or activating the magnifier.
- Switch Between Current Tool and Last Used: Enabling this option allows you to switch back and forth between the current tool and the last used tool when double-tapping the Apple Pencil.
- Only Double-Tap: When this option is turned on, only the double-tap gesture will be recognized by the Apple Pencil, and it won’t draw or interact with the screen when touching it.
Additionally, you can also adjust other general iPad settings that affect the Apple Pencil, such as palm rejection, pressure sensitivity, and tilt sensitivity.
By personalizing the settings for your Apple Pencil, you can optimize its functionality and make it work in a way that suits your needs and preferences. Experiment with different settings to find the configuration that works best for you.
Advanced Techniques
1. Multi-Touch Gestures: Your iPad with a pencil supports various multi-touch gestures that can enhance your productivity and navigation. For example:
- Pinch-to-Zoom: Place two fingers on the screen and pinch them together to zoom in or spread them apart to zoom out.
- Rotate: Place two fingers on the screen and rotate them in a circular motion to rotate the content.
- Swipe: Swipe left or right with two fingers to quickly switch between apps or access the app switcher.
- Four-Finger Swipe: Swipe up with four fingers to reveal the app switcher, swipe left or right with four fingers to switch between apps.
2. Apple Pencil Settings: You can customize your Apple Pencil settings to suit your preferences. To do this, follow these steps:
- Go to the “Settings” app on your iPad.
- Select “Apple Pencil” from the sidebar.
- Here, you can adjust the following settings:
- Double-Tap: Choose what happens when you double-tap on the Apple Pencil. Options include accessing the eraser, switching between the current tool and the last used tool, and more.
- Orientation: Choose whether you want the orientation of the Pencil to be based on the current app or locked in portrait or landscape mode.
- Pressure Sensitivity: Adjust the pressure sensitivity of the Pencil to your liking.
3. Annotation and Markup Tools: The Apple Pencil is perfect for annotating and marking up documents, photos, and screenshots. You can use various tools to highlight, underline, draw shapes, and add text. Here’s how:
- Open the document, photo, or screenshot you want to annotate.
- Tap the Markup icon (looks like a pencil tip) on the top right corner of the screen.
- Use your Apple Pencil to draw or write on the screen. You can choose different brush types, colors, and sizes from the toolbar at the bottom.
- Tap the “+” icon to access additional markup tools, such as highlighter, text, shapes, and more.
4. Handwriting to Text Conversion: With the Apple Pencil and iPadOS, you can convert your handwritten notes into typed text quickly and effortlessly. Here’s how:
- Open the Notes app on your iPad.
- Create a new note or open an existing one.
- Start writing using your Apple Pencil.
- Once you’re done, tap the carrot icon on the bottom right corner of the screen.
- Select “Convert to Text” from the pop-up menu.
- Your handwritten text will be converted into typed text instantly.
These advanced techniques will help you take full advantage of the Apple Pencil’s capabilities and make your iPad experience more efficient and enjoyable.
Tips and Tricks for Mastering the Pencil
1. Familiarize yourself with the different gestures
One of the first things you should do when using the Pencil is to familiarize yourself with the different gestures it supports. The Pencil allows for gestures like double-tapping to switch between your current tool and eraser, as well as tapping to wake up the device and start note-taking instantly. Take some time to learn and practice these gestures to make your iPad experience more efficient.
2. Experiment with pressure sensitivity
The Apple Pencil is designed to be pressure-sensitive, meaning that the harder you press, the thicker or darker your strokes will be. This feature can be particularly useful when drawing or sketching on your iPad. Experiment with different pressure levels to understand how it affects your drawings and to achieve the desired effect.
3. Take advantage of the Pencil’s tilt functionality
In addition to pressure sensitivity, the Apple Pencil also supports tilt functionality. By tilting the Pencil, you can achieve different shading effects, making your drawings look more realistic. Practice using the tilt feature to add depth and dimension to your artwork.
4. Customize the Pencil’s settings
Your iPad allows you to customize the settings for the Apple Pencil to suit your preferences. You can adjust the double-tap gesture to switch between tools, customize the behavior of the eraser, and even assign different functions to the double-tap gesture. Explore the settings menu on your iPad to optimize the Pencil for your needs.
5. Use the Pencil as a navigational tool
The Apple Pencil can also be used as a navigational tool for your iPad. Instead of using your fingers to scroll or swipe, you can use the Pencil to interact with the device. This can be particularly useful when reading or browsing through documents, as it provides a more precise and controlled experience.
6. Protect your Pencil with a case or holder
Since the Apple Pencil is a delicate accessory, it’s important to protect it from accidental damage. Invest in a case or holder specifically designed for the Pencil to keep it safe when not in use. This will help prolong its lifespan and ensure that it’s always readily available when you need it.
7. Use the Pencil for handwriting recognition
If you prefer writing by hand, you can use the Apple Pencil for handwriting recognition on your iPad. Many apps and note-taking programs allow you to convert your handwritten notes into digital text, making it easier to search, edit, and share your notes. Explore handwriting recognition options on your device to take full advantage of the Pencil’s capabilities.
8. Keep your Pencil charged
Lastly, make sure to keep your Apple Pencil charged to avoid any interruptions in your workflow. The Pencil charges wirelessly when connected to the magnetic charging strip on the side of your iPad. Take advantage of this feature and ensure that your Pencil is always ready for use.
Troubleshooting
If you’re having trouble using your iPad with a pencil, here are some common issues and their solutions:
Pencil Not Connecting
If your pencil is not connecting to your iPad, try the following steps:
- Make sure Bluetooth is turned on in your iPad’s settings.
- Ensure that your pencil is charged by connecting it to your iPad using the lightning connector.
- Restart your iPad and try connecting the pencil again.
Inaccurate Input or Delayed Response
If you’re experiencing inaccurate input or a delayed response when using your pencil, try these troubleshooting steps:
- Check if there are any obstacles or dirt on the pencil tip or the iPad screen. Clean them if necessary.
- Update your iPad’s software to the latest version available.
- If the issue persists, try unpairing the pencil and re-pairing it with your iPad.
Palm Rejection Not Working
If the palm rejection feature is not working while using the pencil, try the following solutions:
- Ensure that the palm rejection feature is enabled in your iPad’s settings.
- Try adjusting the position of your hand while using the pencil to see if it improves palm rejection.
- If the issue persists, consider using a screen protector specifically designed for palm rejection compatibility.
Pencil Not Charging
If your pencil is not charging properly, try these troubleshooting steps:
- Ensure that the lightning connector is securely inserted into your pencil.
- Try using a different lightning cable and charging adapter.
- If the issue persists, try charging the pencil with a different iPad or a computer.
Unable to Update Pencil Firmware
If you’re unable to update the firmware of your pencil, try these steps:
- Ensure that your iPad has an internet connection.
- Check if there are any pending software updates for your iPad and install them.
- Unpair the pencil from your iPad and pair it again before attempting the firmware update.
If none of the above troubleshooting steps resolve your issue, it is recommended to contact Apple Support for further assistance.
Common Issues and Solutions with the Pencil
The Apple Pencil is a fantastic tool for enhancing your productivity and creativity on your iPad. However, like any other device, it may encounter some common issues that can hinder its functionality. Here are some of the most common issues users face with the Pencil and their solutions:
1. Pairing Issues
If you’re unable to pair your Pencil with your iPad, try the following solutions:
- Ensure your iPad is compatible with the Apple Pencil model you own.
- Remove the cap from the Pencil and insert it into the Lightning port of your iPad for a few seconds. This helps establish a connection.
- Check if the Pencil is charged. If not, charge it using the Lightning connector or pair it with your iPad wirelessly.
- Restart your iPad and try pairing the Pencil again.
2. Unresponsive or Laggy Pencil
If you’re experiencing delays or unresponsiveness with your Pencil, follow these steps:
- Ensure your Pencil is charged. Low battery can result in issues with responsiveness.
- Remove the tip of the Pencil and gently clean it. Dust or debris on the tip can interfere with its functionality.
- Ensure your iPad’s software is up to date. Outdated software can cause performance issues.
- Restart your iPad to clear any temporary glitches that may be affecting the Pencil.
3. Inaccurate Input
If the Pencil is providing inaccurate input or not registering your strokes correctly, try these solutions:
- Check if the tip of the Pencil is damaged or worn out. Replace it with a new tip if necessary.
- Make sure your iPad screen is clean. Dirty or oily screens can affect the Pencil’s accuracy.
- Adjust the sensitivity settings of the Pencil in the iPad’s settings menu. Experiment with different settings to find the most accurate input.
4. Bluetooth Connectivity Issues
If your Pencil is having trouble maintaining a Bluetooth connection, try these troubleshooting steps:
- Check if your iPad’s Bluetooth is turned on. If not, enable it in the settings menu.
- Move closer to your iPad to ensure a strong Bluetooth signal.
- Forget the Pencil in your iPad’s Bluetooth settings and then pair it again.
- If all else fails, try resetting your iPad’s network settings. This can resolve any underlying Bluetooth issues.
By following these troubleshooting steps, you should be able to resolve common issues with your Apple Pencil and enjoy a seamless experience on your iPad.
FAQ:
Can I use any pencil with my iPad?
No, you need to use an Apple Pencil specifically designed for use with iPads.
How do I connect my Apple Pencil to my iPad?
To connect your Apple Pencil to your iPad, simply plug it into the lightning port of your iPad and wait for the pairing process to start.
Can I use the Apple Pencil to navigate through my iPad’s interface?
Yes, you can use the Apple Pencil to navigate through your iPad’s interface by tapping on icons and swiping on the screen.
What are some useful features of using the Apple Pencil with an iPad?
Using the Apple Pencil with an iPad allows for more precise drawing, handwriting, and annotation, as well as pressure sensitivity for different line thicknesses. It also opens up new possibilities for creativity and productivity.
Do I need to charge the Apple Pencil?
Yes, you need to charge the Apple Pencil. It can be charged by plugging it into the lightning port of your iPad or by using a charging adapter.
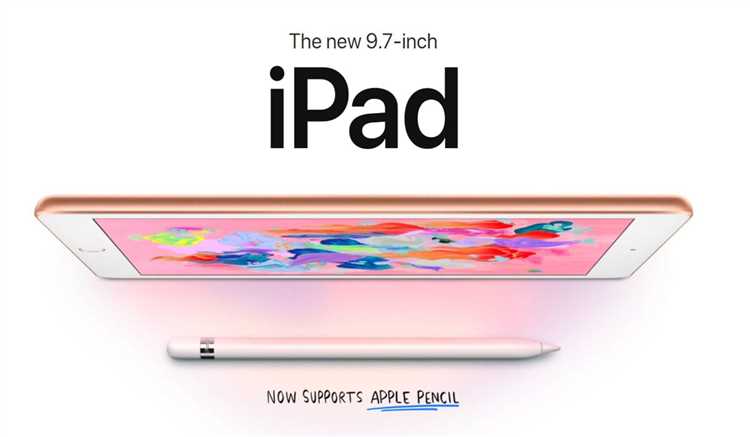
Is the Apple Pencil compatible with all iPad models?
No, the Apple Pencil is only compatible with certain iPad models. It is compatible with iPad Pro models (both older and newer), as well as the iPad Air (4th generation) and the iPad (8th generation).