
As an aspiring iOS developer, you might think that running the iOS Simulator is only possible on a Mac. However, there are actually a few ways you can run the iOS Simulator on a Windows computer, allowing you to test and debug your iOS applications without needing to invest in an expensive Mac.
One method is to use virtualization software like VMware or VirtualBox to install a virtual machine running macOS on your Windows computer. This allows you to run iOS Simulator and test your apps just like you would on a real Mac. However, this method can be a bit complicated and requires a good understanding of virtualization.
Another option is to use a cloud-based iOS simulator service, such as BrowserStack or Appetize.io. These services allow you to remotely access and interact with real iOS devices through your web browser. While this option is more user-friendly and doesn’t require any hardware or software setup, it does come with a cost, as you’ll need to pay for a subscription to use these services.
Whatever method you choose, it’s important to remember that running the iOS Simulator on Windows is not the same as running it on a real Mac. There may be some limitations and differences in performance, so it’s always a good idea to test your app on a real iOS device if possible. However, using these methods can still be a valuable tool for iOS developers who don’t have immediate access to a Mac.
System Requirements for Running iOS Simulator on Windows
In order to run the iOS Simulator on a Windows computer, you need to ensure that your system meets the following requirements:
- Windows Operating System: You must have a Windows operating system installed on your computer. The iOS Simulator is not compatible with other operating systems such as macOS or Linux.
- Minimum RAM: Your computer should have a minimum of 4GB of RAM. However, for optimal performance, it is recommended to have 8GB or more.
- Processor: A multi-core processor is preferred, such as an Intel Core i5 or i7, to ensure smooth performance while running the iOS Simulator.
- Graphics Card: While not mandatory, having a dedicated graphics card can improve the simulator’s performance, especially when dealing with graphic-intensive applications.
- Hard Drive Space: You will need sufficient free space on your hard drive to install and run the iOS Simulator. The exact amount of space required may vary depending on the simulator version and the applications you intend to run.
- Virtualization Technology: If you plan to use virtualization software, such as VMware or VirtualBox, to run the iOS Simulator, make sure that your computer’s processor supports virtualization technology (Intel VT-x or AMD-V).
It is important to note that running the iOS Simulator on Windows will not provide the full functional experience of using a real iOS device. The simulator can only replicate the software environment and behavior, but it cannot simulate certain hardware features such as accelerometers, GPS, or proximity sensors.
Additionally, keep in mind that the performance of the iOS Simulator on a Windows computer may be affected by the hardware specifications and the amount of system resources allocated to it. For optimal results, it is recommended to allocate sufficient resources and prioritize performance over other applications running concurrently.
By ensuring that your system meets these requirements, you can successfully run the iOS Simulator on a Windows computer and test and develop iOS applications without the need for an actual iOS device.
Choosing the Right iOS Simulator
When running the iOS Simulator on Windows, it is important to choose the right simulator that suits your needs. Here are a few factors to consider when making your decision:
- iOS Version: The first thing to consider is the iOS version that you need to test your app on. Different iOS simulators are available for different iOS versions, ranging from older versions to the latest release. Choose a simulator that matches the iOS version you want to test.
- Device Type: iOS simulators mimic different types of iOS devices, such as iPhones and iPads. Consider the device type on which you want to test your app. If your app is designed specifically for iPhones, choose an iPhone simulator. If it is meant for iPads, then go for an iPad simulator.
- Screen Size and Resolution: Different iOS devices have different screen sizes and resolutions. Make sure to choose a simulator that matches the screen size and resolution of the target device. This will help you test the user interface and layout of your app effectively.
- Performance: iOS simulators, like any other emulators, may have varying performance levels. Some simulators may run faster or slower than others. Consider your system specifications and choose a simulator that runs smoothly on your machine without compromising performance.
- Additional Features: Some iOS simulators may offer additional features that can enhance your testing experience. These features may include network simulation, location simulation, debugging tools, and more. Take a look at the available features and choose a simulator that offers the ones you require.
Overall, choosing the right iOS simulator depends on your specific testing needs. Consider the iOS version, device type, screen size and resolution, performance, and additional features to find the simulator that best suits your requirements.
Step-by-Step Guide: How to Install and Run iOS Simulator on Windows
iOS Simulator is a powerful tool that allows developers to test and debug their iOS applications without the need for a physical device. While it is officially only available for macOS, it is possible to run iOS Simulator on Windows using third-party software. Here’s a step-by-step guide on how to install and run iOS Simulator on Windows:
- Download and install Xcode: Xcode is Apple’s integrated development environment (IDE) for macOS and is required to access iOS Simulator. Unfortunately, Xcode is only available for macOS, so in order to install iOS Simulator on Windows, you will need to use a virtual machine or a remote macOS instance.
- Set up a virtual machine or remote macOS instance: You can use virtualization software like VMware or VirtualBox to create a virtual macOS environment on your Windows machine. Alternatively, you can use services like MacStadium or Macincloud to access a remote macOS instance.
- Install Xcode on the virtual machine or remote macOS instance: Once you have set up the virtual machine or remote macOS instance, install Xcode on it just like you would on a regular macOS system. Follow the instructions provided by Apple to complete the installation process.
- Access iOS Simulator: Once Xcode is installed, you can launch iOS Simulator from the “Xcode” menu. This will open the iOS Simulator window, which emulates the features and functionality of an iOS device.
- Run iOS applications: With iOS Simulator up and running, you can now test and debug your iOS applications. Simply select the desired device from the menu and launch your application. You can interact with the simulated device using your mouse and keyboard.
Please note that running iOS Simulator on Windows may not provide the same level of performance and functionality as running it on a native macOS system. Additionally, certain features and capabilities may be limited or unavailable. However, it can still be a useful tool for development and testing purposes.
By following this step-by-step guide, you can install and run iOS Simulator on Windows, allowing you to develop and test your iOS applications without the need for a physical iOS device.
Benefits of Running iOS Simulator on Windows
Running iOS Simulator on a Windows machine offers several advantages, making it a valuable tool for developers and designers. Here are some key benefits:
- Testing iOS Apps: The iOS Simulator allows Windows users to test and debug their iOS apps without needing to own a physical iOS device. This can save both time and money for developers who want to ensure their apps work seamlessly on iOS devices.
- Cross-Platform Development: By running the iOS Simulator on Windows, developers can work on cross-platform projects more efficiently. They can test their apps on both iOS and Windows environments simultaneously, making it easier to identify and resolve any compatibility issues.
- Design and UX: Designers can use the iOS Simulator on Windows to create pixel-perfect mockups and prototypes. This helps them visualize how their designs will look and function on iOS devices, improving the overall user experience.
- Accessibility Testing: The iOS Simulator provides accessibility features that allow developers and designers to test their apps’ accessibility on iOS devices. This ensures that their apps are inclusive and accessible to all users, regardless of their abilities.
- Performance Optimization: Developers can use the iOS Simulator on Windows to analyze and optimize the performance of their iOS apps. They can simulate different device configurations and operating conditions to identify and resolve performance bottlenecks.
In summary, running the iOS Simulator on Windows offers a range of benefits for developers and designers, including simplified app testing, improved cross-platform development, enhanced design capabilities, accessibility testing, and performance optimization. It is a valuable tool that can streamline the iOS app development process and help create high-quality and user-friendly apps.
Common Issues and Troubleshooting Tips
Running an iOS Simulator on a Windows computer can sometimes lead to various issues and errors. Here are some common issues that you may encounter and troubleshooting tips to help you resolve them:
- Compatibility Issues: Ensure that the version of the iOS Simulator you are trying to run is compatible with your Windows operating system. If not, try using a different version or updating your operating system.
- Virtualization Error: If you receive an error message related to virtualization, make sure that virtualization (Intel VT or AMD-V) is enabled in your computer’s BIOS settings. Consult your computer’s documentation or manufacturer’s website for instructions on how to enable virtualization.
- Performance Issues: If the iOS Simulator is running slow or lagging, try allocating more system resources (such as RAM) to the simulator. You can do this by adjusting the settings in your virtualization software or emulator.
- App Installation Failure: If you are unable to install apps on the iOS Simulator, check that you have the necessary provisioning profiles and certificates. Make sure you are using a valid Apple Developer account and that the necessary permissions are set up correctly.
- Screen Resolution Issues: If the iOS Simulator does not fit on your screen or has display issues, adjust the screen resolution settings of your virtualization software or emulator. Ensure that the desktop resolution of your Windows computer matches or is compatible with the iOS Simulator’s resolution.
- Network Connectivity Problems: If the iOS Simulator cannot connect to the internet, check your computer’s network settings. Ensure that your network adapter is enabled and properly configured. You can also try restarting your network router or using a different network connection.
- Debugging Issues: If you are encountering issues with debugging your iOS apps on the Simulator, ensure that you have set up the necessary development tools and debug symbols. Make sure that your Xcode installation and project settings are correct.
If you are still experiencing issues or errors, consult online forums, developer communities, or Apple’s official documentation for further assistance. Remember to provide detailed information about your setup and any error messages you receive to help others diagnose the problem accurately.
Alternatives to Running iOS Simulator on Windows
Although running the iOS Simulator on Windows can be a challenging task, there are several alternatives available for developers who wish to test their iOS applications without purchasing a Mac. Here are some options:
1. Remote iOS Simulator for Windows
Remote iOS Simulator for Windows allows developers to simulate iOS apps on their Windows machines by connecting to a Mac remotely. This solution enables developers to access and control a virtual iOS simulator running on a Mac, directly from their Windows PCs.
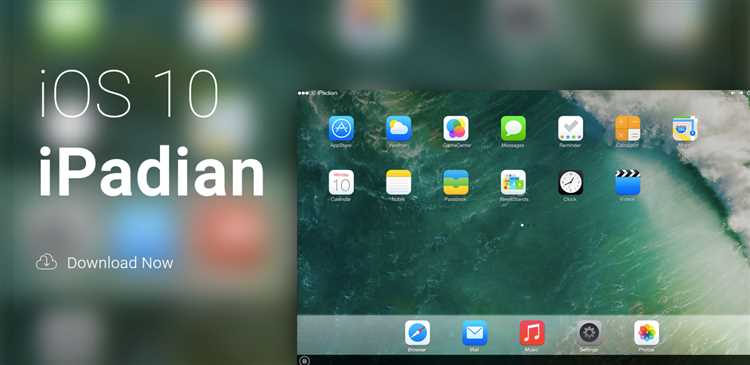
2. Third-Party iOS Emulators
There are also third-party iOS emulators available for Windows, such as iPadian and Smartface, which simulate the iOS environment on a Windows machine. These emulators provide a virtual iOS device that developers can use to test their applications.
3. Testing on Real iOS Devices
One of the best ways to test iOS applications is by using real iOS devices. While this may require purchasing an iOS device like an iPhone or iPad, it provides the most accurate representation of how the application will perform on an actual device.
4. Cloud-Based Mobile Testing Platforms
Cloud-based mobile testing platforms, like BrowserStack and Sauce Labs, offer a wide range of virtual devices, including iOS devices, that developers can access and test their applications on. These platforms provide a convenient solution for cross-platform testing without the need for physical devices.
5. iOS Simulator on macOS Virtual Machine
If you are running Windows on a powerful machine, you can create a macOS virtual machine using software like VMware or VirtualBox and install Xcode, which comes with the iOS Simulator. This allows you to run the iOS Simulator directly on your Windows PC within the virtual macOS environment.
While these alternatives may not provide an exact replica of the iOS Simulator on Windows, they offer viable options for developers to test their iOS applications without needing a Mac. Each option has its advantages and disadvantages, so it’s important to choose the one that best suits your specific needs and requirements.
Final Thoughts
In conclusion, running iOS Simulator on Windows can be a great solution for developers who want to test their applications on an iOS device without having to invest in a Mac. While there are a few limitations and complexities involved, the available options such as using third-party tools or virtual machines can provide a feasible solution.
It’s important to consider the requirements and limitations of each option before making a decision. Developers should assess factors such as performance, compatibility, and ease of use to find the best solution for their specific needs.
Furthermore, it’s worth noting that running iOS Simulator on Windows is not a substitute for testing on a real iOS device. While the simulator can provide a good approximation of the iOS environment, it may not accurately reflect the performance and behavior of a physical device.
Overall, if you’re a Windows user looking to develop or test iOS applications, exploring the various options for running iOS Simulator on Windows can be a worthwhile endeavor. With the right tools and resources, you can efficiently develop and test iOS applications even without a Mac.
FAQ:
Is it possible to run iOS Simulator on Windows?
Yes, it is possible to run iOS Simulator on Windows using different methods.
What is iOS Simulator?
iOS Simulator is a tool provided by Apple that allows developers to test and debug their iOS applications on a virtual iOS device.
Why would someone want to run iOS Simulator on Windows?
Running iOS Simulator on Windows can be useful for developers who do not own a Mac computer but still want to test and debug their iOS applications.
What are the different methods to run iOS Simulator on Windows?
There are several methods to run iOS Simulator on Windows, including using third-party software like Xamarin, creating a Hackintosh, or using online services like Appetize.io.
Is there any free software to run iOS Simulator on Windows?
Yes, Xamarin offers a free version of its software that allows you to run iOS Simulator on Windows. However, there are also paid versions available with additional features.
Are there any limitations when running iOS Simulator on Windows?
Yes, there are some limitations when running iOS Simulator on Windows. These limitations include limited access to certain hardware features, potential performance issues, and the inability to test applications on a real iOS device.
Can I publish an iOS app without using a Mac computer?
No, in order to publish an iOS app to the App Store, you will need a Mac computer running Xcode.