
Have you ever spent hours perfecting an email, only to realize that you forgot to hit the send button? It’s a frustrating situation that many of us have found ourselves in. But fear not – finding your unsent emails and sending them on their way is easier than you might think.
First, check your email client’s draft folder. Most email services automatically save drafts as you work on them, so they should be easily accessible. Look for a tab or folder labeled “Drafts” or something similar. If you can’t find it, try searching for “drafts” in the search bar.
If your email client doesn’t have a dedicated draft folder, don’t worry. Check your outbox or sent folder instead. Sometimes, emails that were not sent will be saved here. Look for any emails that are marked as “unsent” or “failed” and try sending them again. If that doesn’t work, you may need to copy the content of the email and start a new draft.
If you still can’t find your unsent email, it’s possible that it was never saved. In this case, you may need to retype the email from scratch. Before doing so, double-check your internet connection and make sure that your email client is functioning properly. It’s also a good idea to save your progress periodically by clicking on the “Save” or “Draft” button.
Remember, it’s always a good idea to double-check your emails before sending them. Take a moment to proofread and make sure that all necessary attachments are included. And don’t forget to hit that send button this time!
Why Finding Unsent Emails Matters
Sending emails has become an essential part of daily communication, both in personal and professional settings. However, we’ve all experienced moments when we’ve composed an email but forgot to send it. It can be frustrating, especially when the content of the email is time-sensitive or important.
Knowing how to locate unsent emails is crucial as it helps us prevent potential communication gaps and ensures that our messages reach their intended recipients in a timely manner. Here are a few reasons why finding unsent emails matters:
- Avoid missed opportunities: Unsent emails can contain important information or requests that need immediate attention. By locating these emails, you can make sure that you don’t miss out on any opportunities or deadlines.
- Prevent miscommunication: Sometimes, we write emails and forget to send them, assuming that the other person has received the information. Finding unsent emails helps us avoid miscommunication and ensures that all relevant parties are on the same page.
- Save time and effort: By finding unsent emails, you can quickly resend them without having to rewrite the entire message. This saves you time and effort, especially if the content of the email is extensive or complex.
- Maintain professionalism: In professional environments, it’s important to demonstrate professionalism and reliability. Locating unsent emails allows you to follow up on important matters promptly, which reflects positively on your work ethic and attention to detail.
In conclusion, finding unsent emails is crucial for effective communication and ensuring that important messages are delivered in a timely manner. By being proactive in locating and sending these emails, you can avoid missed opportunities, prevent miscommunication, save time and effort, and maintain professionalism.
Step 1: Accessing Your Email Draft Folder
If you are unable to locate your unsent emails, chances are they are stored in your email draft folder. Here’s how you can access it:
- Open your email client or webmail application.
- Log in to your email account using your username and password.
- Once you are logged in, navigate to your inbox.
- Look for a tab or menu option labeled “Drafts” or “Draft Folder.” This may be located on the left-hand side or at the top of the screen.
- Click on the “Drafts” or “Draft Folder” tab to open it.
- Within the draft folder, you should see a list of all your saved email drafts.
If you cannot find a specific “Drafts” or “Draft Folder” tab, try clicking on the “More” or “Other” options in your email client’s menu, as the draft folder may be located there.
If you are using a webmail application, such as Gmail or Yahoo Mail, you can also try searching for the term “drafts” in the search bar at the top of the screen. This should bring up any email drafts that match your search query.
Once you have located your email draft folder, you can open any unsent emails, make any necessary changes, and send them off to their intended recipients.
Remember to regularly check your email draft folder to ensure no important messages remain unsent.
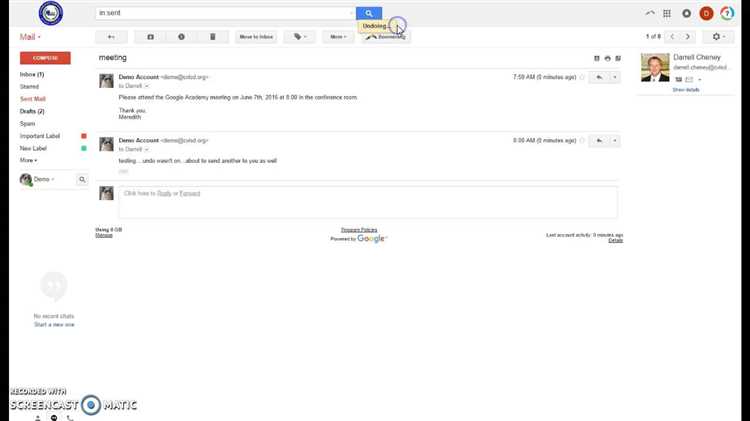
Step 2: Searching for Unsent Emails
Once you have accessed your email account and opened the email composition window, you can follow these steps to search for unsent emails:
- Check the Drafts Folder: The most common location for unsent emails is the Drafts folder. Look for a tab or link labeled Drafts on the main screen of your email account. Click on this tab to access your drafts folder.
- Scan for Unsent Emails: Once you are in the Drafts folder, scan through the list of emails to look for the one you were working on but did not send. The emails in the drafts folder may be listed by subject, sender, or date, depending on the email service provider. Look for any unfinished emails or emails that you remember writing but didn’t send.
- Sort and Filter: If your drafts folder contains a large number of emails, you can use sorting and filtering options to narrow down the search. Look for options like “Sort by Date” or “Filter by Sender” to organize the emails in a way that makes it easier to find the unsent email you need.
- Open and Review: Once you have identified a potential unsent email, click on it to open and review its contents. Make sure to check if any attachments, images, or links were included in the email. Review the text and make any necessary edits or additions before sending it.
- Send the Email: After reviewing and making any necessary changes to the email, click on the “Send” button or a similar option to send the email. Double-check the recipient’s email address to ensure it is correct before sending.
- Delete Unneeded Drafts: If you come across any old or unnecessary drafts while searching for unsent emails, consider deleting them to declutter your drafts folder. This can make it easier to find important drafts in the future.
By following these steps, you can effectively search for and locate unsent emails in your email account’s drafts folder. Remember to check this folder regularly to avoid leaving any important emails unsent.
Step 3: Using Filters to Locate Drafts
Another effective way to locate drafts of unsent emails is by using filters. Filters allow you to narrow down your search criteria and display only the specific types of emails you are looking for.
To use filters to locate drafts, follow these simple steps:
- Open your email provider’s interface and navigate to your inbox or folder where drafts are usually stored.
- Look for the “Filter” or “Search” bar at the top of the page. This is usually a text input field accompanied by a search button.
- Click on the filter or search bar to activate it and begin typing your search criteria. For drafts, you can enter keywords like “draft”, “unsent”, or any specific information related to the unsent email you are looking for.
- As you type, the interface will start displaying suggestions or auto-complete options based on the entered keywords. This can help you refine your search criteria and find the drafts more quickly.
- Once you have entered your search criteria, press the search or enter button, or click on the search icon to initiate the filter or search process.
- The email interface will display a filtered list of emails that match your search criteria. Look through the list to find the drafts of unsent emails you were searching for.
- If you still cannot find the desired drafts, consider revising your search criteria or expanding your keywords to increase the chances of locating the drafts.
Using filters can help you save time and effort by focusing on specific types of emails, such as drafts, and quickly locating them within your email provider’s interface.
Note: The specific steps for using filters may vary depending on your email provider. If you are having trouble finding the filter or search bar, consult your email provider’s help documentation or support resources for more information.
Step 4: Checking Other Devices for Unsent Emails
If you have multiple devices like smartphones, tablets, or laptops that you use for accessing your email account, it’s important to check them as well for any unsent emails. Sometimes, you may have started drafting an email on one device and then switched to another without sending it.
Follow these steps to check for unsent emails on other devices:
- Smartphones: Open the email application on your smartphone and navigate to the drafts folder. This folder typically contains any emails that were not sent. Look for any emails that you may have started but did not finish or send. If you find any unsent emails, you can either complete them and send them or delete them if they are no longer needed.
- Tablets: Similar to smartphones, open the email application on your tablet and look for the drafts folder. Check for any unsent emails that you may have started but not sent. Complete and send them if necessary, or delete them if they are no longer relevant.
- Laptops/Desktops: Access your email account on your computer or laptop and open the email client or web browser. Navigate to the drafts folder or section, where any unsent emails will be stored. Look for any emails that were not sent and take the appropriate action to complete and send them or delete them if needed.
By checking your email on all your devices, you can ensure that you don’t have any unsent emails languishing in the drafts folder.
Step 5: Using Email Recovery Tools
If you have unintentionally deleted or lost your unsent emails, don’t panic just yet. There are email recovery tools available that can help you retrieve those important messages. Here’s how you can use them:
- Check your email provider’s recovery options: Most email providers have built-in recovery features that allow you to restore deleted emails. Log in to your email account and look for options like “Trash,” “Deleted Items,” or “Recover.” These folders usually store deleted emails for a certain period of time before permanently deleting them.
- Use third-party email recovery software: If your email provider doesn’t have a built-in recovery option or if you can’t find your unsent emails in the designated recovery folders, you can try using third-party email recovery software. These tools are designed to help recover deleted or lost emails from various email clients and platforms. Some popular email recovery software options include Stellar Phoenix Mailbox Exchange Recovery, DataNumen Outlook Repair, and Recovery Toolbox for Outlook.
- Follow the instructions provided by the software: Once you’ve installed the email recovery software, follow the instructions provided by the tool to scan for and recover your unsent emails. Typically, you’ll need to select the email client or email platform you’re using, specify the location where your unsent emails were stored, and initiate the recovery process. The software will then scan for any recoverable emails and display them for you to view and restore.
- Save the recovered emails: After the recovery process is complete, make sure to save the recovered emails to a safe location on your computer or other storage devices. You can create a new folder specifically for these emails or save them in an existing folder. This will help ensure that you don’t accidentally delete them again and that you can easily access them whenever needed.
By following these steps and utilizing email recovery tools, you have a good chance of retrieving your unsent emails. However, it’s important to note that the success of email recovery depends on various factors, such as the time elapsed since deletion and the condition of the storage device. It’s always recommended to act quickly and avoid using the device or storage medium where the emails were lost until the recovery process is complete.
Step 6: Finding Unsent Emails in Cloud Storage
If you often use cloud storage solutions, such as Google Drive or Dropbox, to save your important files and documents, it’s possible that you may have also saved unsent emails in these platforms without even realizing it. Here’s how you can find unsent emails in cloud storage:
- Sign in to your cloud storage account using your credentials.
- Navigate to the folder where you typically save your email drafts or any folders where you might have accidentally saved unsent emails.
- Once you’re in the correct folder, look for files with file extensions commonly associated with email drafts, such as .eml or .msg.
- Review the files found and open them using an email client or a compatible software that can read these file types.
- Check the content of the files to see if they contain any unsent emails that you were looking for.
- If you find any unsent emails, you can either open them, make changes if necessary, and send them, or you can delete them if they are no longer relevant.
Remember to always check your cloud storage platforms for any potential unsent emails, especially if you regularly use these services to store your documents and files. It’s easy to overlook saved drafts in cloud storage, so taking the time to verify their presence can help ensure that you don’t miss any important messages.
Step 7: Preventing Unsent Emails in the Future
To prevent the frustration of dealing with unsent emails, there are a few measures you can take. These measures will help ensure that your emails are sent successfully without any issues:
- Double-check your recipient: Before hitting the send button, always double-check the recipient’s email address. Make sure it is correctly spelled and entered.
- Save drafts frequently: While composing an email, save your drafts frequently. This will prevent any accidental chances of losing your work in progress.
- Use an email client with auto-save: Consider using an email client that has an auto-save feature. This will save your drafts automatically at regular intervals, minimizing the risk of losing unsent emails.
- Check your internet connection: Ensure that you have a stable internet connection before sending any email. Fluctuating or weak internet connections can lead to unsent emails.
- Disable automatic sending: If you prefer to review your emails before they are sent, disable any auto-send features in your email client or webmail service. This will give you the opportunity to review and make any necessary changes before sending.
By following these preventive measures, you can significantly reduce the chances of encountering unsent emails in the future. Remember, taking a few extra seconds to verify the recipient’s information and double-checking your draft can save you time and frustration in the long run.