
With the increase in remote work and the importance of staying connected, being able to make Wi-Fi calls on your MacBook Air can be a game-changer. Whether you need to make a business call or want to catch up with friends and family, the ability to make calls over Wi-Fi can save you money on your phone bill and provide a more reliable connection.
In this step-by-step guide, we will walk you through the process of setting up Wi-Fi calling on your MacBook Air. We will cover everything from enabling the necessary settings to troubleshooting common issues. So, grab your MacBook Air and let’s get started!
Step 1: Check Compatibility and Enable Wi-Fi Calling
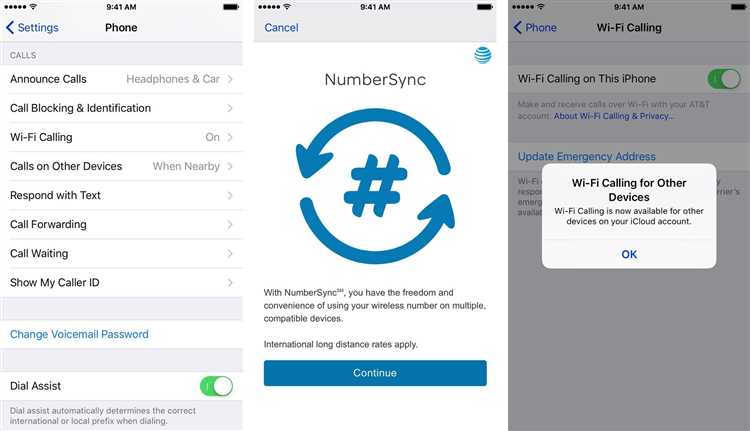
Before you can start making Wi-Fi calls on your MacBook Air, you’ll need to ensure that your device is compatible. Check with your carrier to see if Wi-Fi calling is supported on your MacBook Air model. Once confirmed, enable Wi-Fi calling by going to the System Preferences and selecting the “Phone” option.
Step 1: Check your Wi-Fi connection
Before making Wi-Fi calls on your MacBook Air, it’s important to ensure that your Wi-Fi connection is stable and functioning properly. Follow these steps to check your Wi-Fi connection:
- Click on the Wi-Fi icon in the menu bar at the top right corner of your screen.
- A dropdown menu will appear, displaying the available Wi-Fi networks. Make sure that your desired network is selected and connected.
- If your network is not listed, click on “Join Other Network” and enter the name of your network manually. Make sure to enter the correct network name and password, if required.
- Wait for your MacBook Air to establish a connection to the network. This may take a few moments.
- Once connected, open a web browser and try accessing a website to check your internet connection.
- If the website loads successfully, your Wi-Fi connection is working properly.
- If you are experiencing any issues, try restarting your MacBook Air and router, and check that your Wi-Fi router is within range.
By following these steps, you can ensure that your Wi-Fi connection is stable and ready for making Wi-Fi calls on your MacBook Air.
Step 2: Install a Wi-Fi calling app
After enabling Wi-Fi calling on your MacBook Air, you’ll need to install a Wi-Fi calling app that is compatible with your service provider. These apps allow you to make calls over Wi-Fi using your existing phone number.
- Check your service provider: Before installing a Wi-Fi calling app, make sure to check if your service provider supports Wi-Fi calling on macOS. Not all providers offer this feature, so it’s important to confirm compatibility.
- Download the app: Once you’ve confirmed that your service provider supports Wi-Fi calling on macOS, head to the App Store or the official website of your service provider to download and install the Wi-Fi calling app.
- Sign in or create an account: After installing the app, open it and sign in with your service provider account credentials. If you don’t have an account, you may need to create one.
- Grant necessary permissions: The app may require certain permissions to function properly, such as access to your contacts or microphone. Make sure to grant these permissions when prompted.
- Configure settings: Once you’ve signed in and granted permissions, you may have the option to customize a few settings, such as call forwarding or voicemail preferences. Adjust these settings according to your preferences.
- Start making Wi-Fi calls: With the app installed and configured, you’re ready to start making Wi-Fi calls on your MacBook Air. Open the app and use the interface to dial a phone number or select a contact to initiate a call.
It’s important to note that the specific steps may vary depending on the Wi-Fi calling app and service provider you use. The app’s interface and settings may differ, so make sure to refer to the app’s documentation for further guidance if needed.
Step 3: Open the app and sign in
Once you have installed the app on your MacBook Air, locate the app icon in your Applications folder or Launchpad. Click on the icon to open the app.
Next, you will need to sign in to the app using your account credentials. If you don’t have an account, you may need to create one first. Look for a “Sign In” or “Create Account” button within the app and follow the prompts to enter your email and password.
After signing in, you may be asked to grant the app permissions to access your microphone and network settings. Click “Allow” or “Grant” to proceed.
Once you have successfully signed in and granted the necessary permissions, the app should be ready to use for making Wi-Fi calls on your MacBook Air. Move on to the next step to learn how to make your first call.
Step 4: Grant necessary permissions
Before you can start making Wi-Fi calls on your MacBook Air, you need to grant the necessary permissions to the calling app. Here’s how to do it:
- Open the “System Preferences” on your MacBook Air by clicking on the Apple menu in the top left corner of the screen and selecting “System Preferences” from the dropdown menu.
- In the System Preferences window, click on the “Security & Privacy” icon.
- In the Security & Privacy window, click on the “Privacy” tab.
- Scroll down the left sidebar and click on “Microphone”.
- In the list of apps on the right side, find the calling app you are using and make sure it is checked.
- If the app is not listed, click on the lock icon in the bottom left corner of the window and enter your administrator password to make changes.
- Click on the “+” button below the list of apps and select the calling app from the Applications folder.
- Once the app is added to the list, make sure it is checked.
- Close the System Preferences window and you’re done!
By granting the necessary microphone permissions, you can now make Wi-Fi calls using the calling app on your MacBook Air without any issues. Enjoy the convenience of making calls over Wi-Fi!
Step 5: Add contacts to your app
Once you have set up your Wi-Fi calling app on your MacBook Air, the next step is to add contacts to the app. Adding contacts allows you to easily make calls to your friends, family, and colleagues without having to manually dial their numbers every time.
To add contacts to your app, follow these steps:
- Launch the Wi-Fi calling app on your MacBook Air.
- Click on the “Contacts” tab or navigate to the contacts section of the app.
- Click on the “Add Contact” button or select the option to add a new contact.
- Enter the contact’s name and phone number in the designated fields. You can also add additional information such as email address or notes if desired.
- Click on the “Save” button or select the option to save the contact.
- Repeat steps 3 to 5 for adding more contacts to your app.
Once you have added all your contacts, you can easily access them in the app’s contacts section. You can search for contacts by name, phone number, or any additional information you have entered. This makes it convenient to find and call the person you want to reach quickly and efficiently.
Additionally, some Wi-Fi calling apps may offer synchronization with your existing contact list on your MacBook Air. This means that any changes you make to your contacts in the app will be reflected in your device’s contacts as well, keeping your information up to date across platforms.
Adding contacts to your Wi-Fi calling app simplifies the calling process and ensures that you have easy access to the people you frequently communicate with. Take a few minutes to add your contacts, and you’ll be ready to make Wi-Fi calls in no time!
Step 6: Make a Wi-Fi call
Now that you have set up Wi-Fi calling on your MacBook Air, you can make calls using your Wi-Fi connection. Follow these steps to make a Wi-Fi call:
- Open the FaceTime app on your MacBook Air. You can find it in your Applications folder or by searching for it in Spotlight.
- In the FaceTime app, click on the “Audio” tab at the top of the window.
- Enter the phone number or email address of the person you want to call in the search bar at the top of the window.
- Click on the “Audio” button next to their name in the search results. This will start the Wi-Fi call.
- Wait for the person to answer the call. Once they answer, you can start talking.
- To end the call, click on the red “End” button in the call window.
During a Wi-Fi call, you can use the built-in microphone and speakers on your MacBook Air to talk and listen to the other person. If you prefer, you can also use headphones or an external microphone.
Remember, Wi-Fi calling uses your internet connection to make calls, so make sure you are connected to a Wi-Fi network before making a call. This will help you avoid using your cellular data and potentially incurring additional charges.
Step 7: Adjust call settings
After making a Wi-Fi call on your MacBook Air, you can adjust the call settings to enhance your calling experience. Here are some options you can explore:
- Speaker or Headphones: Depending on your preference and privacy, you can select whether to use the built-in speakers or connect headphones to your MacBook Air for the call.
- Microphone: You can choose which microphone input you want to use during the call, such as the built-in microphone or an external microphone.
- Advanced Audio Settings: If you’re an advanced user, you can access additional audio settings to configure the audio input and output devices, adjust the volume, and enable noise cancellation features.
- Camera: If you want to enable video during your Wi-Fi call, you can select the appropriate camera input for video calls.
- Do Not Disturb: If you don’t want to be interrupted by incoming calls while you’re on a Wi-Fi call, you can enable the “Do Not Disturb” mode to silence notifications and calls temporarily.
By adjusting these call settings, you can personalize your Wi-Fi calling experience on your MacBook Air to suit your needs and preferences.
Step 8: End the Wi-Fi call
Once you’re done with your Wi-Fi call on your MacBook Air, you can easily end the call using the built-in controls.
Here’s how to end a Wi-Fi call on your Macbook Air:
- Locate the call controls on your MacBook Air screen.
- Click on the “End Call” button.
Note: Depending on the app or service you are using for the Wi-Fi call, the location and appearance of the call controls may vary.
Once you end the Wi-Fi call, you will be disconnected from the call and the call window will close.
Remember to properly disconnect from the Wi-Fi network if you no longer need it to conserve battery life and ensure the security of your device.
FAQ:
Can I make Wi-Fi calls on my MacBook Air?
Yes, you can make Wi-Fi calls on your MacBook Air by using various applications and services that support this feature.
What applications can I use to make Wi-Fi calls on my MacBook Air?
There are several applications you can use to make Wi-Fi calls on your MacBook Air, such as Skype, Google Hangouts, FaceTime, and WhatsApp.
Do I need an active phone number to make Wi-Fi calls on my MacBook Air?
No, you don’t necessarily need an active phone number to make Wi-Fi calls on your MacBook Air. Some apps like Skype, Google Hangouts, and FaceTime allow you to make calls using your email address or username.
Can I use my MacBook Air to receive Wi-Fi calls?
Yes, you can use your MacBook Air to receive Wi-Fi calls if you have set up the necessary applications or services to receive calls.
Are Wi-Fi calls free on my MacBook Air?
Wi-Fi calls can be free depending on the application or service you are using. For example, Skype-to-Skype calls are usually free, while calls made through FaceTime may use up your cellular data or require a Wi-Fi connection.
Is it possible to make international Wi-Fi calls on my MacBook Air?
Yes, it is possible to make international Wi-Fi calls on your MacBook Air using applications like Skype, Google Hangouts, or FaceTime. However, keep in mind that there may be charges for calling landlines or mobile numbers abroad.