
Are you an iPhone user who wishes they could use iMessage on their Chrome browser? Well, you’re in luck! With the help of a nifty tool called “Chrome Remote Desktop,” you can now access iMessage on your Chromebook or any other device running Chrome OS. In this step-by-step guide, we will walk you through the process of setting up and using iMessage on Chrome, so you can stay connected with your iPhone contacts, even when you don’t have your iPhone handy.
Step 1: Install Chrome Remote Desktop on your iPhone and Chromebook
The first step in using iMessage on Chrome is to ensure that you have Chrome Remote Desktop installed on both your iPhone and your Chromebook. You can download and install the app from the App Store on your iPhone and the Chrome Web Store on your Chromebook. Once installed, make sure you sign in to Chrome Remote Desktop using the same Google account on both devices.
Step 2: Enable iMessage on your iPhone
Before you can access iMessage on Chrome, you need to enable the “Remote Messages” feature on your iPhone. To do this, open the “Settings” app on your iPhone, navigate to “Messages,” and toggle on the “Remote Messages” switch. You will also need to set a username and password for accessing iMessage on Chrome, so make sure to do that as well.
Note: You will need to know the local IP address of your iPhone to use iMessage on Chrome. You can find this by going to “Settings,” then “Wi-Fi,” and tapping on the network you are connected to. The IP address will be listed under “IP Address.”
Setting up Chrome for iMessage
Before you can use iMessage on Chrome, you will need to follow a few simple steps to set it up properly. Here’s how to do it:
- Make sure you have a Mac computer with iMessage already set up and working correctly.
- Open the Chrome browser on your Mac.
- Go to the Chrome Web Store and search for the “Messages for web” extension.
- Click on the “Add to Chrome” button to install the extension.
- A pop-up window will appear asking for confirmation to install the extension. Click on the “Add extension” button to proceed.
- The extension will be downloaded and installed automatically.
- Once the installation is complete, click on the puzzle piece icon in the top-right corner of the Chrome browser.
- Find the “Messages for web” icon and click on it to open the extension.
- A QR code will be displayed on the screen.
- Now, take your iPhone and open the Messages app.
- Go to the Settings within the app.
- Select the option for “Messages for Web” or “Scan QR Code.”
- Aim your iPhone’s camera at the QR code displayed on your Mac screen.
- Once the QR code is scanned, your iPhone and Mac will be linked for iMessage on Chrome.
- Now, you can use iMessage on your Chrome browser by accessing the “Messages for web” extension.
That’s it! You have successfully set up Chrome for iMessage. Enjoy using iMessage on your Mac through the Chrome browser!
Logging into your Apple ID
To use iMessage on Chrome, you need to log into your Apple ID. Follow these steps to log in:
- Open the Messages app on your iPhone or other Apple device.
- In the top left corner, tap on the “Write a New Message” icon.
- Type in the recipient’s phone number or email address, and then tap the “Send” icon.
- You will see a message saying “iMessage needs to be enabled to send this message.” Tap on “Enable”.
- If you’re not already logged into your Apple ID, you will be prompted to enter your Apple ID and password.
- Enter the correct Apple ID and password associated with your device, and then tap on “Sign In”.
- Once you successfully log in, your iMessage will be enabled, and you can start using it on Chrome.
It’s important to note that you need to have your Apple ID and password handy before starting this process. If you forgot your Apple ID or password, you can go to the Apple ID account page and follow the steps to recover or reset your password.
Enabling iMessage on your Mac
Using iMessage on your Mac is a convenient way to send and receive messages from your Apple devices. Here’s a step-by-step guide on how to enable iMessage on your Mac:
- Open the Messages app on your Mac. You can find it in the Applications folder or by searching for it using Spotlight.
- If you have never used iMessage on your Mac before, you will need to sign in with your Apple ID. Click on “Messages” in the menu bar at the top of the screen and choose “Preferences.” Then, click on the “Accounts” tab and click on the “+” button to add your Apple ID.
- After signing in, make sure your phone number and email address are selected for “Start new conversations from” and “You can be reached for messages at.” This will ensure that you can send and receive messages from these contact points on your Mac.
- If you are having trouble signing in or if iMessage is not working properly, you can try signing out and signing back in. To do this, go to “Messages” > “Preferences” > “Accounts” and click on your Apple ID. Then, click on the “-” button to remove the account. Finally, click on the “+” button to add your Apple ID again and sign in.
- If you want to sync your messages across all your Apple devices, including your Mac, iPhone, and iPad, make sure that the “Enable Messages in iCloud” option is checked. This will allow you to access your entire iMessage history from any device.
- Once iMessage is enabled on your Mac, you can start sending and receiving messages with other iMessage users. You can also enjoy additional features such as sending attachments, sharing your location, and using stickers and effects in your messages.
That’s it! You have successfully enabled iMessage on your Mac. Now you can enjoy the convenience of using iMessage across all your Apple devices!
Installing the Chrome Remote Desktop extension
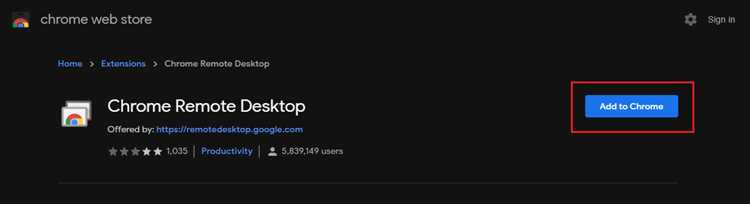
To use iMessage on Chrome, you will need to install the Chrome Remote Desktop extension on your computer. This extension allows you to access your Mac or PC remotely from your Chrome browser, giving you the ability to use iMessage on your Chromebook.
Follow these steps to install the Chrome Remote Desktop extension:
- Open the Chrome browser on your Chromebook.
- Go to the Chrome Web Store by typing “chrome.google.com/webstore” in the address bar.
- In the search bar of the Chrome Web Store, type “Chrome Remote Desktop” and press Enter.
- Click on the “Add to Chrome” button next to the “Chrome Remote Desktop” extension.
- A pop-up window will appear asking for confirmation to add the extension. Click on the “Add extension” button.
- The Chrome Remote Desktop extension will start downloading and installing.
Once the installation is complete, you will see a small icon for the Chrome Remote Desktop extension in the top right corner of your browser window.
Note: You will need to set up remote access on your Mac or PC in order to use the Chrome Remote Desktop extension. Follow the on-screen instructions to complete the setup process.
Accessing your Mac using Chrome Remote Desktop
Chrome Remote Desktop is a helpful tool that allows you to access your Mac computer remotely using the Google Chrome browser. With Chrome Remote Desktop, you can securely connect to your Mac from another computer or mobile device, enabling you to access your files, applications, and even control your Mac. Here’s a step-by-step guide on how to use Chrome Remote Desktop to access your Mac:
- Install Chrome Remote Desktop on your Mac:
- Open the Google Chrome browser on your Mac.
- Visit the Chrome Web Store and search for “Chrome Remote Desktop.”
- Click on the “Add to Chrome” button to install the Chrome Remote Desktop app.
- Follow the prompts to complete the installation.
- Set up remote access on your Mac:
- Launch the Chrome Remote Desktop app on your Mac.
- Click on the “Enable remote connections” button.
- Follow the instructions to install the Chrome Remote Desktop Host on your Mac.
- Once the installation is complete, you’ll see a confirmation message.
- Access your Mac using Chrome Remote Desktop:
- Open the Google Chrome browser on the computer or device you want to use to access your Mac.
- Visit the Chrome Remote Desktop website and click on the “Get started” button.
- Under the “Remote Access” section, click on the “Access” button next to your Mac’s name.
- Enter the PIN you set up during the installation process on your Mac.
- Click on the “Connect” button to establish a remote connection.
Once the connection is established, you’ll be able to see and control your Mac’s screen within the Chrome browser. You can navigate your Mac just like you would if you were physically sitting in front of it. Keep in mind that for security reasons, you’ll need to enter the PIN every time you connect to your Mac using Chrome Remote Desktop.
Chrome Remote Desktop is a convenient solution for accessing your Mac remotely, whether you’re traveling, working from home, or simply need to access your Mac from another room in your house. Make sure to install and set up Chrome Remote Desktop properly to ensure a seamless remote access experience.
Navigating the iMessage interface on Chrome
Once you have successfully installed the iMessage extension on Chrome, you can start using it to send and receive messages on your computer. Here’s a step-by-step guide on how to navigate the iMessage interface:
- Open Chrome and log in to your Apple ID on the iMessage extension if you haven’t done so already.
- Click on the extension icon located on the top-right corner of your browser to open the iMessage interface.
- You will see a familiar layout similar to the Messages app on your iPhone or Mac. The left panel displays your existing conversations, while the right panel shows the selected conversation thread.
- To start a new conversation, click on the “New Message” button located at the top-left corner of the interface.
- Enter the recipient’s name, phone number, or email address in the “To” field. You can also select a contact from your address book by clicking on the “+” button next to the “To” field.
- Type your message in the text field at the bottom of the interface and press the “Enter” key to send it. You can also add attachments like photos or files by clicking on the paperclip icon.
- To view and reply to incoming messages, click on the desired conversation from the left panel. The conversation thread will appear on the right.
- When viewing a conversation, you can use various options available at the top of the interface. For example, you can click on the “i” icon to view details about the contact, use the microphone icon to record and send a voice message, or use the camera icon to take and send a photo or video.
- To search for specific messages or contacts, use the search bar located at the top of the left panel. Simply enter your search query and the relevant results will be displayed instantly.
- If you want to customize your iMessage settings, click on the settings icon at the bottom-left corner of the interface. Here, you can modify preferences such as notifications, appearance, and privacy settings.
With these simple navigation steps, you can easily use iMessage on Chrome and stay connected with your friends and family right from your computer. Enjoy the convenience of sending and receiving messages without the need to switch devices!
Sending and receiving iMessages on Chrome
While iMessage is primarily designed for Apple devices, there are methods available that allow you to use iMessage on other platforms, including Chrome. Here’s a step-by-step guide on how to send and receive iMessages on Chrome:
- Download and install Chrome Remote Desktop: Chrome Remote Desktop is a free extension that allows you to remotely access another computer. To use iMessage on Chrome, you’ll need to set up a remote connection to a Mac computer that has iMessage.
- Set up Chrome Remote Desktop: Once you’ve downloaded and installed Chrome Remote Desktop, follow the instructions to set it up on both your Chrome browser and the Mac computer you want to connect to. Make sure to enable remote connections on the Mac computer.
- Connect to the Mac computer: Open Chrome on your Chromebook or Windows computer, click on the Chrome Remote Desktop extension, and select the Mac computer you want to connect to. Enter the PIN and you’ll be connected to the Mac computer.
- Access iMessage: Once you’re connected to the Mac computer, you’ll be able to access its desktop. Open iMessage on the Mac computer and you’ll be able to send and receive iMessages as if you were using a Mac device.
- Manage iMessage notifications: To receive iMessage notifications on your Chromebook or Windows computer, make sure to enable notifications in the iMessage settings on the Mac computer. This way, you’ll be alerted when you receive new iMessages even if you’re not actively using the remote connection.
By following these steps, you’ll be able to use iMessage on Chrome and enjoy the convenience of sending and receiving iMessages on non-Apple devices. Keep in mind that you’ll need a reliable internet connection for the remote connection to work smoothly.
Troubleshooting common issues with iMessage on Chrome
If you’re experiencing issues with using iMessage on Chrome, there are a few common problems that you might encounter. Here are some troubleshooting steps to help you resolve them:
- Ensure you’re using the latest version of Chrome: Make sure that your browser is up to date. You can check for updates by clicking on the three vertical dots in the top right corner of the Chrome window, and then selecting “Help” > “About Google Chrome”. If there is an update available, follow the prompts to install it.
- Clear your browsing data: Sometimes, accumulated cache and cookies can cause issues with iMessage. Clearing your browsing data can help resolve these issues. To do this, click on the three vertical dots, then select “More tools” > “Clear browsing data”. Make sure the “Browsing history” and “Cookies and other site data” options are selected, and then click “Clear data”.
- Disable Chrome extensions: Some Chrome extensions might interfere with the functionality of iMessage. Try disabling any extensions you have installed to see if that resolves the issue. Go to the three vertical dots, select “More tools” > “Extensions”, and then toggle off the extensions.
- Check your internet connection: Ensure that you have a stable internet connection. You can try resetting your router or connecting to a different network to see if that resolves the problem.
- Restart your computer: Sometimes, a simple restart can help resolve software conflicts or temporary glitches. Restart your computer and try using iMessage on Chrome again.
- Contact Apple Support: If none of the above steps resolve your issue, it’s possible that there might be a problem with your Apple ID or iMessage settings. In this case, it’s best to reach out to Apple Support for further assistance.
Hopefully, these troubleshooting steps help you resolve any common issues you may encounter while using iMessage on Chrome. Remember to follow the steps in order and test iMessage after each step to see if the issue is resolved.
FAQ:
Can I use iMessage on Chrome?
Yes, you can use iMessage on Chrome with the help of a third-party app called Beeper.
How can I use iMessage on Chrome?
To use iMessage on Chrome, you need to install the Beeper app on your computer and sign in with your Apple ID. The app will sync your iMessage conversations and allow you to send and receive messages directly from Chrome.
Is Beeper a free app?
No, Beeper is not a free app. It has a subscription fee of $10 per month. However, it offers a 30-day free trial for users to test the app before subscribing.
Can I use iMessage on Chrome without Beeper?
No, you cannot use iMessage on Chrome without Beeper. Beeper is the only known solution that allows you to use iMessage on non-Apple devices, including Chrome.
Is Beeper available for Windows and Linux?
Yes, Beeper is available for Windows and Linux. It is compatible with different operating systems, allowing users to use iMessage on Chrome regardless of their device.