
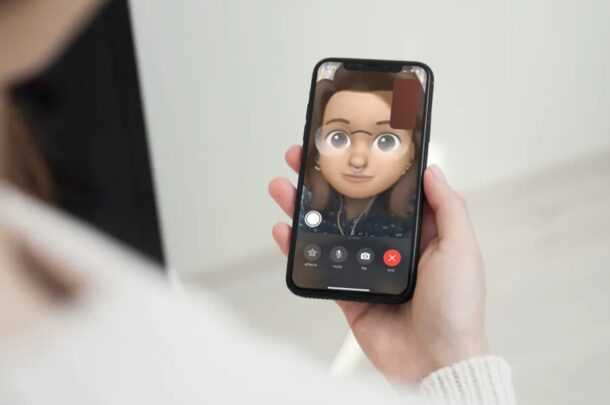
FaceTime is a popular video calling app that allows users to connect with friends, family, and colleagues. However, if your camera is not enabled or not working properly, you won’t be able to enjoy the full functionality of the app. In this step-by-step guide, we will show you how to enable your camera for FaceTime.
Step 1: Check Camera Settings
First, you need to check your camera settings to ensure that it is enabled. Go to your device’s Settings and find the FaceTime option. Tap on it and make sure that the “Camera” option is toggled on. If it is already enabled, try toggling it off and on again to refresh the settings.
Note: If you don’t see the FaceTime option in your Settings, it may be disabled or restricted on your device. You may need to contact your device’s manufacturer or service provider for assistance.
Step 2: Update FaceTime and iOS
If your camera is still not working, make sure that you have the latest version of FaceTime and iOS installed on your device. Outdated software can sometimes cause compatibility issues with the camera. Check the App Store for any available updates for FaceTime, and go to your device’s Settings to update the iOS if necessary.
Pro tip: It is always recommended to keep your apps and device software up to date to ensure the best performance and compatibility.
Troubleshooting Camera Issues on FaceTime
If you are experiencing camera issues while using FaceTime, follow these troubleshooting steps to resolve the problem:
- Check camera settings: Ensure that your camera is enabled and properly configured in the settings of your device. Go to the Settings app, select FaceTime, and make sure the Camera option is turned on.
- Restart FaceTime: Close the FaceTime app completely and reopen it to see if the camera issue is resolved. Swipe up from the bottom of the screen (on iPhone X or later) or double-click the home button (on older iPhones or iPads) to view the app switcher. Swipe left or right to find the FaceTime app, then swipe it up to close it. Launch FaceTime again from the home screen.
- Update your device: Make sure that your device is running the latest version of iOS or macOS. Camera issues on FaceTime can sometimes be fixed by updating the operating system.
- Check for app updates: If you are using an older version of FaceTime, it is recommended to update the app to the latest version available. App updates often contain bug fixes and improvements, which could resolve camera issues.
- Restart your device: A simple device restart can solve many software-related issues, including camera problems. Press and hold the power button (or the power button and volume down button on iPhones without a home button) until the power off screen appears. Slide to power off, then wait a few seconds before turning your device back on.
- Reset settings: If none of the above steps work, you can try resetting the settings of your device. Keep in mind that this will erase all customized preferences, but it does not delete any data. To reset settings, go to the Settings app, select General, then Reset, and choose Reset All Settings. Enter your passcode when prompted, then confirm the reset.
- Contact Apple Support: If you have tried all the troubleshooting steps and the camera issue still persists, it is recommended to contact Apple Support for further assistance. They can provide guidance specific to your device model and help diagnose any potential hardware issues.
By following these troubleshooting steps, you should be able to resolve camera issues on FaceTime and enjoy uninterrupted video calls with your friends and family.
Step 1: Check Camera Permissions
Before you can use your camera for FaceTime, you need to make sure that the camera has the necessary permissions to be accessed by the application. Follow these steps to check if camera permissions are enabled:
- Open the Settings app on your device.
- Scroll down and tap on “Privacy”.
- Select “Camera” from the list of options.
- You should see a list of apps that have requested access to your camera. Look for “FaceTime” in the list.
- If “FaceTime” is not listed, it means that the app has not requested access to your camera. In this case, you can enable camera access for FaceTime by sliding the toggle next to it to the right.
- If “FaceTime” is already listed and the toggle next to it is already enabled, then camera access is already granted for FaceTime.
Once you have verified that camera access is enabled for FaceTime, you can proceed to the next step to make sure that your camera is working properly.
Step 2: Update FaceTime App
In order to enable camera for FaceTime, you need to make sure that you have the latest version of the FaceTime app installed on your device. Follow these steps to update the app:
- Open the App Store on your device.
- Tap on the “Updates” tab at the bottom of the screen.
- If you see an available update for FaceTime, tap on the “Update” button next to it.
- If there is no update available, it means that you already have the latest version of FaceTime installed.
Updating the FaceTime app will ensure that you have the latest features and bug fixes, which can help resolve any issues you may be experiencing with the camera. It’s important to regularly check for updates and install them to keep your apps functioning optimally.
Step 3: Restart Your Device
After following the previous steps to enable and check your camera settings on your device, if you still encounter issues with the camera during FaceTime, a simple restart of your device may solve the problem.
To restart your device, follow these steps:
- iPhone or iPad:
- Press and hold the power button located on the top or side of your device.
- Swipe the power icon from left to right to turn off your device.
- Wait for a few seconds.
- Press and hold the power button again until the Apple logo appears.
- Release the power button and wait for your device to restart.
- Mac:
- Click on the Apple logo located in the top left corner of your screen.
- Select “Restart” from the drop-down menu.
- Wait for your Mac to shut down and restart.
Once your device has finished restarting, open FaceTime again and check if the camera is now working properly. If the issue persists, proceed to the next step.
Step 4: Reset FaceTime Preferences
If you’ve tried the previous steps but your camera still isn’t working with FaceTime, you may need to reset your FaceTime preferences. Resetting the preferences can help resolve any software conflicts or settings issues that may be causing the camera problem.
Here’s how to reset your FaceTime preferences:
- Open the FaceTime app on your device.
- Click on “FaceTime” in the menu bar at the top of the screen.
- Select “Preferences” from the drop-down menu.
- In the preferences window, click on the “Settings” tab.
- Click on the “Restore Defaults” button.
- Confirm that you want to reset your FaceTime preferences by clicking “OK” in the pop-up window.
Once you have reset your FaceTime preferences, try using the camera with FaceTime again. Hopefully, this will resolve the camera issue and you’ll be able to see and be seen during your FaceTime calls.
Step 5: Check for Software Updates
Before proceeding with troubleshooting your camera for FaceTime, it is important to make sure that your device’s software is up to date. Software updates often include bug fixes and improvements that can help resolve issues with your camera.
To check for software updates on your device:
- Open the Settings app on your device.
- Scroll down and tap on General.
- In the General settings, tap on Software Update.
- If an update is available, tap on the Download and Install button.
- Follow the on-screen instructions to complete the software update.
Once the software update is complete, restart your device and try using FaceTime again to see if the camera issue is resolved.
Step 6: Reset the Camera Settings
If you have tried all the above methods and you are still unable to enable the camera for FaceTime, you may need to reset the camera settings. This can help to troubleshoot any software issues that may be causing the problem.
Here are the steps to reset the camera settings:
- Open the Settings app on your device.
- Scroll down and tap on “General”.
- Tap on “Reset”.
- Choose “Reset All Settings”.
- Enter your passcode if prompted.
- Confirm your decision to reset all settings.
Once the camera settings are reset, you may need to reconfigure them to your preferences. Make sure to enable the camera for FaceTime by following the steps mentioned in the previous sections.
If resetting the camera settings does not solve the issue, there may be a deeper problem with your device’s hardware. In this case, it is recommended to contact Apple support or visit an authorized service center for further assistance.
Step 7: Contact Apple Support
If you have tried all the previous steps and are still unable to enable your camera for FaceTime, it may be time to contact Apple Support for further assistance. They have a team of knowledgeable technicians who can help troubleshoot and resolve any issues you are experiencing.
To contact Apple Support, you can follow these steps:
- Go to the official Apple Support website.
- Navigate to the “Contact Support” section.
- Select your device and the specific issue you are facing (in this case, camera-related).
- Choose to either chat with a support representative online, schedule a call, or visit an Apple Store.
- If you choose to chat with a representative, describe the problem you are facing and provide any relevant details.
- Follow the instructions given by the support representative to troubleshoot the issue.
- If the issue cannot be resolved remotely, the support representative may advise you to visit an Apple Store or send in your device for further inspection and repair.
Remember to be patient and cooperative during the support process. Apple Support is there to help you, and providing them with accurate information and following their instructions will ensure a smoother resolution to your camera problem.
FAQ:
Why can’t I use my camera for FaceTime?
If you can’t use your camera for FaceTime, there could be several reasons. First, make sure that your device has a front-facing camera, as some older models may not have one. Second, check if your camera is enabled in your device’s settings. You can do this by going to the “Settings” app, selecting “FaceTime,” and making sure that the toggle switch for “Camera” is turned on. If the problem still persists, there might be a hardware issue with your camera, and you should contact Apple support for further assistance.
Can I use FaceTime on my iPad without a camera?
No, you cannot use FaceTime on an iPad without a camera. FaceTime is a video calling feature that requires a camera to function. If your iPad does not have a front-facing camera, you will not be able to use FaceTime for video calls. However, you can still use FaceTime for audio calls if your iPad has a microphone.
Why does my camera not work during FaceTime calls?
If your camera does not work during FaceTime calls, there could be a few reasons for this. First, check if your camera is working properly by opening the Camera app and taking a photo or recording a video. If your camera is working fine, try restarting your device and see if the issue resolves. Also, make sure that you have granted FaceTime permission to access your camera by going to “Settings,” selecting “FaceTime,” and enabling the camera toggle switch. If the problem still persists, there might be a software glitch, and you can try updating your device’s software to the latest version.
Can I use FaceTime on my Windows PC?
No, you cannot use FaceTime on a Windows PC. FaceTime is an Apple-exclusive app and is only available on Apple devices such as iPhones, iPads, and Macs. However, there are other video calling apps available for Windows, such as Skype, Zoom, and Microsoft Teams, that you can use to make video calls.
How can I check if my camera is working properly for FaceTime?
To check if your camera is working properly for FaceTime, you can open the Camera app on your device and take a photo or record a video. If the camera functions normally in the Camera app, it should work fine for FaceTime as well. Additionally, you can test your camera during a FaceTime call by making a call to a trusted contact and asking them if they can see you properly. If they can see you and your camera is functioning, then your camera is working properly for FaceTime.