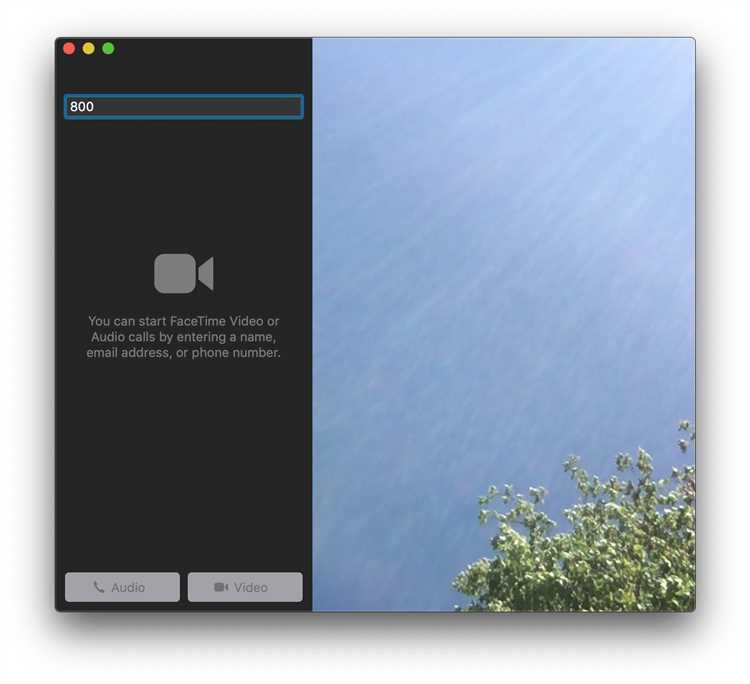
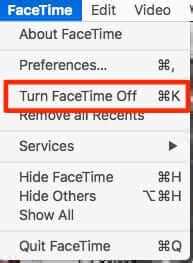
FaceTime is a popular video calling app that allows Mac users to connect with friends, family, and colleagues through high-quality video and audio calls. While FaceTime can be a useful tool for staying in touch, there may be instances where you want to disable the app on your Mac. Whether you’re concerned about privacy or simply want to limit distractions, disabling FaceTime is a straightforward process. In this step-by-step guide, we’ll walk you through the process of disabling FaceTime on your Mac.
The first step to disabling FaceTime on your Mac is to open the FaceTime app. You can usually find it in your Applications folder or by searching for it in Spotlight. Once you have the app open, click on the “FaceTime” menu in the top left corner of the screen, and then select “Preferences” from the dropdown menu. This will open the FaceTime preferences window, where you can manage various settings and options.
In the preferences window, you’ll see a series of tabs at the top. Click on the “Settings” tab to access FaceTime’s settings. Here, you’ll find a checkbox labeled “Enable FaceTime.” To disable FaceTime on your Mac, simply uncheck this box. Once unchecked, FaceTime will be disabled and you won’t be able to make or receive calls using the app. It’s worth noting that disabling FaceTime on your Mac doesn’t affect FaceTime on your other Apple devices, such as iPhones and iPads.
Now that FaceTime is disabled on your Mac, you won’t receive any incoming FaceTime calls, and you won’t be able to make outgoing calls. However, if you change your mind and want to enable FaceTime again in the future, you can simply follow the same steps and check the “Enable FaceTime” box in the FaceTime preferences window. Disabling FaceTime can be a useful tool for managing your time and maintaining privacy, so don’t hesitate to give it a try if you’re looking for a break from video calls.
Turn Off FaceTime Using System Preferences
To turn off FaceTime on your Mac using System Preferences, follow these steps:
- Open the Apple menu by clicking on the Apple icon in the top-left corner of your screen.
- Select “System Preferences” from the drop-down menu.
- In the System Preferences window, click on the “Apple ID” option.
- A new window will open with your Apple ID settings. Click on the “iCloud” tab.
- In the iCloud settings, scroll down until you find the “Apps on this Mac using iCloud” section.
- Find and uncheck the box next to “FaceTime” in the list of apps.
- A pop-up window will appear asking if you want to keep a copy of your FaceTime data on your Mac. You can choose to keep or remove the data, depending on your preference.
- After making your selection, click on the “Done” button to save the changes.
By following these steps, you have successfully turned off FaceTime on your Mac using System Preferences. You can always go back and repeat the steps if you decide to enable FaceTime again in the future.
Disable FaceTime Notifications
To disable FaceTime notifications on your Mac, follow these steps:
- Open the FaceTime app on your Mac.
- In the menu bar at the top of the screen, click on “FaceTime” and select “Preferences”.
- In the Preferences window, click on the “Settings” tab.
- Under the “Notifications” section, you will see different options for controlling FaceTime notifications.
- To completely disable FaceTime notifications, uncheck the box next to “Enable push notifications”.
- If you only want to disable specific types of notifications, such as incoming call alerts or missed call alerts, you can uncheck the corresponding boxes.
- You can also customize how notifications are displayed by selecting the desired options under the “Alerts” and “Banners” sections.
- Once you have made your desired changes, close the Preferences window.
By following these steps, you can easily disable FaceTime notifications on your Mac and prevent any interruptions while working or using your computer.
Deactivate FaceTime on Your Mac
If you no longer wish to use FaceTime on your Mac and want to deactivate it, follow these simple steps:
- Open the FaceTime application on your Mac. You can find it in the Applications folder or use Spotlight to search for it.
- In the top menu bar, click on “FaceTime” and then select “Preferences”.
- A new window will appear with various options. Click on the “Settings” tab.
- On the Settings tab, you will see a checkbox next to “Enable this account”. Uncheck the box to deactivate FaceTime on your Mac.
- You may also want to consider signing out of your FaceTime account. To do this, click on the “Sign Out” button next to your Apple ID.
- Once you have unchecked the “Enable this account” box and signed out, close the preferences window.
By following these steps, you have successfully deactivated FaceTime on your Mac. You will no longer be able to make or receive FaceTime calls on your computer.
If you change your mind and want to reactivate FaceTime in the future, simply follow the same steps and check the “Enable this account” box again.
Prevent FaceTime from Starting Automatically
If you want to prevent FaceTime from starting automatically on your Mac, you can follow these steps:
- Open the FaceTime app on your Mac.
- In the menu bar at the top of the screen, click on “FaceTime“.
- A drop-down menu will appear. Click on “Preferences“.
- A new window will open. In this window, click on the “Settings” tab.
- Under the “General” section, you will see an option that says “Open FaceTime:“.
- Next to this option, there is a drop-down menu. Click on it and select “Turn Off“.
- Close the Preferences window.
- From now on, FaceTime will not start automatically when you turn on your Mac.
By following these steps, you can easily prevent FaceTime from automatically starting on your Mac. This can be useful if you don’t use FaceTime regularly or if you want to reduce the amount of apps that open at startup.
Block FaceTime Access to Your Camera and Microphone
If you want to completely block FaceTime from accessing your camera and microphone on your Mac, you can follow these steps:
- Click on the Apple logo in the top left corner of your screen.
- Select “System Preferences” from the drop-down menu.
- Click on the “Security & Privacy” option.
- In the “Privacy” tab, select the “Camera” option from the left menu.
- Uncheck the box next to “FaceTime” to disable camera access.
- Next, select the “Microphone” option from the left menu.
- Uncheck the box next to “FaceTime” to disable microphone access.
By following these steps, you will effectively block FaceTime from accessing your camera and microphone on your Mac. This can be useful if you want to ensure your privacy or if you don’t want FaceTime to use these features for any reason.
Note that if you want to enable FaceTime access to your camera and microphone again in the future, you can simply go back to the “Security & Privacy” settings and check the boxes next to “FaceTime” for camera and microphone access.
Disable FaceTime on Certain Wi-Fi Networks
If you want to disable FaceTime only when connected to certain Wi-Fi networks, you can use the following steps:
- Open the FaceTime app on your Mac.
- Click on “FaceTime” in the menu bar at the top of the screen.
- Click on “Preferences” from the dropdown menu.
- In the Preferences window, click on the “Settings” tab.
- Under the “Automatically ring on speakers and headset” section, you will see a list of Wi-Fi networks.
- Uncheck the box next to the Wi-Fi networks where you want to disable FaceTime.
- Click on the “OK” button to save your changes.
By unchecking the box next to specific Wi-Fi networks, you are telling FaceTime not to automatically connect or ring when connected to those networks. This means that when you are connected to those Wi-Fi networks, FaceTime will be effectively disabled.
Remove FaceTime from Your Dock and Menu Bar
If you want to completely remove FaceTime from your Mac’s Dock and Menu Bar, follow these steps:
- Click on the FaceTime icon in your Dock to open the app.
- In the top menu bar, click on “FaceTime” and then select “Preferences”.
- In the FaceTime Preferences window, uncheck the box next to “Show FaceTime icon in the menu bar”.
- Close the FaceTime Preferences window.
- Right-click on the FaceTime icon in your Dock.
- In the context menu that appears, hover over “Options” and then select “Remove from Dock”.
By following these steps, you will remove FaceTime from both your Mac’s Dock and Menu Bar, making it less accessible and reducing the chances of accidentally initiating a FaceTime call.
FAQ:
Is it possible to disable FaceTime on my Mac?
Yes, it is possible to disable FaceTime on your Mac. Here is a step-by-step guide on how to do it.
Why would someone want to disable FaceTime on their Mac?
There could be several reasons why someone would want to disable FaceTime on their Mac. Some people may have privacy concerns and want to prevent others from being able to initiate video calls with them. Others may find FaceTime to be a distraction and want to limit their use of it. In some cases, disabling FaceTime may be necessary for troubleshooting purposes.
Can I still receive FaceTime calls if I disable FaceTime on my Mac?
No, if you disable FaceTime on your Mac, you will not be able to receive FaceTime calls. Disabling FaceTime essentially turns off the feature completely on your Mac.
Will disabling FaceTime on my Mac affect FaceTime on my other devices?
No, disabling FaceTime on your Mac will not affect FaceTime on your other devices. FaceTime is an independent feature on each device, so disabling it on one device will not impact its functionality on other devices.
Is there a way to temporarily disable FaceTime on my Mac?
Yes, there is a way to temporarily disable FaceTime on your Mac. Instead of unchecking the box next to “Enable this account” or “Enable FaceTime” in the preferences, you can simply sign out of your FaceTime account. This will prevent you from receiving FaceTime calls until you sign back in.


