
Creating an Apple ID is essential for iPhone, iPad, and Mac users as it allows them to access various Apple services and apps. However, some users may hesitate to create an Apple ID due to the requirement of providing billing information. Thankfully, there is a way to create an Apple ID without billing information, and this step-by-step guide will walk you through the process.
Step 1: Visit the Apple ID account creation page
To begin, open your preferred web browser and go to the Apple ID account creation page. You can easily find this page on the Apple website or by searching for “Apple ID create account” in your favorite search engine.
Step 2: Fill in your personal information
Once you reach the Apple ID account creation page, you will be prompted to enter your personal information. This includes your name, email address, password, and security questions. It is important to provide accurate information to ensure seamless access to your Apple ID account.
Step 3: Select the “None” option for billing information
When you come to the billing information section, you will notice that a credit card option is selected by default. However, you can easily change this by selecting the “None” option from the drop-down menu. This option allows you to proceed without entering any billing information.
Step 4: Verify your Apple ID
After completing the previous steps, you will need to verify your Apple ID. Apple will send you an email with a verification link or a verification code to your provided email address. Follow the instructions in the email to verify your Apple ID and complete the account creation process.
Creating an Apple ID without billing information is a convenient option for users who prefer not to share their credit card details. By following these simple steps, you can easily create an Apple ID and enjoy the benefits of Apple’s vast ecosystem of services and apps.
Why Create an Apple ID without Billing Information?
Creating an Apple ID without providing billing information can be beneficial for various reasons:
- Privacy: By not linking a credit card or payment method to your Apple ID, you can maintain a higher level of privacy. This can be particularly useful if you are concerned about sharing your financial information with Apple or any potential security risks.
- Restricted Budget: If you have a limited budget and prefer not to make purchases through your Apple ID, creating an account without billing information allows you to access and enjoy free content from the App Store without worrying about accidental purchases or subscriptions.
- Age Restrictions: Some individuals, such as minors, may not have access to a credit card or payment method. By creating an Apple ID without billing information, they can still enjoy services like the App Store, iCloud, iMessage, and more.
- International Access: Certain countries may have limited access to Apple’s online store, iTunes, or other services due to regional restrictions. By creating an Apple ID without billing information, you can potentially bypass these restrictions and access content from different regions.
Overall, creating an Apple ID without providing billing information provides more flexibility and control over your digital purchases, privacy, and access to various Apple services. It is a convenient option for individuals who do not wish or are unable to link their payment method to their Apple ID.
Benefits of Creating an Apple ID without Billing Information
1. Easy and Convenient: Creating an Apple ID without billing information makes the process quick and hassle-free. You don’t have to provide any credit card details, which can be time-consuming and require additional verification steps.
2. Avoid Unwanted Charges: By not linking your billing information to your Apple ID, you can ensure that you won’t be charged for any purchases made on the App Store or iTunes Store. This is especially useful if you want to prevent accidental in-app purchases or unauthorized transactions.
3. Privacy and Security: Not sharing your payment details when creating an Apple ID adds an extra layer of privacy and security. It minimizes the risk of your financial information falling into the wrong hands or being compromised in any way.
4. Flexibility: Creating an Apple ID without billing information allows you to have multiple accounts for different purposes. For example, you can have one account for personal use and another for business purposes, without having to link them to your credit card.
5. Access to Free Content: With an Apple ID that doesn’t require billing information, you can download and enjoy free apps, games, music, movies, books, and other digital content available on the App Store and iTunes Store. This means you can explore and try out various apps and media without any financial commitment.
6. Family Sharing: Creating an Apple ID without billing information enables you to set up Family Sharing without linking a credit card. Family Sharing allows you to share purchases, subscriptions, and iCloud storage with up to six family members, making it convenient for managing expenses and content sharing within your family.
7. International Access: If you reside in a country where Apple Pay or the iTunes Store is not available, creating an Apple ID without billing information allows you to still access other features and services provided by Apple, such as iCloud storage, email, iMessage, and FaceTime.
8. Testing and Development: Having an Apple ID without billing information can be useful for developers and testers who want to create test accounts or try out beta versions of apps without the need for payment details. This allows for easier app testing and development without the worry of incurring charges.
Overall, creating an Apple ID without billing information offers convenience, privacy, security, and the ability to access and enjoy various free content and features provided by Apple. It’s a great option for those who prefer not to share their payment details or who want to have multiple accounts for different purposes.
Step 1: Open the App Store or iTunes Store
To create an Apple ID without billing information, you will first need to open the App Store or iTunes Store on your device. Both the App Store and iTunes Store can be found on your iPhone, iPad, iPod touch, or Mac computer.
On iPhone, iPad, or iPod touch:
- Tap on the “App Store” icon on your home screen.
- If prompted, sign in with your existing Apple ID or tap “Create New Apple ID” to proceed.
On Mac computer:
- Click on the “App Store” icon in the Dock or open the “App Store” application from the Applications folder.
- If prompted, sign in with your existing Apple ID or click on “Create Apple ID” to proceed.
By opening the App Store or iTunes Store, you will be ready to begin the process of creating an Apple ID without providing any billing information.
Accessing the App Store or iTunes Store
In order to download and access content from the App Store or iTunes Store, you will need to have an Apple ID. Follow these steps to create an Apple ID without providing billing information:
- Open the App Store or iTunes Store on your Apple device.
- Tap on the option to create a new Apple ID.
- Choose your country or region and tap “Next”.
- Read and agree to the terms and conditions.
- Enter your email address, password, and security questions, and tap “Next”.
- Select “None” as the payment method when prompted.
- Fill out the necessary information, such as your name, date of birth, and a valid address.
- Verify your email address by following the instructions sent to your inbox.
- Once your email is verified, you can start using your Apple ID to access the App Store or iTunes Store.
It’s important to note that even though you are not providing billing information initially, you may still need to add a payment method if you wish to make purchases in the future. However, you can always choose to remove the payment method after completing your initial Apple ID setup, ensuring you can continue to access free content without any payment information.
Step 2: Find a Free App to Download
Once you have created your Apple ID, the next step is to find a free app to download. This will allow you to proceed with the account setup without needing to provide any billing information.
Here’s how you can find a free app:
- Open the App Store on your device. To do this, tap on the blue icon with the letter “A” inside a white circle.
- In the bottom navigation bar, tap on the “Search” tab. This will open the search functionality.
- In the search bar at the top of the screen, type in the name of an app or a general category that you’re interested in. For example, you could search for “weather app” or “photo editing app”.
- Tap on the “Search” button on your keyboard or the “Search” button on the screen to initiate the search.
- A list of apps that match your search criteria will appear. Scroll through the list to find a free app that you’d like to download. Free apps are indicated by the word “GET” or a cloud icon with a downward arrow.
- Tap on the “GET” button or the cloud icon next to the app that you want to download. The button or icon will change to a blue “INSTALL” button.
- Tap on the blue “INSTALL” button to start the download process. You may be prompted to enter your Apple ID password or use Face ID/Touch ID to confirm the download.
- Wait for the app to download and install on your device. You can monitor the progress of the download on the app’s icon on your home screen.
- Once the app is installed, you can open it and explore its features.
By downloading a free app, you can proceed with the Apple ID setup without needing to provide any payment or billing information.
Searching for Free Apps
Once you have successfully created your Apple ID without billing information, you can start exploring and downloading free apps from the App Store. Here are the steps to search for free apps:
- Launch the App Store on your iOS device or open the App Store app on your Mac.
- Tap on the “Search” tab at the bottom of the screen.
- In the search bar at the top, type the name of the app you are looking for or a keyword related to the type of app you want.
- Tap on the “Search” button on the keyboard or the one next to the search bar.
- A list of apps related to your search will appear. Scroll through the list and look for the ones labeled “Get” or “Free”.
- If you find an app that you want to download, tap on it to view more details.
- On the app’s page, you can read the description, check the ratings and reviews, and view screenshots or videos to get a better idea of what the app offers.
- If you are satisfied with the app and want to download it, tap on the “Get” or “Free” button.
- After tapping, the button will change to “Install”. Tap on “Install” to start the download process.
- Wait for the app to download and install on your device. Once it is completed, you can find the app on your home screen or in the app library (if using iOS 14 or later).
Selecting and downloading free apps is a great way to explore the wide range of apps available on the App Store without any financial commitment. Enjoy discovering new apps and enhancing the functionality of your Apple device!
Step 3: Tap on “Get” to Begin the Download
Once you have found the desired app or game, you can begin the download process by tapping on the “Get” button. This button is usually located next to the app or game’s thumbnail image.
Before tapping on “Get,” make sure that you have a stable internet connection, as the download process may take some time depending on the size of the app or game and the speed of your connection.
After tapping on “Get,” the button will change to “Install” or “Download,” indicating that the app or game is being downloaded onto your device. You may be prompted to enter your Apple ID password or to use Touch ID/Face ID authentication for security purposes.
Once the app or game has finished downloading, its icon will appear on your device’s home screen. You can then tap on the icon to open and begin using the app or game.
Keep in mind that some apps or games may require additional permissions or settings to be configured before they can function properly. For example, a photo editing app may need access to your device’s photo library, or a music streaming app may require permission to use your location for personalized recommendations.
It’s always a good idea to review and adjust the settings of each app or game according to your preferences and privacy concerns.
Initiating the Download Process
Once you have set up your Apple ID without billing information, you can proceed with downloading apps and other content from the App Store. The following steps will guide you through the process:
- Unlock your Apple device and go to the home screen.
- Locate the “App Store” icon, which is represented by a blue icon with a white letter “A” inside.
- Tap on the “App Store” icon to open the application.
- Once the App Store is open, you will be directed to the “Today” tab by default. Tap on the “Search” tab located at the bottom right corner of the screen to proceed with searching for the app you want to download.
- In the search bar at the top of the screen, type in the name of the app you want to download. You can also search for apps by category or by browsing the featured apps.
- As you type, the App Store will provide suggestions based on your search query. Select the app you want to download from the list of suggestions or continue typing until you find the specific app you are looking for.
- Once you have found the app you want to download, tap on it to view the app’s details page.
- On the app’s details page, you will find information such as the app’s description, screenshots, and reviews. Scroll down to find the “Get” or “Download” button.
- Tap on the “Get” or “Download” button to initiate the download process. The button’s label may vary depending on whether the app is free or paid.
- If the app is paid, you may be prompted to confirm your purchase by either entering your Apple ID password or using Touch ID or Face ID.
- Once the download is initiated, the app’s icon will appear on your home screen. You can then tap on the app’s icon to open and start using it.
Congratulations! You have successfully initiated the download process and can now enjoy your newly downloaded app.
Step 4: Create a New Apple ID
Now that you have all the necessary information, you can create a new Apple ID without providing billing information. Follow these steps to create your Apple ID:
- Open the App Store on your iPhone, iPad, or iPod touch. If you don’t have the App Store app, make sure your device is running the latest version of iOS.
- Tap on your profile picture or the “Sign In” button at the top right corner of the screen.
- Tap on “Create New Apple ID” at the bottom of the screen.
- Choose your country or region from the list of options.
- Read and agree to the Terms and Conditions by tapping on “Agree” at the bottom of the page.
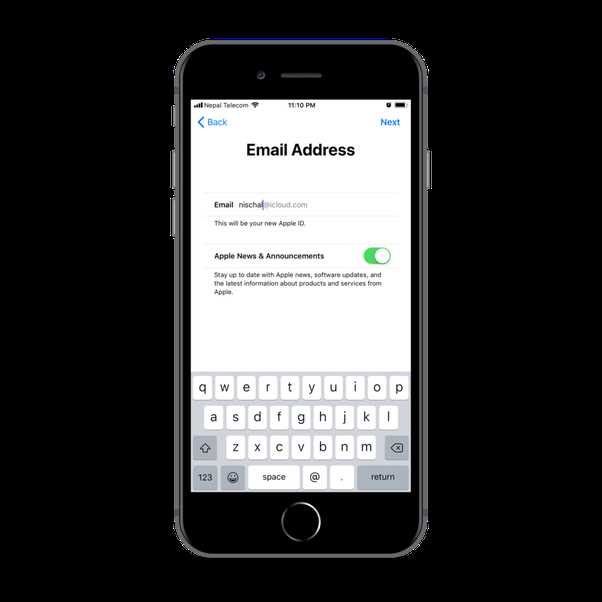
- Fill out the required fields, including your email address, password, and security questions. Make sure to use the email address that you previously prepared.
- Tap on “Next” to proceed.
- Enter your personal information, including your name and birthday. You can choose to skip adding a payment method at this step.
- Tap on “Next” to continue.
- Verify your email address by entering the verification code sent to your email. If you didn’t receive the code, tap on “Didn’t Get a Verification Code” to request a new one.
- Once your email is verified, your new Apple ID is created successfully.
You can now use your newly created Apple ID to download apps, access iTunes, and enjoy all the services offered by Apple.
Creating a New Apple ID without Billing Information
Creating a new Apple ID without providing billing information is a simple and straightforward process. By following these steps, you can set up an Apple ID without the need for any payment details:
- Open the Apple ID account creation page on your preferred web browser.
- Click on the “Create Your Apple ID” button.
- Fill in the required information, such as your first name, last name, email address, and password. Make sure to choose a secure password that meets Apple’s criteria.
- Choose a security question and provide an answer. This helps in case you ever need to recover your account.
- Agree to the terms and conditions by checking the box.
- You will be asked to enter your billing information, but you can skip this step by selecting the option that says “None” under payment methods.
- Provide your shipping address, including your country and postcode.
- Enter your phone number, including the country code, if required.
- Complete the security verification process by entering the characters displayed.
- Finally, click on the “Create Apple ID” button.
Once you have completed these steps, your new Apple ID will be created, and you can start using it to access various Apple services and applications on your device.
Note that without providing billing information, you will not be able to make purchases or subscribe to paid services through your Apple ID. However, you can still download free apps, music, and other content from the App Store.
It is important to remember your Apple ID and password, as they are required to access your account and make changes in the future. You may also consider enabling two-factor authentication for added security.
| Step | Description |
|---|---|
| 1 | Open Apple ID account creation page |
| 2 | Click “Create Your Apple ID” |
| 3 | Fill in required information |
| 4 | Choose security question and answer |
| 5 | Agree to terms and conditions |
| 6 | Skip billing information |
| 7 | Provide shipping address |
| 8 | Enter phone number |
| 9 | Complete security verification |
| 10 | Click “Create Apple ID” |
FAQ:
Can I create an Apple ID without providing billing information?
Yes, you can create an Apple ID without providing billing information. The article provides a step-by-step guide on how to do it.
Why would I want to create an Apple ID without billing information?
There are various reasons why someone might want to create an Apple ID without providing billing information. Perhaps they don’t have a credit card or they simply don’t want to link their payment information to their Apple ID.
What are the requirements for creating an Apple ID without billing information?
To create an Apple ID without billing information, you need a valid email address, a device that supports Apple ID creation, and access to the internet.
Is it possible to add billing information to an Apple ID after creating it without billing information?
Yes, it is possible to add billing information to an Apple ID even after creating it without providing billing information. The article explains how to do it.