
Are you interested in capturing and showcasing your favorite objects from all angles? Creating a stunning 360 picture of an object can be a captivating and immersive way to present it to others. Whether you want to showcase a piece of art, a product, or even a unique item from your personal collection, a 360 picture allows viewers to fully appreciate the object’s details and intricacies.
In this step-by-step guide, we will walk you through the process of creating a stunning 360 picture of an object. From choosing the right equipment to capturing the images and processing them, we will cover all the essential steps to help you achieve remarkable results. So, let’s dive in and get started!
First and foremost, you’ll need the right equipment to create a 360 picture. While professional setups can be expensive, there are more affordable options available. You’ll need a camera with a manual mode, a tripod to keep the camera steady, and a turntable or rotating platform to spin the object smoothly. Additionally, you might want to consider using a remote shutter release to avoid camera shake. These items are essential to ensure clear and well-aligned images that will result in a seamless 360 picture.
Once you have the equipment ready, it’s time to start capturing the images. Position the object in the center of the turntable and set up the camera on the tripod. Make sure the camera is level and the object is well-lit. Starting from the front, take a picture of the object every few degrees as you rotate it on the turntable. Aim for consistency in lighting, focus, and framing to ensure a smooth and cohesive final image. Once you have captured images from all angles, it’s time to move on to the next step: processing.
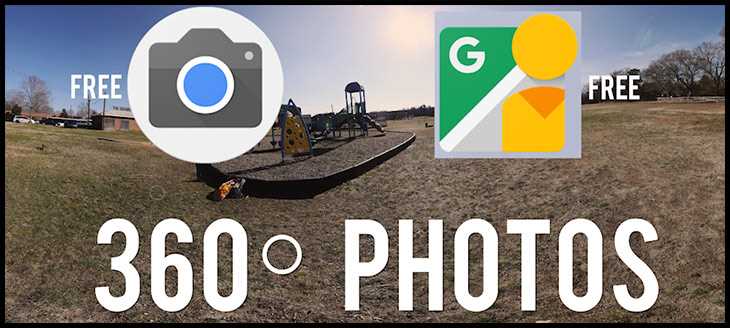
What is a 360 Picture?
A 360 picture is an interactive image that allows viewers to see an object or scenery from all angles. It provides a complete view of the subject as if the viewer is physically present. Unlike traditional images, which are static and only show one perspective, 360 pictures enable users to explore and rotate the image using their mouse or touchscreen, giving them a more immersive experience.
360 pictures are commonly used in different fields, such as real estate, tourism, e-commerce, and product showcasing. They allow people to virtually explore a space or examine a product in detail, enhancing the overall user experience.
To create a 360 picture, you need a specialized camera that captures images from all angles or software that stitches together multiple images taken from different perspectives. The resulting image can then be displayed using a compatible viewer or embedded in websites or presentations for others to explore.
With the increasing popularity of virtual reality (VR) and augmented reality (AR), 360 pictures are becoming even more prominent. They are often used as a foundation for creating immersive VR experiences, allowing users to step into virtual worlds and interact with their surroundings.
In conclusion, a 360 picture offers a more dynamic and interactive way of viewing and exploring objects or spaces. It provides a unique perspective and allows users to engage with the content in a more immersive manner.
Why Create a 360 Picture of an Object?
Creating a 360 picture of an object allows you to showcase the item from all angles and provide a more immersive visual experience for viewers. Whether you are selling products online, documenting a collection, or simply want to share a unique perspective, a 360 picture can help captivate your audience.
Here are some reasons why creating a 360 picture of an object can be beneficial:
- Enhanced online shopping experience: By providing a 360 view of a product, customers can examine it from all angles, giving them a better understanding of its features and aesthetics. This can help reduce returns and increase customer satisfaction.
- Engaging content: 360 pictures create a more dynamic and interactive experience compared to static images. Users can rotate the object, zoom in and out, and explore it in detail, leading to increased engagement and interest.
- Improved product documentation: For museums, art galleries, or collectors, a 360 picture can serve as a comprehensive documentation tool. It allows for a detailed representation of an object, including its condition and intricate details that might be missed with traditional photographs.
- Virtual reality and augmented reality: 360 pictures can be integrated into virtual reality (VR) and augmented reality (AR) experiences, providing a more immersive environment for users. This opens up opportunities for virtual tours, interactive exhibits, and virtual shopping experiences.
- Showcasing unique features: Certain objects may have features that are not easily visible from a single photograph. A 360 picture allows you to highlight these unique attributes and give viewers a more comprehensive view.
Overall, creating a 360 picture of an object offers numerous benefits in terms of customer engagement, enhanced visuals, and immersive experiences. It can be a valuable tool for businesses, collectors, and anyone who wants to showcase an object in a more interactive and captivating way.
Step 1: Prepare Your Object
Before you can create a stunning 360 picture of an object, you need to prepare the object itself. This involves ensuring that the object is clean, well-lit, and positioned correctly.
Clean your object: Start by making sure that the object is free from dust, dirt, and any other debris. Use a soft cloth or brush to gently remove any particles that may be present. This will help ensure that your final picture looks clean and polished.
Ensure proper lighting: Good lighting is essential for capturing a high-quality 360 picture. Make sure that the object is well-lit by positioning it near a window or using artificial lighting if necessary. Avoid harsh shadows or uneven lighting as this can affect the overall quality of the picture.
Position the object: It’s important to position the object in a way that showcases its best features. Consider the shape and size of the object and place it in a way that allows it to be easily rotated for the 360 picture. This may involve using a turntable or simply placing the object on a flat surface.
Consider the background: The background of your 360 picture can greatly impact its overall appeal. Choose a background that complements the object and allows it to stand out. You can use a plain backdrop or consider using props or other objects to create a more interesting setting.
By following these steps to prepare your object, you will be well on your way to creating a stunning 360 picture. The next step involves setting up your equipment and capturing the images needed for the final result.
Clean and Prepare the Object
Before you start taking pictures of the object, it is important to clean and prepare it properly. This will ensure that the final 360 picture looks stunning and professional. Here are the steps to clean and prepare the object:
- Remove dust and dirt: Use a soft cloth or brush to gently remove any dust or dirt from the object. Make sure to clean all the surfaces, including hard-to-reach areas.
- Remove fingerprints: Use a microfiber cloth or a soft cotton cloth lightly dampened with water to remove any fingerprints from the object. Be gentle while cleaning to avoid damaging the surface.
- Fix any imperfections: If the object has any scratches, dents, or other imperfections, consider fixing them before taking pictures. You can use appropriate methods or materials depending on the type of object and the imperfections.
- Position the object: Place the object on a clean and stable surface. Make sure the background and surroundings are clutter-free and don’t distract from the object. You can use a plain colored background or a professional photo backdrop for better results.
- Lighting setup: Set up the lighting to highlight the object and minimize shadows. Use diffused light sources like softboxes or reflectors to achieve even lighting. Avoid harsh direct light that can create strong shadows or reflections.
- Clean the camera lens: Before taking pictures, clean the lens of your camera with a microfiber cloth to remove any smudges or fingerprints. This will ensure clear and sharp images.
By following these steps and paying attention to detail, you can ensure that your object is clean and prepared for capturing stunning 360 pictures. Remember to take your time and make necessary adjustments to create the best possible outcome.
Lighting Setup
Creating an attractive and visually appealing 360 picture requires careful attention to the lighting setup. Here are some important factors to consider when setting up the lighting:
- Ensure even lighting: It is essential to have consistent and evenly distributed lighting across the entire object. This can be achieved by using multiple light sources placed at various angles around the object.
- Eliminate shadows: Shadows can disrupt the overall appearance of the 360 picture. To avoid shadows, position the lights in a way that minimizes any direct shadows being cast onto the object.
- Choose the right light temperature: Different light temperatures can create different moods and effects. Consider whether you want a warm or cool light setup and select the appropriate light sources accordingly.
- Use diffusers and reflectors: Diffusers help to soften harsh lighting, while reflectors bounce light onto areas that may need more illumination. Experiment with different diffusers and reflectors to achieve the desired lighting effect.
- Control reflections: Reflections can be distracting in a 360 picture. Use flags or black velvet to block unwanted reflections on the object’s surface.
- Adjust lighting intensity: Depending on the object and the desired effect, you may need to adjust the intensity of your light sources. Use dimmer switches or move the lights closer or farther from the object as needed.
- Consider the background: The background of your 360 picture can also impact the overall lighting. Ensure that the background complements the object and that there are no distracting elements that may take away from the focal point.
Setting up the lighting for a stunning 360 picture may require some experimentation and adjustments. Take the time to carefully evaluate the lighting setup and make any necessary changes to achieve the desired result.
Step 2: Choose the Right Equipment
After deciding to create a stunning 360 picture of an object, the next step is to choose the right equipment. Having the right tools can make a significant difference in the quality and outcome of your final image. Here are some key factors to consider when selecting your equipment:
- Camera: It is important to choose a camera with a high-resolution sensor and the ability to capture high-quality images. Some popular options for 360 photography include DSLRs, mirrorless cameras, and action cameras.
- Lens: A wide-angle lens is crucial for capturing a wide field of view and achieving a seamless 360 image. Look for a lens with a focal length between 8mm and 14mm for best results.
- Tripod: A stable tripod is essential to ensure minimal movement and avoid blurry images. Look for a tripod with a sturdy build and adjustable height options.
- Panoramic tripod head: To capture multiple images from different angles, a panoramic tripod head is necessary. This allows you to rotate the camera smoothly in a controlled manner.
- Remote shutter release: A remote shutter release eliminates the risk of camera shake that can occur when manually pressing the shutter button. It helps to ensure sharp and blur-free images.
- Software: In addition to hardware, software plays a vital role in creating a stunning 360 picture. Look for software that allows for seamless stitching of images and provides options for post-processing.
It is important to do thorough research and read reviews before investing in any equipment. Take into consideration your budget, requirements, and the specific needs of your project. Finding the right combination of equipment will help you achieve the desired results and create a stunning 360 picture of your object.
Select a Camera with 360 Capability
When it comes to creating a stunning 360 picture of an object, the first and most important step is to select a camera with 360 capability. Not all cameras have the ability to capture a full 360-degree image, so it’s crucial to choose the right equipment for the job.
There are several options available when it comes to cameras with 360 capability. Here are a few popular choices:
- 360 Cameras: These cameras are specifically designed to capture 360-degree images. They usually have multiple lenses or a fish-eye lens that enables them to capture a full spherical image. Some popular 360 cameras include the Insta360 One X, GoPro Fusion, and Ricoh Theta Z1.
- Action Cameras: While not specifically designed for 360 photography, some action cameras like GoPro Hero 8 and DJI Osmo Action have the ability to capture a wide-angle view that can be stitched together to create a 360-degree image.
- DSLR/Mirrorless Cameras: With the right accessories, DSLR and mirrorless cameras can also be used to capture 360-degree images. These cameras offer the advantage of interchangeable lenses and higher image quality, but they require additional equipment like fisheye lenses or panoramic heads.
When selecting a camera, consider factors such as image quality, ease of use, price, and compatibility with editing software. It’s also essential to check specific camera features such as resolution, image stabilization, and battery life to ensure they meet your requirements.
Once you have chosen a camera with 360 capability, you are ready to move on to the next step in creating a stunning 360 picture of an object.
Use a Tripod or Mount
Using a tripod or mount is essential for creating a stunning 360 picture of an object. It helps to keep your camera steady and ensures that each image is captured from the same position, resulting in a smooth and seamless final product.
Here are a few tips to follow when using a tripod or mount:
- Choose a sturdy tripod or mount: Make sure to select a tripod or mount that is stable and can support the weight of your camera. This will prevent any unwanted movement or vibrations during the image capturing process.
- Set up the tripod or mount at the right height: Adjust the height of the tripod or mount so that your camera is positioned at the center of the object. This will ensure that all angles of the object are captured in the 360 picture.
- Use a remote shutter release or self-timer: To minimize any camera shake, it is best to avoid physically pressing the shutter button on your camera. Instead, use a remote shutter release or set a self-timer to capture the image. This will result in sharper and clearer photos.
- Lock the tripod or mount in place: Once you have positioned the tripod or mount and set up your camera, make sure to lock it in place. This will prevent any accidental movement or rotation of the camera during the image capturing process.
- Level your camera: Use a bubble level or the built-in leveling function on your tripod or mount to ensure that your camera is perfectly level. This will help maintain a consistent perspective as you capture each image.
By using a tripod or mount and following these tips, you can greatly enhance the quality and consistency of your 360 picture. It will result in a professional-looking final product that showcases the object from all angles.
Step 3: Set Up the Scene
Once you have your equipment and software ready, it’s time to set up the scene for capturing the 360 picture of your object. Here are the steps to follow:
- Choose a suitable location: Find a well-lit area with enough space to accommodate both your object and the camera setup. It’s best to use a controlled environment where you can easily control the lighting conditions.
- Prepare the object: Clean the object thoroughly to remove any dust or smudges that may appear in the final picture. Position the object in the center of the shooting area, ensuring it is stable and won’t move during the capturing process.
- Set up the camera: Mount your camera on a tripod or a stable surface to ensure steady shots. Adjust the camera height and angle to capture the object from a desirable viewpoint. Ensure that the camera is level to avoid distortion in the final picture.
- Configure the camera settings: Adjust the camera settings such as exposure, white balance, and focus to achieve the desired image quality. Experiment with different settings and test shots to find the optimal configuration.
- Set up the lighting: Position lighting sources to provide even illumination on the object. Use diffusers or reflectors if needed to soften or redirect the light. Avoid any harsh shadows or reflections that may affect the final picture.
- Arrange the background: Place a plain and non-distracting background behind the object. Use a solid-colored backdrop or a backdrop with a pattern that complements the object without stealing the focus.
- Remove any unwanted elements: Clear the scene of any unnecessary items or clutter that may distract from the object. This creates a cleaner and more professional-looking final picture.
By following these steps, you can set up a well-organized scene that allows you to capture a stunning 360 picture of your object. This will ensure that the final result showcases the object in its best light and provides an immersive experience for viewers.
Choose the Right Background
When creating a stunning 360 picture of an object, it is important to choose the right background. The background can greatly enhance the overall aesthetic appeal of the picture and can also help to highlight the details of the object.
Here are some tips to help you choose the right background for your 360 picture:
- Consider the Object: Think about the size, shape, and color of the object you want to capture in the picture. Choose a background that complements the object and helps to bring out its best features.
- Contrast: Look for a background color or pattern that creates contrast with the object. This will help to make the object stand out and draw the viewer’s attention.
- Avoid Clutter: Make sure the background is clean and free from distractions. Too much clutter or busy patterns can take away from the focus on the object.
- Lighting: Consider the lighting conditions in the area where you are taking the picture. Ensure that the background is well-lit, as this can significantly improve the overall quality of the picture.
- Experiment: Don’t be afraid to try different backgrounds and see what works best for your object. You can use different colors, textures, or even props to enhance the visual appeal of the picture.
Remember, the background plays a crucial role in creating a stunning 360 picture. It can make the object shine and capture the viewer’s attention. So take the time to choose the right background and experiment with different options to achieve the desired result.
FAQ:
What is a 360 picture?
A 360 picture is a photograph that captures a 360-degree view of a subject or environment.
Why would I want to create a 360 picture of an object?
Creating a 360 picture of an object allows you to showcase the object from all angles, giving viewers a more immersive and interactive experience.
What equipment do I need to create a 360 picture?
To create a 360 picture, you will need a camera capable of capturing 360-degree photos, a tripod to stabilize the camera, and image editing software to process and stitch the images together.
Can I create a 360 picture using a smartphone?
Yes, there are smartphone apps available that allow you to capture 360-degree photos. However, the quality may not be as high as using a dedicated 360-degree camera.
What is the process for creating a 360 picture?
The process for creating a 360 picture involves setting up your camera and tripod, taking multiple photos of the subject from different angles, and then stitching the photos together using image editing software.
What are some tips for creating a stunning 360 picture?
Some tips for creating a stunning 360 picture include using a tripod to ensure steady shots, shooting in good lighting conditions, experimenting with different angles and perspectives, and editing the final image to enhance colors and clarity.