
When it comes to digital art and graphic design, Photoshop is an incredibly powerful tool. However, one issue that many artists face is having brush strokes that are either too small or too large for their canvas. Luckily, there is a simple solution to this problem – resizing brush strokes in Photoshop.
Resizing brush strokes can be particularly useful when working on large scale projects or when trying to create detailed artwork. By adjusting the size of your brush strokes, you can achieve more precision and control over your design.
To resize brush strokes in Photoshop, follow these step-by-step instructions:
- Select the brush tool from the toolbar.
- Click on the brush icon in the options bar to access the brush settings.
- Adjust the size slider to increase or decrease the size of the brush stroke.
- You can also enter a specific size value in the text field, or use the bracket keys on your keyboard to adjust the size.
- Experiment with different brush sizes until you find the perfect fit for your project.
Remember, resizing brush strokes in Photoshop is a simple but powerful technique that can greatly enhance your digital artwork. By mastering this skill, you can take your designs to the next level and create stunning visuals that are perfectly tailored to your canvas.
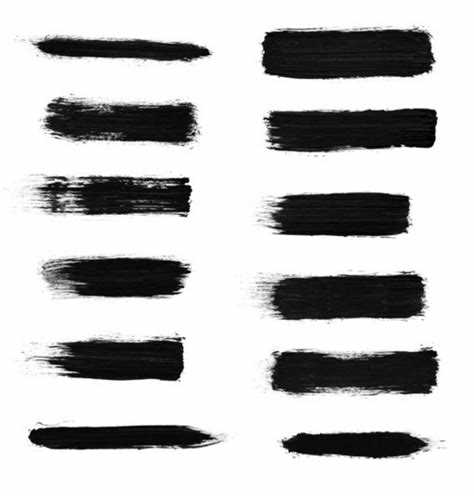
Resize Brush Strokes in Photoshop
Resizing brush strokes in Photoshop can be a useful technique to adjust the size of your brush strokes to fit your desired composition. Whether you want to make your brush strokes larger or smaller, Photoshop offers several methods to resize them effectively.
Here is a step-by-step guide to help you resize brush strokes in Photoshop:
- Select the Brush Tool: Open Photoshop and select the Brush Tool from the toolbar on the left side of the screen. Alternatively, you can press the B key on your keyboard to activate the Brush Tool.
- Adjust the Brush Size: Once you have the Brush Tool selected, you can adjust the size of the brush by clicking on the Brush Size option located in the options bar at the top of the screen. Alternatively, you can use the bracket keys ([ and ]) on your keyboard to increase or decrease the size.
- Use the Brush Preset Picker: Another way to resize your brush strokes is by using the Brush Preset Picker. Click on the Brush Preset Picker located on the options bar, and a drop-down menu will appear. Here, you can select a different brush preset with a different size.
- Change the Brush Hardness: If you want to resize your brush strokes while maintaining the same brush size, you can adjust the hardness of the brush. By decreasing the hardness, the brush strokes will become softer and more diffuse. Conversely, increasing the hardness will make the brush strokes sharper and more defined.
- Adjust the Opacity: The opacity of your brush strokes can also affect the size perception. By reducing the opacity, the brush strokes will appear lighter and more transparent, giving the illusion of a smaller size. Conversely, increasing the opacity will make the brush strokes more vibrant and solid, making them look larger.
- Experiment and Practice: The best way to master resizing brush strokes in Photoshop is through experimentation and practice. Try out different brush sizes, hardness levels, and opacity settings to achieve the desired effect. Don’t be afraid to explore and push the boundaries of your creativity!
By following these steps, you can easily resize brush strokes in Photoshop and have more control over the size and appearance of your artwork. Remember to save your work regularly and have fun while exploring the endless possibilities that Photoshop has to offer!
Why Resize Brush Strokes?
Resizing brush strokes in Photoshop can be a useful technique for various reasons. Whether you are creating digital artwork, retouching photos, or designing graphics, having the ability to resize brush strokes gives you more control over the final result. Here are some reasons why resizing brush strokes can be beneficial:
- Customization: Resizing brush strokes allows you to customize the size of your strokes to fit your specific needs. This can be helpful when working on different types of projects or when you want to experiment with different brush sizes for artistic purposes.
- Detailing: By resizing brush strokes, you can add finer details to your artwork or images. This is particularly useful when working on intricate designs or when you need to enhance specific areas of a photo.
- Control: Resizing brush strokes gives you greater control over the intensity and impact of your strokes. You can achieve different effects by adjusting the brush size, whether you want to create bold, expressive strokes or subtle, delicate ones.
- Consistency: When working on a project that requires consistent brush strokes, resizing can help ensure uniformity. Whether you are using the same brush size across multiple elements or need to align strokes with existing artwork, resizing ensures a consistent appearance.
- Efficiency: Resizing brush strokes can also improve your workflow. By quickly adjusting the brush size, you can save time and avoid the need to switch between different brushes or tools for different sizes. This efficiency can be especially valuable when working on time-sensitive projects.
Overall, the ability to resize brush strokes in Photoshop gives you more flexibility and control over your creative process. It allows you to tailor your strokes to meet specific requirements, add intricate details, maintain consistency, and work more efficiently. Being able to resize brush strokes is a valuable skill that can enhance the quality and impact of your digital artwork and design projects.
Step 1: Open Photoshop
To begin resizing brush strokes in Photoshop, you’ll first need to open the software on your computer. If you don’t already have Photoshop installed, you can download a free trial or purchase a subscription from Adobe’s website.
Once Photoshop is open, you’ll be greeted with the home screen. Here, you have the option to create a new document, open a recent file, or choose from a variety of templates and presets. For resizing brush strokes, you’ll want to either open an existing document or create a new one.
To open an existing document, go to the “File” menu at the top of the screen and select “Open”. Then, navigate to the location on your computer where the file is saved, select it, and click “Open”.
To create a new document, go to the “File” menu and select “New”. This will open the New Document dialog box, where you can specify the dimensions, resolution, and other settings for your new document. Once you have entered the desired values, click “Create” to create the new document.
After you have opened or created a document in Photoshop, you can proceed to the next step of resizing your brush strokes.
Step 2: Select the Brush Tool
After opening Photoshop and creating a new document or opening an existing image, you will need to select the Brush Tool from the toolbar to begin resizing your brush strokes.
To select the Brush Tool, you can either click on its icon in the toolbar or use the keyboard shortcut by pressing the letter “B”. Once selected, the Brush Tool options will appear in the top toolbar.
If you can’t find the Brush Tool in the toolbar, click on the small arrow on the right side of the icon to reveal a hidden fly-out menu with additional tool options. You can then select the Brush Tool from the menu.
Once the Brush Tool is selected, you can customize its settings in the top toolbar to achieve the desired brush stroke size. These settings include the brush size, hardness, and opacity.
The brush size determines how large or small the brush stroke will be. You can adjust the size by either entering a specific value in the brush size dropdown menu or using the bracket keys on your keyboard to increase or decrease the size.
The hardness setting affects the edge sharpness of the brush stroke. A hardness of 100% will create a solid and sharp edge, while a lower hardness value will create a softer and more blurred edge.
The opacity setting determines the transparency of the brush stroke. A higher opacity value will make the stroke more visible and opaque, while a lower value will make it more transparent.
By experimenting with these settings, you can easily resize your brush strokes to achieve the desired effect in your Photoshop project.
Step 3: Adjust Brush Size
In order to resize your brush strokes in Photoshop, you need to adjust the size of your brush. Here are the steps to do that:
- Select the Brush Tool by clicking on the brush icon in the toolbar on the left side of the screen.
- Click on the brush size indicator in the options bar at the top of the screen. It will display the current size of your brush.
- A dropdown menu will appear with a slider and a text input field. You can use either of these options to adjust the brush size.
- If you prefer using the slider, click and hold on the indicator and drag it to the left or right to decrease or increase the brush size, respectively.
- If you prefer using the text input field, click on the arrow next to the brush size indicator to open the dropdown menu. Then, type the desired size directly into the text field and press Enter.
It’s important to note that the brush size is measured in pixels. Larger values will result in bigger brush strokes, while smaller values will result in smaller brush strokes.
You can also access additional brush settings by clicking on the gear icon located next to the brush size indicator. This will open a menu where you can adjust other parameters such as hardness, opacity, and flow.
Once you have adjusted the brush size to your liking, you’re ready to start resizing your brush strokes in Photoshop.
Step 4: Use the Bracket Keys
Another way to change the size of your brush strokes in Photoshop is by using the bracket keys on your keyboard. These keys, located next to the letter P on most keyboards, allow you to quickly increase or decrease the brush size.
To make your brush strokes larger, press the right bracket key ( ] ). Each time you press it, the brush size will increase by a set increment. Similarly, to make your brush strokes smaller, press the left bracket key ( [ ). By pressing it, the brush size will decrease.
Using the bracket keys is a convenient way to adjust your brush size on the fly. It lets you quickly switch between different brush sizes while working on your project, without having to go back to the brush settings menu.
Keep in mind that the increment by which the brush size changes with each press of the bracket keys may vary depending on your brush settings and preferences. Experiment with different sizes and find the one that works best for you.
Using the bracket keys in combination with the other methods mentioned earlier in this guide will give you even more control over the size of your brush strokes in Photoshop. Feel free to mix and match these techniques to achieve the desired effect in your projects.
Step 5: Use the Brush Preset Picker
After selecting the Brush Tool and adjusting the size using the brush size slider or keyboard shortcuts, you can further customize your brush strokes by using the Brush Preset Picker.
The Brush Preset Picker is located in the Options Bar at the top of the Photoshop window. It allows you to choose from a variety of predefined brush presets or create your own custom brush presets.
To access the Brush Preset Picker, simply click on the brush icon in the Options Bar. This will open a drop-down menu displaying all the available brush presets.
You can scroll through the presets using the up and down arrows or by clicking and dragging the scroll bar. Each preset is represented by a small thumbnail image, making it easy to visually select the desired brush style.
If you don’t see a preset that meets your needs, you can create your own custom brush preset by clicking on the small gear icon at the top right corner of the Brush Preset Picker. This will open the Brush Preset Manager, where you can create, organize, and delete brush presets.
Once you have selected a brush preset, you can further modify its settings using the Brush Settings panel. To open the Brush Settings panel, click on the small arrow next to the brush icon in the Options Bar. Here, you can adjust various parameters such as brush opacity, flow, spacing, and shape dynamics.
Experiment with different brush presets and settings to achieve the desired effect for your brush strokes. Remember to save your custom presets if you want to reuse them in the future.
Step 6: Save Custom Brush Sizes
Once you have adjusted the brush size to your liking, you can save it as a custom brush size for future use. Here’s how to do it:
- Click on the “Window” menu at the top of the screen.
- Select “Brush Settings” from the drop-down menu to open the brush settings panel.
- In the brush settings panel, make sure the brush you adjusted is selected.
- Click on the small cog icon in the top right corner of the panel to open the brush presets menu.
- Select “New Brush Preset” from the menu.
- A dialogue box will appear where you can name your new brush preset. Enter a descriptive name for your custom brush size.
- Click “OK” to save the brush preset.
Now, whenever you want to use your custom brush size, simply select it from the brush presets panel.
Having customized brush sizes readily available can save you time and make your workflow more efficient, allowing you to achieve the desired brush stroke size with ease.
Step 7: Use the Resize Brush Tool
After you have made the necessary adjustments to your brush strokes using the previous techniques, you can further refine the size and shape of your brush strokes using the Resize Brush tool. This tool allows you to easily resize your brush strokes without having to redo them from scratch.
Here’s how you can use the Resize Brush tool:
- Select the Resize Brush tool from the toolbar.
- Click and drag on your canvas to select the brush stroke(s) that you want to resize. You can also use the marquee tool to make a selection.
- Once you have made your selection, you will see transform handles around the brush stroke(s).
- Click and drag any of the transform handles to resize the selected brush stroke(s). You can resize them proportionally by holding down the Shift key while dragging.
- Release the mouse button to apply the resize transformation.
- If you’re not satisfied with the result, you can undo the resize by pressing Ctrl+Z (Windows) or Command+Z (Mac).
The Resize Brush tool is a great way to quickly adjust the size and shape of your brush strokes. It saves you time and effort by allowing you to make changes without having to start over. Experiment with different sizes and shapes to achieve the desired effect for your digital artwork.
Step 8: Explore Other Photoshop Tools
While the brush tool is a powerful tool for resizing strokes, Photoshop offers a wide range of other tools that can also be used to manipulate, refine, and enhance your artwork. Here are a few tools you might find helpful:
- Eraser Tool: Use this tool to remove parts of your stroke or artwork. You can choose from various eraser brush presets and customize the size and opacity of the eraser.
- Clone Stamp Tool: This tool allows you to clone areas of your artwork and apply them to other areas. It can be useful for fixing mistakes or duplicating certain elements of your design.
- Blur Tool: Use this tool to blur parts of your artwork. It can be used to create a soft focus effect or to blend colors seamlessly.
- Burn Tool: This tool helps darken areas of your artwork. It can be used to add depth or shadows to your design.
- Dodge Tool: Use this tool to lighten areas of your artwork. It can be used to add highlights or lighten specific parts of your design.
- Pen Tool: The pen tool is a versatile tool that allows you to create precise shapes and paths. It can be used to create vector objects or make selections.
These are just a few examples of the many tools available in Photoshop. Experiment with different tools and techniques to find what works best for your specific project. Remember, practice makes perfect!
FAQ:
How can I resize brush strokes in Photoshop?
To resize brush strokes in Photoshop, you can use the Transform tool. Select the layer with the brush strokes, then go to Edit > Transform > Scale. Drag the corners of the bounding box to resize the brush strokes as desired.
Can I resize brush strokes proportionally?
Yes, you can resize brush strokes proportionally in Photoshop. While using the Transform tool, hold down the Shift key while dragging the corners of the bounding box. This will maintain the aspect ratio of the brush strokes as you resize them.
Is there any other way to resize brush strokes in Photoshop?
Yes, besides using the Transform tool, you can also resize brush strokes in Photoshop by going to Edit > Brush Settings. In the Brush Settings panel, you can adjust the Size slider to resize the brush strokes. This method allows for more precise control over the size of the brush strokes.
Can I resize brush strokes individually?
Yes, you can resize brush strokes individually in Photoshop. Select the layer with the brush strokes and use the Transform tool to resize them. You can also use the Brush Settings panel to adjust the size of specific brushes and apply them to specific areas of your artwork.
Will resizing brush strokes affect the quality of my artwork?
Resizing brush strokes in Photoshop should not significantly affect the quality of your artwork, especially if you are working with high-resolution images. However, if you resize the brush strokes too much, they may appear pixelated or lose some detail. It’s always a good idea to work on a separate layer or make a backup of your artwork before resizing to have the option to revert back if needed.
Is it possible to resize brush strokes without distorting the image?
Yes, it is possible to resize brush strokes without distorting the image in Photoshop. To do this, you can use the Preserve Details 2.0 option while using the Transform tool. This option helps to maintain the sharpness and quality of the image while resizing the brush strokes.