
Are you looking to improve your productivity and streamline your workflow? One way to do this is by connecting a trackpad to your MacBook Pro. A trackpad can provide a more seamless and intuitive way of navigating your computer, allowing for precise cursor control and multi-touch gestures.
In this step-by-step guide, we will walk you through the process of connecting a trackpad to your MacBook Pro. Whether you are a seasoned Mac user or new to the world of Apple, we will cover everything you need to know to get started.
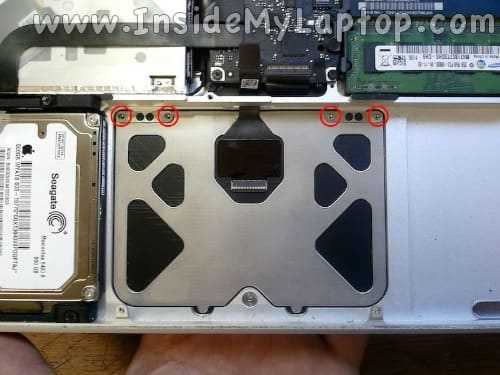
First, you will need to ensure that your MacBook Pro is compatible with a trackpad. Most MacBook Pro models released after 2009 are compatible, but it’s always best to check the specifications of your specific model to be sure. You can find this information on the Apple website or by consulting the user manual that came with your MacBook Pro.
Once you have verified compatibility, you will need to acquire a compatible trackpad. Apple offers their own trackpad, called the Magic Trackpad, which is designed specifically for Mac computers. Additionally, there are third-party options available that may offer different features or price points.
Now that you have your trackpad, it’s time to connect it to your MacBook Pro. Start by turning on your MacBook Pro and opening the System Preferences. Within the System Preferences, locate and open the “Bluetooth” settings. Make sure that Bluetooth is turned on and your trackpad is powered on and in pairing mode.
Back in the Bluetooth settings, your MacBook Pro should detect the trackpad. Once it appears in the list of available devices, click on it to begin the pairing process. Your MacBook Pro may prompt you to confirm the connection or enter a passcode. Follow the on-screen instructions to complete the pairing process.
Once the trackpad is connected, you may need to customize the settings to suit your preferences. This can be done within the “Trackpad” section of the System Preferences. Here, you can adjust the tracking speed, enable or disable gestures, and configure any additional features specific to your trackpad.
With your trackpad successfully connected and customized, you are now ready to start enjoying the benefits of improved productivity and navigation on your MacBook Pro. Whether you are editing photos, designing graphics, or simply browsing the web, a trackpad can enhance your overall Mac experience.
In conclusion, connecting a trackpad to your MacBook Pro is a straightforward process that can greatly enhance your workflow and user experience. By following this step-by-step guide, you can easily connect and customize your trackpad, allowing for precise cursor control and multi-touch gestures. So why wait? Start enjoying the benefits of a trackpad on your MacBook Pro today!
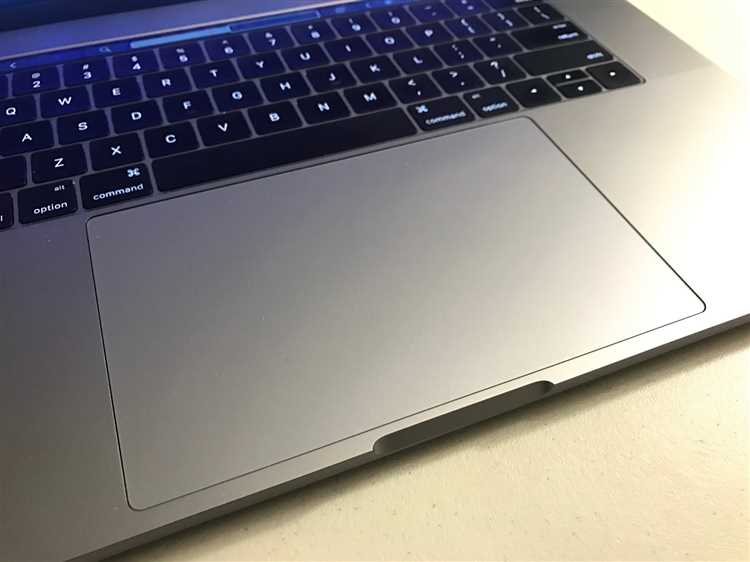
Prepare your MacBook Pro and Trackpad
Before connecting your trackpad to your MacBook Pro, make sure you have the following things ready:
- A MacBook Pro with an available USB port or a USB-C port (depending on the model)
- A compatible trackpad (such as the Magic Trackpad or a third-party trackpad)
- A USB cable or a USB-C cable (depending on the model of your MacBook Pro and trackpad)
- A working power source (if your trackpad requires external power)
Once you have gathered all the necessary items, follow these steps:
- Make sure your MacBook Pro is powered on.
- Connect one end of the USB cable (or USB-C cable) to the USB port (or USB-C port) on your MacBook Pro.
- Connect the other end of the USB cable (or USB-C cable) to the USB port (or USB-C port) on your trackpad.
- If your trackpad requires external power, connect it to a working power source.
- Wait for your MacBook Pro to recognize the trackpad. You may see a notification or a pop-up confirming the connection.
- If necessary, follow any on-screen prompts to complete the setup process.
- Once the trackpad is connected and recognized by your MacBook Pro, you can start using it.
It is important to note that some trackpad models may require additional software or drivers to be installed on your MacBook Pro. Check the manufacturer’s website or user manual for any specific instructions or requirements.
Check compatibility and requirements
Before connecting a trackpad to your MacBook Pro, it is important to check the compatibility and requirements. Here are some key points to consider:
- Operating system: Ensure that your MacBook Pro is running a compatible operating system. Check the system requirements provided by the trackpad manufacturer to ensure compatibility.
- Connectivity: Determine which connectivity options are supported by your MacBook Pro and the trackpad. Common options include USB, Bluetooth, and Lightning. Make sure both devices have the necessary ports or wireless capabilities.
- Driver software: Some trackpads require the installation of specific driver software to function properly. Check if your trackpad model requires any additional software and ensure that it is compatible with your MacBook Pro’s operating system.
- System resources: Confirm that your MacBook Pro has sufficient system resources to support the trackpad. This includes available memory, processing power, and storage space. Refer to the trackpad’s system requirements for specific details.
By checking the compatibility and requirements beforehand, you can ensure a smooth and successful connection between your trackpad and MacBook Pro.
Update your MacBook Pro
In order to ensure compatibility and performance with a new trackpad, it is recommended to update your MacBook Pro to the latest software version. Follow these steps to update your MacBook Pro:
- Connect to the internet: Make sure your MacBook Pro is connected to a stable Wi-Fi network or an ethernet connection.
- Check for updates: Click on the Apple menu in the top-left corner of your screen and select “System Preferences”.
- Software Update: In the System Preferences window, click on “Software Update”. This will open the Software Update menu.
- Check for updates: Click on the “Check for updates” button. Your MacBook Pro will now check for any available software updates.
- Download and install updates: If any software updates are available, click on the “Download” or “Update” button next to each update. Follow the on-screen instructions to download and install the updates.
- Restart your MacBook Pro: Once the updates are installed, your MacBook Pro may prompt you to restart the system. Make sure to save any unsaved work before restarting.
By updating your MacBook Pro, you ensure that it has the latest software, including any necessary drivers or firmware updates that may be needed for the successful connection and performance of a new trackpad.
Turn on Bluetooth on your MacBook Pro
To connect a trackpad to your MacBook Pro, you need to turn on Bluetooth. Bluetooth is a wireless technology that allows devices to communicate and connect with each other.
- Click on the Apple menu icon in the top-left corner of your screen.
- Select “System Preferences” from the dropdown menu.
- In the System Preferences window, click on the “Bluetooth” icon.
- If Bluetooth is currently turned off, click on the “Turn Bluetooth On” button to enable it. If Bluetooth is already on, you can skip this step.
Your MacBook Pro will now search for available Bluetooth devices nearby. Make sure your trackpad is turned on and in pairing mode so that it can be detected by your MacBook Pro.
Note: If you are using a wired mouse connected to your MacBook Pro, you may need to disconnect it before your MacBook Pro can detect and connect to the trackpad via Bluetooth.
Put your Trackpad in pairing mode
Before you can connect your Trackpad to your MacBook Pro, you need to put it in pairing mode. Here’s how you can do it:
- Make sure your Trackpad is turned on and has enough battery power.
- Press and hold the power button on the Trackpad for a few seconds until the status light starts blinking.
- Once the status light is blinking, your Trackpad is now in pairing mode.
Note: The specific steps to put your Trackpad in pairing mode may vary depending on the model you have. Refer to the user manual or documentation provided by the manufacturer for detailed instructions.
Now that your Trackpad is in pairing mode, you can proceed to connect it to your MacBook Pro using Bluetooth. Follow the next steps in this guide for instructions on how to do it.
Connect your MacBook Pro and Trackpad
Connecting a trackpad to your MacBook Pro is a simple process that can improve your productivity and user experience. Follow the steps below to connect your MacBook Pro and trackpad:
- Check compatibility: Ensure that your MacBook Pro supports trackpad connectivity. Most MacBook Pro models have built-in trackpads, so you may not need an external trackpad.
- Charge the trackpad: If you are using an external trackpad, make sure it is fully charged or connected to a power source.
- Enable Bluetooth: On your MacBook Pro, go to “System Preferences” from the Apple menu, then click on “Bluetooth”. Ensure that Bluetooth is turned on.
- Put the trackpad in pairing mode: If you are using an external trackpad, refer to the manufacturer’s instructions on how to put it in pairing mode.
- Pair the trackpad: On your MacBook Pro, click on the Bluetooth icon in the menu bar and select “Open Bluetooth Preferences” from the drop-down menu. Click on the “+” button to start the pairing process.
- Connect the trackpad: Choose the trackpad device from the list of available devices and click on “Pair”. Follow any on-screen instructions to complete the pairing process.
- Test the connection: Once the trackpad is connected, test its functionality by moving the cursor and performing gestures. Adjust the trackpad settings in the “Trackpad” section of “System Preferences” to customize your experience.
That’s it! You have successfully connected your MacBook Pro and trackpad. Enjoy the enhanced control and navigation options that the trackpad offers.
Test the connection
Once you have connected your trackpad, it’s important to test if it is working properly before you start using it with your MacBook Pro. Follow these steps to test the connection:
- Make sure the trackpad is turned on. Usually, there is a power button or switch on the trackpad itself. If it’s a wireless trackpad, ensure that the batteries are properly inserted and charged.
- On your MacBook Pro, go to the Apple menu and click on “System Preferences”.
- In the System Preferences window, click on “Trackpad”.
- You will see a Trackpad settings window. Here, you can adjust the various settings for your trackpad, such as scrolling speed and gesture controls.
- To test the connection, try using the trackpad to move the cursor around on the screen. If the cursor moves smoothly and accurately, the connection is working correctly.
- Additionally, you can try using the trackpad to perform various gestures, such as scrolling, pinching, and swiping. If all the gestures work as expected, then your trackpad is functioning properly.
If you are experiencing any issues with the trackpad, make sure the trackpad is properly connected and powered on. Try restarting your MacBook Pro and testing the trackpad again. If the problem persists, you may need to troubleshoot or contact customer support for further assistance.
Adjust trackpad settings
Once you’ve successfully connected a trackpad to your MacBook Pro, you may want to adjust the trackpad settings to customize the behavior and functionality to suit your preferences. Here’s how you can do it:
- Click on the Apple menu in the top left corner of the screen.
- Select “System Preferences” from the drop-down menu.
- In the System Preferences window, click on the “Trackpad” icon.
- On the Trackpad settings page, you’ll find various options to customize the trackpad’s behavior.
- Under the “Point & Click” tab, you can adjust settings such as the tracking speed, click pressure, and whether to enable tap to click.
- In the “Scroll & Zoom” tab, you can customize the scroll direction, zooming behavior, and whether to enable smart zoom.
- The “More Gestures” tab allows you to configure additional trackpad gestures, such as swipe between full-screen apps or switch between pages.
- Take your time to go through each tab and adjust the settings according to your preferences.
Remember to click the “Apply” button to save any changes you make to the trackpad settings. You can always come back to the Trackpad settings page to make further adjustments as needed. Enjoy the enhanced trackpad experience on your MacBook Pro!
FAQ:
How do I connect a trackpad to my MacBook Pro?
In order to connect a trackpad to your MacBook Pro, you need to go to the Apple menu, select “System Preferences,” then choose “Bluetooth.” From there, make sure Bluetooth is turned on and click on the “+” button to add a new device. Follow the on-screen instructions to pair and connect your trackpad to your MacBook Pro.
Can I connect any trackpad to my MacBook Pro?
No, not all trackpads are compatible with MacBook Pro. You need to make sure that the trackpad you want to connect supports Bluetooth connectivity and is designed for use with Mac computers. Check the manufacturer’s specifications or look for the “Designed for Mac” label to ensure compatibility.
Can I use a trackpad and a mouse at the same time on my MacBook Pro?
Yes, you can use both a trackpad and a mouse simultaneously on your MacBook Pro. Mac computers have built-in support for multiple input devices, so you can connect and use both a trackpad and a mouse without any issues. This allows for more flexibility in how you interact with your MacBook Pro.
Are there any settings I can adjust for my connected trackpad?
Yes, you can adjust various settings for your connected trackpad. To do this, go to the Apple menu, select “System Preferences,” then choose “Trackpad” or “Mouse.” Here, you can customize settings such as tracking speed, scrolling direction, clicking options, and gestures. Explore the available options to find the settings that best suit your preferences and needs.
Can I connect multiple trackpads to my MacBook Pro?
No, you can only connect one trackpad to your MacBook Pro at a time. Mac computers do not support multiple trackpad connections simultaneously. However, you can connect multiple Bluetooth mice or other input devices if needed.
Do I need to install any additional software for my trackpad to work with my MacBook Pro?
No, most trackpads designed for Mac computers should work plug-and-play without the need for any additional software installation. However, some advanced trackpads may have accompanying software that allows for additional features and customization. Check the manufacturer’s instructions or website to see if any software is recommended for optimal performance.