
With the increasing popularity of Apple devices, the HEIC image format has become more common. However, since not all devices and platforms support this format, you may find yourself needing to convert these HEIC files to JPEG. Luckily, if you own an iPad, there are simple steps you can take to easily convert your HEIC files to JPEG.
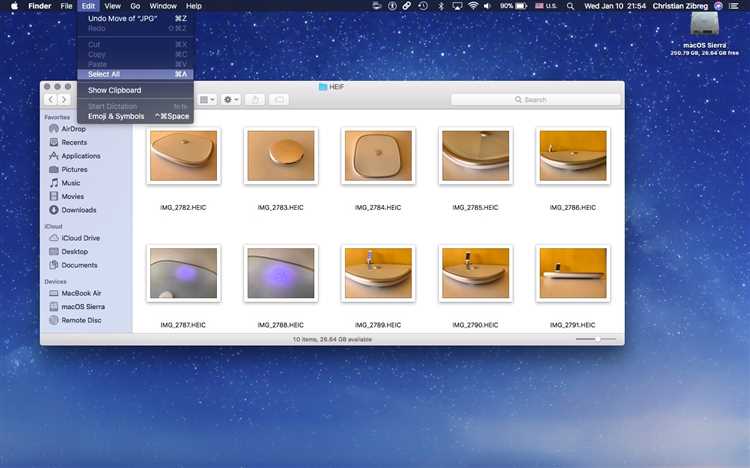
The first step is to open the Photos app on your iPad. This app allows you to view, edit, and organize your photos. Once you have the app open, navigate to the HEIC file that you want to convert to JPEG.
Once you have selected the HEIC file, tap on the “Share” button. This button is typically represented by a box with an arrow pointing upwards. When you tap on this button, a menu of options will appear.
From the menu of options, select the “Save as JPEG” option. This will convert your HEIC file to JPEG format. The newly converted file will be saved as a separate file, so you will still have the original HEIC file if you need it.
Converting HEIC files to JPEG on your iPad is a simple process that can be done in just a few steps. By following these steps, you can ensure that your files are compatible with a wider range of devices and platforms.
How to Convert HEIC Files to JPEG on iPad
HEIC (High Efficiency Image Format) is a file format commonly used by Apple devices to capture and store images. While it offers high-quality images with smaller file sizes, it may not be compatible with all devices and platforms. If you want to convert your HEIC files to JPEG format on your iPad, follow these simple steps:
- Open the App Store on your iPad and search for a HEIC to JPEG converter app, such as “HEIC to JPEG Converter”.
- Download and install the app on your iPad.
- Launch the app and allow it to access your photos.
- On the app’s main screen, you will see a list of your HEIC files.
- Select the HEIC files that you want to convert to JPEG. You can select multiple files at once by tapping on them.
- Once you have selected the files, tap on the “Convert” button.
- The app will convert the selected HEIC files to JPEG format. This process may take some time, depending on the number and size of the files.
- After the conversion is complete, you will see a notification indicating that the files have been successfully converted.
- Tap on the “Save” button to save the converted JPEG files to your iPad’s Photos app.
Now, you have successfully converted your HEIC files to JPEG format on your iPad. You can now easily share or use these files on other devices and platforms without any compatibility issues.
It is worth noting that after converting HEIC files to JPEG, the file size may increase slightly due to the differences in compression algorithms. However, JPEG files are widely supported and can be easily accessed and viewed on most devices and platforms.
Step-by-Step Guide for Converting HEIC to JPEG
HEIC is a new image file format that offers better compression quality compared to JPEG. However, some devices and applications might not support HEIC files. If you need to convert HEIC files to JPEG on your iPad, follow these simple steps:
- Open the Photos app on your iPad.
- Select the HEIC photo that you want to convert to JPEG.
- Tap on the “Share” button located at the bottom left corner of the screen.
- In the share menu, scroll down and tap on the “Save Image” option.
- The selected HEIC photo will be saved as a JPEG file in your iPad’s Photos library.
- You can access the converted JPEG file by opening the Photos app and navigating to the “All Photos” or “Photos” tab.
Alternatively, you can also use third-party apps available on the App Store to convert HEIC files to JPEG on your iPad. These apps offer additional features and customization options for your converted files.
Converting HEIC files to JPEG allows you to easily share and use the images on devices and platforms that do not support the HEIC format. Whether it’s for compatibility reasons or personal preference, the process of converting HEIC to JPEG on your iPad is quick and straightforward.
Why Should You Convert HEIC Files to JPEG?
HEIC (High Efficiency Image Format) is a relatively new image format introduced by Apple with iOS 11. While it offers superior compression and image quality compared to JPEG, there are several reasons why you might want to convert your HEIC files to JPEG:
- Compatibility: HEIC files are not universally supported, especially on older devices and non-Apple platforms. By converting them to JPEG, you ensure that your images can be viewed and edited on a wider range of devices and software.
- Sharing and transferring: Many online platforms, email services, and messaging apps do not fully support HEIC files. Converting them to JPEG makes it easier to share and transfer your images without any compatibility issues.
- Editing and processing: While some image editors and software have added support for HEIC, many still primarily rely on JPEG. If you are used to using certain editing tools, converting your HEIC files to JPEG ensures that you can continue to work with them seamlessly.
- Efficient storage: Although HEIC offers better compression and smaller file sizes, JPEG is still the most widely used image format and is supported by various cloud storage services. Converting HEIC files to JPEG makes it easier to store and organize your images across different platforms and devices.
Overall, converting HEIC files to JPEG provides greater compatibility, ease of use, and flexibility when it comes to sharing, editing, and storing your images. While HEIC has its advantages, opting for JPEG ensures that your files are universally accessible and can be easily managed across different platforms and software.
Choosing the Right Method to Convert HEIC to JPEG
When it comes to converting HEIC files to JPEG on your iPad, there are several methods you can choose from. Each method has its own advantages and limitations, so it’s important to choose the one that best suits your needs.
1. Apple Photos App:
The easiest and most straightforward way to convert HEIC to JPEG is by using the built-in Apple Photos app. This app allows you to select multiple HEIC files and convert them to JPEG with just a few taps. However, keep in mind that this method requires you to have the latest version of iOS installed on your iPad.
2. Third-Party Apps:
If you prefer more advanced features and customization options, you can also opt for third-party apps specifically designed for converting HEIC to JPEG. These apps often offer additional editing tools and the ability to convert files in bulk. However, some of these apps may require a one-time purchase or a subscription fee.
3. Online Converter:
If you don’t want to install any additional apps on your iPad, you can use online file conversion services. These services allow you to upload HEIC files from your iPad and convert them to JPEG. However, keep in mind that uploading sensitive or private files to an online converter may pose a security risk, so make sure to choose a reputable and secure service.
4. Cloud Storage Services:
Another method to convert HEIC to JPEG is by using cloud storage services like iCloud or Google Drive. Simply upload your HEIC files to the cloud, and you can then download them as JPEG files on any device. This method is convenient if you frequently switch between devices and want to access your converted files from anywhere.
5. Command Line Tools:
If you are comfortable using command line tools, you can also convert HEIC to JPEG using a Mac or PC. There are various command line tools available that can convert HEIC files in bulk, allowing you to automate the conversion process. However, this method requires some technical knowledge and may not be suitable for beginners.
Conclusion:
Choosing the right method to convert HEIC to JPEG on your iPad depends on your preferences and requirements. Whether you prefer simplicity, additional features, or accessibility across devices, there is a method that will suit your needs. Consider the advantages and limitations of each method and choose the one that best fits your workflow.
Method 1: Using the Files App
If you want to convert HEIC files to JPEG on your iPad, you can do so using the built-in Files app. Follow these simple steps:
- Open the Files app on your iPad. You can find it on your home screen or in the App Library.
- Navigate to the folder that contains the HEIC files you want to convert.
- Select the HEIC file you want to convert by tapping on it. If you want to convert multiple files, you can tap and hold on one file, then tap on the other files to select them.
- Tap on the “Share” button, which looks like a square with an arrow pointing out of it. You can find it in the lower left corner of the screen.
- In the share sheet that appears, scroll to the right and tap on “Convert to JPEG.” Note that if you don’t see this option, it means that the selected HEIC file is already in JPEG format.
- A preview of the converted JPEG file will appear. You can tap on “Done” to save the converted file to the same location as the original HEIC file.
- If you want to save the converted file to a different location, tap on “Save to Files” and choose the desired location.
That’s it! You have successfully converted HEIC files to JPEG using the Files app on your iPad. Repeat these steps for any other HEIC files you want to convert.
Method 2: Using a Third-Party App
If the first method did not work for you or you prefer using a third-party app for the conversion, you can try using the “JPEG Convert” app. This app allows you to easily convert HEIC files to JPEG format on your iPad.
- Open the App Store on your iPad and search for “JPEG Convert”.
- Download and install the “JPEG Convert” app on your iPad.
- Launch the “JPEG Convert” app from your home screen.
- Tap on the “+” button to add the HEIC files that you want to convert.
- Select the HEIC files from your iPad’s gallery or file manager.
- Once you have selected the files, tap on the “Convert” button to start the conversion process.
- The app will convert the HEIC files to JPEG format and save them to your iPad’s photo library.
- You can now access the converted JPEG files from your photo library and use them as needed.
Note: The “JPEG Convert” app may require in-app purchases or have limitations on the number of files you can convert for free. Make sure to check the app’s details and ratings before downloading it.
Method 3: Using Cloud Storage Services
If you prefer not to install any third-party apps on your iPad, another convenient method to convert HEIC files to JPEG is by using cloud storage services like Dropbox or Google Drive.
Here’s how you can do it:
- First, ensure that you have the respective cloud storage app installed on your iPad. If not, download and install the app from the App Store.
- Launch the cloud storage app and sign in to your account or create a new one if you don’t have an account already.
- Upload the HEIC files that you want to convert to JPEG to your cloud storage account. You can do this by tapping on the “Upload” button or using the drag and drop feature.
- Once the files are uploaded, open a web browser on your iPad and navigate to the cloud storage website. Sign in to your account if prompted.
- Navigate to the folder where you uploaded the HEIC files.
- Select the HEIC files that you want to convert to JPEG by clicking on them or using the checkmark feature.
- Look for an option to download or export the selected files. In most cases, this option will be available in the toolbar or under a menu.
- Choose the export format as JPEG and click on the download/export button.
Once the conversion process is complete, you can find the newly converted JPEG files in your device’s downloads folder or the location you specified during the export process.
This method allows you to convert HEIC files to JPEG without installing any additional apps on your iPad. However, it may require an internet connection and may not be as fast as using dedicated converter apps.
Considerations before Converting HEIC to JPEG
- Compatibility: JPEG files are more universally supported than HEIC files. Before converting HEIC to JPEG, consider whether you need the files to be accessible on a wide range of devices and platforms.
- Image Quality: HEIC files often offer superior image quality with smaller file sizes compared to JPEG. When converting to JPEG, there may be some loss of image quality, especially if the HEIC file contains a high level of compression or complex details.
- File Sizes: While HEIC files tend to have smaller file sizes, converting them to JPEG may increase the file size. This can be a consideration if storage space is limited or you need to upload the images to a website or send them via email.
- Metadata: Converting HEIC to JPEG may result in the loss of some metadata, such as location information or editing details. Make sure to back up the original HEIC files if you require this information for future reference.
- Batch Conversion: If you have a large number of HEIC files, consider using a batch conversion tool or software to streamline the conversion process. This can save time and effort compared to converting each file individually.
- Backup: Always make sure to back up your files before converting them to JPEG. This ensures that you have a copy of the original HEIC files in case anything goes wrong during the conversion process.
By considering these factors before converting HEIC files to JPEG, you can make an informed decision that suits your specific needs and requirements.
Summary
Converting HEIC files to JPEG format on your iPad can be done easily by following a few simple steps. With the help of built-in features and third-party apps, you can convert the files and make them compatible with a wider range of devices and applications.
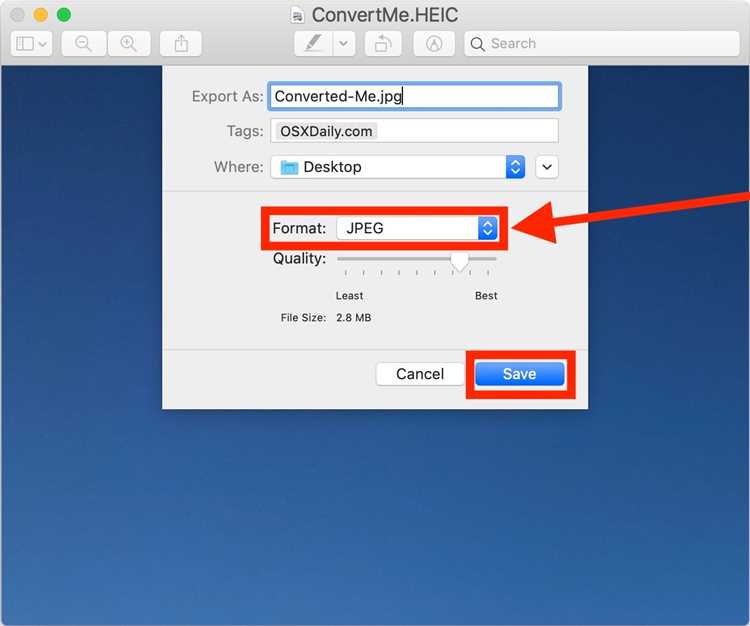
First, you can use the default Photos app on your iPad to convert HEIC files to JPEG. Simply open the Photos app, select the HEIC file you want to convert, tap on the share icon, and choose the “Save as JPEG” option. This will create a JPEG version of the HEIC file that you can use on various devices and platforms.
Another option is to use a third-party app like “HEIC Converter” from the App Store. After installing the app, you can open it, select the HEIC files you want to convert, and choose the “Convert” option. The app will convert the files to JPEG format and save them in your desired location.
It is important to note that converting HEIC files to JPEG may result in some loss of quality, as JPEG is a compressed format. However, for most purposes, the difference in quality is negligible, and the converted JPEG files will still be sufficient for viewing, sharing, and printing.
In conclusion, converting HEIC files to JPEG on your iPad is a simple process that can be done using the default Photos app or third-party apps. By converting the files, you can ensure their compatibility with a wider range of devices and applications.
FAQ:
Can I convert HEIC files to JPEG on my iPad?
Yes, there are a few simple steps you can follow to convert HEIC files to JPEG on your iPad.
What is the advantage of converting HEIC files to JPEG?
Converting HEIC files to JPEG allows for greater compatibility with devices and software that do not support the HEIC format.
How do I convert HEIC files to JPEG on my iPad?
You can convert HEIC files to JPEG on your iPad by using the built-in Files app and following some simple steps.
Is there a special app I need to download to convert HEIC files to JPEG on my iPad?
No, you can convert HEIC files to JPEG using the built-in Files app on your iPad, which means you don’t need to download any additional apps.
Can I convert multiple HEIC files to JPEG at once on my iPad?
Yes, you can convert multiple HEIC files to JPEG at once on your iPad by selecting multiple files in the Files app and then choosing the “Convert to JPEG” option.