
If you’re an artist or a graphic designer, you may have encountered situations where you need to rotate a canvas 90 degrees to achieve a different perspective or composition. Rotating a canvas can add an interesting dynamic to your artwork and open up new creative possibilities. In this step-by-step guide, we’ll walk you through the process of rotating a canvas 90 degrees.
Step 1: Prepare Your Workspace
The first step is to ensure that you have a clean and organized workspace. Remove any unnecessary items from your desk and make sure you have enough space to comfortably work on your canvas. Gather all the materials you’ll need, such as your canvas, paints, brushes, and any other tools you use for your artwork.
Step 2: Secure the Canvas
Before you begin rotating your canvas, it’s important to secure it properly. Place your canvas on a sturdy easel or table and make sure it’s well-supported. Use clips or masking tape to fix the edges of the canvas to the easel or table to ensure it doesn’t move or slide while you’re working on it.
Step 3: Choose Your Rotation Method
There are a few different methods you can use to rotate your canvas 90 degrees. The method you choose will depend on personal preference and the tools you have available. One popular method is to physically turn the canvas on the easel or table. Another option is to use a digital editing software like Photoshop to rotate the canvas on your computer screen.
Step 4: Rotate the Canvas
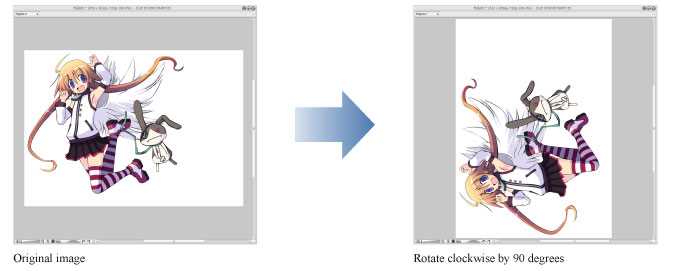
Once you’ve chosen your rotation method, it’s time to rotate the canvas. If you’re physically turning the canvas, carefully grab the sides or edges and slowly rotate it 90 degrees clockwise or counterclockwise. If you’re using a digital editing software, follow the program’s instructions to rotate the canvas on your screen. Take your time and make precise adjustments to achieve the desired rotation.
Step 5: Continue Your Artwork
After rotating the canvas, you can now continue working on your artwork from the new perspective. Experiment with different techniques and styles to make the most of the rotated canvas. Don’t be afraid to think outside the box and embrace the new possibilities that the rotation brings to your creative process.
Remember, rotating a canvas 90 degrees can help you break free from conventional compositions and open up new avenues of creativity in your artwork. Take your time, experiment, and enjoy the process of exploring new perspectives.
In conclusion, rotating a canvas 90 degrees can be an exciting way to add a unique twist to your artwork. By following these steps and staying open to creative possibilities, you’ll be able to explore new perspectives and push the boundaries of your own artistic style. So go ahead, rotate that canvas and let your creativity soar!
Step 1: Prepare your canvas
To rotate a canvas 90 degrees, you will need a few materials:
- A canvas
- An easel or a flat surface to place your canvas on
- Acrylic or oil paints
- Paintbrushes
- A palette for mixing your colors
- A cup of water for cleaning your brushes
Before you start rotating your canvas, make sure you have a clear workspace. Remove any unnecessary objects from your working area to avoid any accidents.
Place your canvas on an easel or a flat surface, depending on your preference. Make sure it is secure and won’t move while you work.
Step 2: Choose the right tools
Before you can start rotating a canvas, you need to make sure that you have the right tools for the job. Here are a few things you’ll need:
- Canvas: You’ll need a canvas to work on. This can be a physical canvas or a digital one.
- Drawing tools: Depending on the type of canvas you’re working with, you’ll need the appropriate drawing tools. This can include pencils, pens, paintbrushes, or digital drawing tools.
- Rotational tool: To rotate the canvas, you’ll need a rotational tool. This can be a physical tool like a rotating easel or a digital tool like the rotation feature in a drawing software.
- Reference material: If you’re working on a specific subject or trying to recreate something, you may need reference material such as photographs, sketches, or visual references.
- Workspace: Make sure you have a clean and well-lit workspace to work in. This will make it easier to see your canvas and ensure that you have enough space to rotate it comfortably.
Having the right tools at your disposal will ensure that you can rotate your canvas effectively and achieve the desired results. Once you have gathered all the necessary tools, you can move on to the next step of the process.
Step 3: Secure the canvas
Once the canvas has been rotated to the desired angle, it is important to secure it in place to prevent any accidental movement or misalignment during the painting process. Here are a few steps to follow to securely fasten the canvas:
- Check the stability: Ensure that the easel or surface on which the canvas is placed is stable and won’t wobble or tip over. This will help maintain the canvas in its rotated position.
- Use clamps or clips: Consider using clamps or clips to hold the edges of the canvas securely in place. These can be attached to the easel or surface to prevent any movement.
- Adjust the tension: If working with a stretched canvas, check the tension and make any necessary adjustments. The canvas should be taut and smooth, which will aid in the painting process.
- Double-check alignment: Verify that the canvas is still properly aligned and straight after securing it. Make any minor adjustments if needed.
By taking the time to secure the canvas effectively, you can ensure that it remains in the desired rotated position throughout your painting process. This will provide a stable and comfortable working surface, allowing you to focus on creating your artwork with ease.
Step 4: Mark the center point
Before rotating the canvas, it is important to identify and mark the center point. This will ensure that the rotation occurs accurately and around the desired point.
- Using a ruler or a straight edge, draw a horizontal line that bisects the canvas.
- Next, draw a vertical line that intersects the canvas at its center.
- Mark the point where these two lines intersect as the center point.
It is crucial to ensure that the center point is marked accurately, as any deviation can result in an imprecise rotation.
Step 5: Apply the rotational force
Now that you have prepared the canvas and secured the necessary materials, it’s time to apply the rotational force to rotate the canvas 90 degrees. Here’s how you can do it:
- Grasp the canvas: Carefully hold the canvas with both hands, making sure your grip is firm but not too tight.
- Apply force: Slowly and steadily apply a rotational force to the canvas in a clockwise direction. Use your hands and arms to create a smooth and controlled rotation.
- Monitor the rotation: As you apply the rotational force, keep an eye on the canvas to ensure that it is rotating smoothly and evenly. Adjust the force if needed to maintain a steady rotation.
- Complete the rotation: Continue applying the rotational force until the canvas has completed a 90-degree rotation. Make sure to rotate the canvas in a controlled manner to avoid any sudden movements or accidents.
By following these steps, you should be able to successfully apply the rotational force and rotate your canvas 90 degrees. Take your time and be mindful of the force you apply to ensure a smooth and accurate rotation.
Step 6: Rotate the canvas
Now that we have created the canvas object and set its context, we can rotate it using the rotate() method. This method takes an angle as its parameter, which is specified in radians.
Here’s the code to rotate the canvas 90 degrees:
var canvas = document.getElementById('myCanvas');
var ctx = canvas.getContext('2d');
// Rotate the canvas 90 degrees
ctx.rotate(Math.PI / 2);
In the code above, we use the rotate() method on the context object (ctx) to rotate the canvas 90 degrees. We pass the angle Math.PI / 2 as the parameter, which rotates the canvas 90 degrees clockwise.
After rotating the canvas, any subsequent drawing operations will be affected by the rotation. For example, if you were to draw a rectangle after rotating the canvas, the rectangle would be drawn at a 90-degree angle.
It’s important to note that the rotate() method rotates the entire coordinate system of the canvas, not just the content that is being drawn. This means that any subsequent drawing operations will be affected by the rotation until the coordinate system is reset or restored.
Now that we have rotated the canvas, we can move on to the last step: drawing on the rotated canvas.
Step 7: Finishing touches and cleanup
After you have successfully rotated your canvas 90 degrees, there are a few finishing touches and cleanup steps you may want to take to ensure a polished final result.
1. Check for any errors or imperfections: Carefully inspect the rotated canvas for any errors or imperfections. Look for any areas where the rotation may have caused distortion or blur, and make any necessary adjustments or corrections.
2. Crop the canvas: If there are any unwanted areas or empty spaces around the rotated canvas, you can use the cropping tool to remove them. This will help to focus the viewer’s attention on the main subject or content of the rotated canvas.
3. Adjust the canvas size: If the rotated canvas is larger or smaller than desired, you can resize it by changing the canvas dimensions. This can be done by going to the “Image” menu, selecting “Canvas Size,” and entering the desired width and height values.
4. Save your work: Once you are satisfied with the rotated canvas and any additional adjustments you have made, be sure to save your work. Use the “Save” or “Save As” option in the file menu to save the rotated canvas in your desired file format and location.
5. Clean up any excess mess: Finally, clean up any excess mess or materials that you may have used during the rotation process. This could include brushes, paints, or other tools. Keeping your workspace tidy will help ensure a professional and organized feel to your creative process.
By following these finishing touches and cleanup steps, you can enhance the overall quality and presentation of your rotated canvas. Take the time to carefully review and make any necessary adjustments to achieve the desired result.
FAQ:
Why would I want to rotate a canvas by 90 degrees?
There can be several reasons why you might want to rotate a canvas by 90 degrees. One common reason is when you want to create a landscape painting but only have a portrait-oriented canvas. By rotating the canvas, you can easily work on your painting in the desired orientation. Another reason could be to experiment with different angles and perspectives in your artwork.
Can I rotate any type of canvas?
In most cases, you should be able to rotate any type of canvas. However, it’s important to consider the type and quality of the canvas before attempting to rotate it. Stretched canvases are typically easier to rotate compared to canvas boards or panels. Additionally, make sure that the canvas is securely attached to its frame or support before starting the rotation.
Are there any risks or potential problems when rotating a canvas?
Rotating a canvas can come with some risks and potential problems. If the canvas is not securely attached to its frame or support, it may loosen or even detach during the rotation. This can lead to damage to the artwork or injuries. It’s also important to ensure that the canvas is properly balanced and supported during the rotation to avoid any falls or accidents. Additionally, if the canvas has any wet paint or other materials, they may drip or smudge during the rotation.
Can I rotate a canvas that already has paint on it?
Yes, you can rotate a canvas that already has paint on it. However, you need to be careful to avoid any smudging or dripping of the paint. It’s best to let the paint dry completely before attempting to rotate the canvas. If the paint is still wet, you can try propping the canvas up at an angle to allow it to dry without smudging. If there is a concern about the paint shifting or moving during the rotation, you may want to consider using a fixative or protective spray to secure the paint.
Is there a specific technique or method for rotating a canvas 90 degrees?
There are several techniques and methods for rotating a canvas 90 degrees. One common method is to use wooden blocks or braces to tilt and support the canvas at the desired angle. You can attach the blocks or braces to the back of the canvas or frame using screws or other hardware. Make sure the blocks or braces are securely attached and provide enough support to prevent the canvas from falling or shifting during the rotation. Slowly and carefully rotate the canvas to the desired position, making sure to steady it as you go. Once the canvas is rotated, adjust the blocks or braces as needed to stabilize the canvas in the new position.