
If you have been using Skype for Business and find that you are unable to locate the program to uninstall it, don’t worry, you’re not alone. Many users have encountered this issue and it can be quite frustrating. Fortunately, there are a few solutions that you can try to resolve this problem.
Firstly, it’s important to note that Skype for Business is typically included as part of the Microsoft Office suite, especially in the business versions of Office. So, if you are unable to find Skype for Business in your installed programs, it’s possible that it was not installed with your version of Office.
One solution is to check whether Skype for Business is listed in the Office 365 application list. To do this, open the Office 365 application list and look for the Skype for Business icon. If you find it, you can simply right-click on it and select “Uninstall”. This will remove the program from your system.
If Skype for Business is not listed in the Office 365 application list or you are using a different version of Office, you can try using the “Programs and Features” feature in the Control Panel to uninstall Skype for Business. Simply navigate to the Control Panel, select “Programs”, and then click on “Programs and Features”. From there, you should be able to locate Skype for Business in the list of installed programs and uninstall it.
If neither of these solutions work, it’s possible that Skype for Business was installed with a different name. You can try searching for “Microsoft Lync” or “Microsoft Office Communicator” in the installed programs list. These are the previous names of Skype for Business and may still be used in some installations. Once you locate the program, you can proceed to uninstall it.
Remember, if you are unable to locate Skype for Business to uninstall it, it’s always a good idea to consult with your IT department or a technical support professional for assistance. They may have additional solutions or steps specific to your system to help you uninstall Skype for Business.
Having Trouble Uninstalling Skype for Business?
If you are experiencing difficulties uninstalling Skype for Business from your computer, there are a few steps you can try to resolve the issue.
1. Use the Control Panel:
Go to the Control Panel by searching for it in the Start menu. Open the Control Panel and navigate to “Programs” or “Programs and Features”. Look for Skype for Business in the list of installed programs and select it. Choose the option to uninstall or remove the software.
2. Use PowerShell:
If using the Control Panel does not work, you can try using PowerShell to uninstall Skype for Business. Open PowerShell by searching for it in the Start menu. Once open, type the following command and press Enter:
Get-WmiObject -Query “SELECT * FROM Win32_Product WHERE Name LIKE ‘Skype for Business%'” | ForEach-Object { $_.Uninstall() }
This command will search for any instances of Skype for Business and uninstall them.
3. Use a Third-Party Uninstaller:
If the above methods do not work, you can try using a third-party uninstaller tool. There are several available online that can help you remove stubborn programs like Skype for Business.
4. Contact Support:
If all else fails, you can reach out to Microsoft Support for assistance. They may be able to provide additional troubleshooting steps or guidance for uninstalling Skype for Business.
Remember to restart your computer after uninstalling Skype for Business to ensure all files and settings are fully removed.
Reasons for Not Being Able to Locate Skype for Business
There can be several reasons why you might not be able to locate Skype for Business on your computer. Here are some common reasons:
-
Skype for Business is not installed: It is possible that Skype for Business is not installed on your computer. Double-check your installed programs or applications list to ensure that Skype for Business is actually installed on your system.
-
Using a different name or version: Skype for Business is also known by other names, depending on the version or edition. It might be listed as Microsoft Lync or Microsoft Office Communicator. Search for these alternative names in your installed programs or applications list.
-
Incorrect installation directory: Skype for Business might be installed in a non-default directory on your computer. This can happen if you selected a custom installation path during the installation process. Try searching for Skype for Business in different directories or using the search function of your operating system.
-
Hidden or disabled application: It is possible that Skype for Business is hidden or disabled on your computer. Check the system tray area on your taskbar for the Skype for Business icon. If it is not visible, try customizing the system tray settings to show all icons. Additionally, check your list of installed applications for any entries related to Skype for Business and make sure they are not disabled or hidden.
-
Corrupted or missing installation files: If the installation files for Skype for Business are corrupted or missing, it can prevent the application from being located on your computer. In such cases, you may need to reinstall Skype for Business using a valid installation source or contact your IT department for assistance.
These are some of the common reasons why you might not be able to locate Skype for Business on your computer. By addressing these issues, you should be able to find and uninstall Skype for Business successfully.
Common Issues with Uninstalling Skype for Business
Uninstalling Skype for Business can sometimes be a challenging task, especially if you encounter any of the following common issues:
- Skype for Business not appearing in the Programs and Features list: Sometimes, Skype for Business may not be listed in the Programs and Features section of the Control Panel. This can make it difficult to uninstall the application using the conventional method. In such cases, you may need to utilize alternative methods for removal.
- “Cannot Uninstall Skype for Business because it is required by another application” error: This error message indicates that another program on your computer is dependent on Skype for Business, and therefore, it cannot be uninstalled. To resolve this issue, you may need to identify the dependent application and uninstall it first before attempting to remove Skype for Business.
- Skype for Business being reinstalled automatically: In some cases, Skype for Business may reinstall itself automatically after you uninstall it. This can be caused by certain system settings or the presence of other Microsoft Office applications. To prevent Skype for Business from reinstalling, you may need to disable auto-updates or modify specific system configurations.
- Incomplete removal of Skype for Business files: Uninstalling Skype for Business through the conventional method may not remove all of its associated files from your computer. This can lead to leftover files taking up storage space and potentially causing conflicts with other applications. To ensure a complete removal, you may need to manually delete the remaining files and folders related to Skype for Business.
If you encounter any of these issues while trying to uninstall Skype for Business, it is recommended to seek assistance from Microsoft support or utilize dedicated uninstallation tools provided by Microsoft. These tools are designed to handle complex removal scenarios and ensure a thorough cleanup of Skype for Business from your system.
Step-by-Step Guide: Locating Skype for Business for Uninstallation
Before you can uninstall Skype for Business, you need to locate the program on your computer. Follow the steps below to find the installation files:
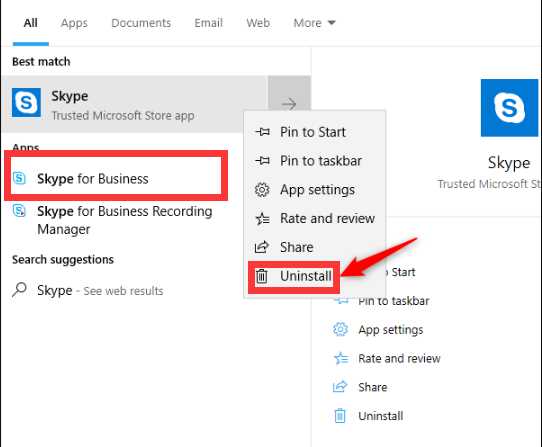
- Click on the “Start” button in the bottom left corner of your screen.
- Type “Skype for Business” in the search bar.
- A list of results will appear. Scroll through the list and look for the Skype for Business app icon.
- If you don’t see the Skype for Business app icon, try typing “Microsoft Office” in the search bar and look for the Microsoft Office folder.
- Open the Microsoft Office folder and search for the Skype for Business app icon.
- If you still can’t find it, try searching for “Programs and Features” in the search bar and open the app.
- In the “Programs and Features” window, scroll through the list of installed programs and look for “Skype for Business” or “Microsoft Office 365”.
- Once you locate Skype for Business, right-click on it and select “Uninstall” from the dropdown menu.
- Follow the prompts to complete the uninstallation process.
If you encounter any issues or difficulties during the uninstallation process, it’s recommended to reach out to Microsoft support for further assistance.
Alternative Methods for Uninstalling Skype for Business
If you are unable to locate Skype for Business through the traditional uninstallation methods, you can try alternative approaches to remove the application from your device. Here are some alternative methods you can consider:
- Using Apps & Features: Open the “Apps & Features” settings on your device and search for Skype for Business. Click on the application and select the “Uninstall” button to remove it.
- Using Command Prompt: Open Command Prompt on your device and type the following command:
msiexec /uninstall <Skype for Business MSI Product Code>. Replace “<Skype for Business MSI Product Code>” with the actual Product Code associated with Skype for Business on your device. This will initiate the uninstallation process. - Using PowerShell: Open PowerShell on your device and run the command:
Get-WmiObject -Query "SELECT * FROM Win32_Product WHERE Name='Skype for Business'" | ForEach-Object { $_.Uninstall() }. This will trigger the uninstallation of Skype for Business through PowerShell. - Manually removing Skype for Business files: If the above methods do not work, you can manually remove Skype for Business files from your device. Navigate to the installation directory of Skype for Business and delete all associated files and folders.
Remember to restart your device after performing any of these alternative methods to ensure that Skype for Business is completely removed. It is recommended to back up your important files and data before attempting any uninstallation procedures.
If you continue to experience difficulties in uninstalling Skype for Business, it is advisable to seek assistance from a technical support professional or refer to the official Microsoft support documentation for further guidance.
Troubleshooting Common Error Messages
When encountering issues with Skype for Business, you may come across different error messages. Here are some common error messages and their troubleshooting solutions:
Error: “Skype for Business cannot connect to the server”
- Ensure that you have a stable internet connection.
- Check if your firewall is blocking Skype for Business. If so, configure your firewall settings to allow the program access.
- Verify that the server you are trying to connect to is available and accessible.
- Restart your computer and try connecting again.
Error: “Your sign-in address is not found”
- Double-check your sign-in address and make sure it is entered correctly.
- Ensure that your Skype for Business account is properly set up.
- Try signing in with a different account to see if the issue persists.
Error: “Skype for Business has stopped working”
- Close Skype for Business and reopen it to see if the issue resolves itself.
- Check for any pending updates for Skype for Business and install them.
- If the problem persists, try repairing the program through the Control Panel.
- Consider reinstalling Skype for Business if none of the above solutions work.
Error: “Cannot find the required video device”
- Ensure that your webcam is connected properly to your computer.
- Update your webcam drivers to the latest version.
- Check if your webcam is being used by another application, and close that application if necessary.
- Restart your computer and try using Skype for Business again.
If none of the troubleshooting solutions above resolve the issue, consider contacting technical support for further assistance.
Uninstalling Skype for Business on Different Operating Systems
If you are facing difficulties in locating Skype for Business on your computer and want to uninstall it, follow the instructions below based on your operating system:
- Windows:
- Open the Control Panel by searching for it in the Start menu.
- Click on “Uninstall a program” or “Programs and Features” (depending on your Windows version).
- Scroll through the list of installed programs and locate Skype for Business.
- Right-click on Skype for Business and select “Uninstall” or “Remove”.
- Follow the prompts to complete the uninstallation process.
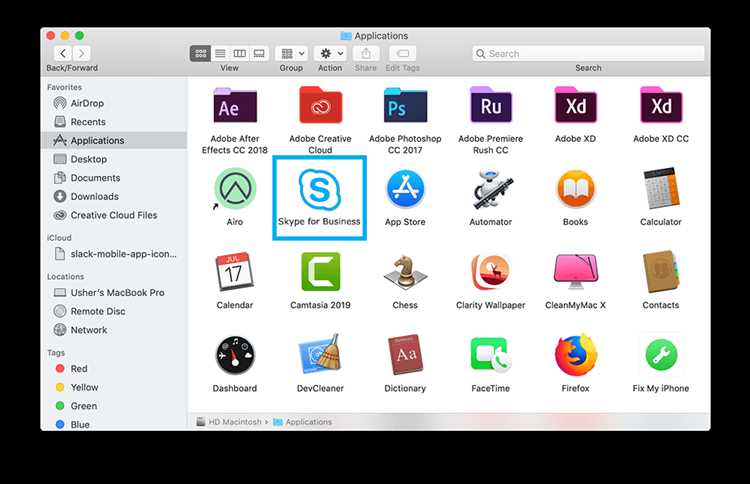
- Mac:
- Open the Finder by clicking on the magnifying glass icon in the menu bar.
- Search for “Skype for Business” using the search bar.
- When the search results appear, drag the Skype for Business icon to the Trash.
- Right-click on the Trash and select “Empty Trash” to permanently remove Skype for Business.
- Linux:
- Open the terminal by pressing Ctrl + Alt + T.
- Type the command “sudo apt-get remove skypeforbusiness” and press Enter.
- Enter your administrator password when prompted and press Enter.
- Follow the on-screen instructions to complete the uninstallation process.
Once you have successfully uninstalled Skype for Business, make sure to restart your computer to fully remove any remaining components or services.
Removing Skype for Business from Microsoft Office Suite
If you are looking to uninstall Skype for Business from your Microsoft Office Suite, there are a few steps you can follow to ensure a successful removal.
- Open the Start Menu and navigate to the Control Panel.
- In the Control Panel, click on “Programs” or “Programs and Features,” depending on your version of Windows.
- Scroll through the list of installed programs and locate “Skype for Business” or “Microsoft Office Suite.”
- Right-click on the program and select “Uninstall” or “Remove.”
- Follow the prompts to complete the uninstallation process.
- Restart your computer to ensure any remaining components are removed.
If you encounter any issues during the uninstallation process or if Skype for Business is not listed in the installed programs, you can try the following steps:
- Download the Skype for Business uninstaller from the Microsoft website.
- Run the uninstaller and follow the on-screen instructions to remove Skype for Business.
- Restart your computer to complete the removal process.
Alternatively, if you have the Microsoft Office Suite installed, you can customize the installation and choose not to include Skype for Business.
- Open the Control Panel and click on “Programs” or “Programs and Features.”
- Locate and select the Microsoft Office Suite.
- Click on the “Change” button at the top of the window.
- In the installation options, deselect or uncheck the box next to “Skype for Business” or “Lync.”
- Click on “Continue” or “Next” to save the changes.
- Wait for the installation to complete, and then restart your computer.
After following these steps, you should have successfully removed Skype for Business from your Microsoft Office Suite. If you still encounter any issues or if Skype for Business is not listed, you may need to seek further assistance from Microsoft support.
Seeking Additional Support and Solutions
If you have tried all the methods mentioned above and are still unable to locate Skype for Business to uninstall, don’t worry. There are additional support options and alternative solutions you can try.
1. Contact Microsoft Support:
If you are encountering persistent issues with Skype for Business uninstallation, it is advisable to reach out to Microsoft Support for further assistance. They have a dedicated team of experts who can guide you through the troubleshooting process and help you resolve the issue.
2. Visit the Microsoft Community:
The Microsoft Community is a platform where users can seek support and advice from fellow users who have encountered similar issues. You can try posting your problem on the community forum and see if someone has a solution or workaround for your particular situation.
3. Consider using third-party uninstallation tools:
If all else fails, you can explore the option of using third-party uninstallation tools that are designed to remove stubborn or difficult-to-uninstall programs. However, exercise caution when using such tools and make sure to download them from trusted sources to avoid any potential malware or security risks.
4. Consult with an IT professional:
If you are using Skype for Business on a work computer or as part of a corporate network, reach out to your company’s IT department or consult with an IT professional who can provide further guidance and assistance in uninstalling the application.
Remember:
It’s important to follow proper troubleshooting steps and seek assistance from authorized sources to ensure a safe and effective solution. Be cautious of downloading software or making changes to your computer without expert advice, as it may lead to unintended consequences or compromise the security of your system.
Conclusion
While locating and uninstalling Skype for Business may seem challenging, there are multiple solutions and support options available to help you resolve the issue. Whether it’s contacting Microsoft Support, seeking help from the community, or exploring alternative uninstallation methods, you have resources at your disposal to tackle this problem. Remember to exercise caution and consult with experts to ensure a safe and effective resolution.
FAQ:
I cannot find Skype for Business on my computer. How can I uninstall it?
If you cannot locate Skype for Business on your computer, you can try uninstalling it using the Control Panel. Go to “Programs and Features” in the Control Panel, find Skype for Business in the list of installed programs, and select “Uninstall”. If Skype for Business is not listed there, it is possible that it was not installed on your computer. In that case, you do not need to uninstall it.
I accidentally deleted Skype for Business from my computer. How can I reinstall it?
If you accidentally deleted Skype for Business from your computer, you can reinstall it by downloading the installation files from the official Microsoft website. Go to the Microsoft Download Center and search for “Skype for Business”. Download the appropriate version for your operating system and follow the on-screen instructions to install it.
I have tried uninstalling Skype for Business using the Control Panel, but it shows an error. What should I do?
If you are experiencing an error while trying to uninstall Skype for Business using the Control Panel, you can try using Microsoft’s “Fix it” tool. This tool is designed to fix common uninstallation issues. Download and run the tool, and it should guide you through the process of uninstalling Skype for Business. If the issue persists, you can try using third-party uninstaller software to remove Skype for Business from your computer.
I want to completely remove Skype for Business from my computer. How can I do it?
To completely remove Skype for Business from your computer, you need to uninstall both the Skype for Business client and the Skype for Business Online PowerShell Module (if you have it installed). First, uninstall the Skype for Business client using the Control Panel. Then, open PowerShell as an administrator and run the following command to uninstall the Skype for Business Online PowerShell Module: “Uninstall-CsClientPolicy -PolicyType Online”. After that, Skype for Business should be completely removed from your computer.
I tried to uninstall Skype for Business, but it keeps reinstalling itself. How can I stop this?
If Skype for Business keeps reinstalling itself after you uninstall it, it is possible that it is being automatically reinstalled by a Microsoft Office update. To prevent this from happening, you can try disabling the automatic updates for Microsoft Office. Open any Office application, go to the “File” menu, then click on “Account”. Under “Product Information”, click on the “Update Options” button and select “Disable Updates”. This should prevent Skype for Business from being automatically reinstalled.
I uninstalled Skype for Business, but it still appears in my Outlook. How can I remove it completely?
If Skype for Business still appears in your Outlook after uninstalling it, you can try disabling the Skype for Business add-in in Outlook. Open Outlook, go to the “File” menu, click on “Options”, then go to the “Add-ins” tab. Find the Skype for Business add-in in the list and disable it. This should remove any traces of Skype for Business from your Outlook.
I cannot uninstall Skype for Business because it is required by my organization. What should I do?
If you cannot uninstall Skype for Business because it is required by your organization, you should reach out to your IT department for assistance. They will be able to provide guidance on how to properly manage and uninstall Skype for Business in accordance with your organization’s policies.