
Your remote control (RC) car is ready to roll, but before you can take it for a spin, there are a few important steps you need to take. One of the first things you’ll need to do is turn on your RC car, but what exactly should you turn on first? In this step-by-step guide, we’ll walk you through the process of turning on your RC car, from the essential components to the optional extras.
The first thing you’ll want to do is make sure you have fresh batteries in both your RC car and your remote control. This will ensure that you have enough power to get your car up and running. Once your batteries are in place, you can start by turning on your RC car itself. Look for the power switch, typically located on the bottom or side of the car, and flip it to the “on” position.
Next, it’s time to turn on your remote control. This is the device you’ll be using to control your RC car, so it’s important to make sure it’s powered up and ready to go. Look for the power switch on your remote control and turn it on. You may need to hold down a button or flip a switch to activate it.
Once both your RC car and remote control are turned on, you can test the connection between the two. Most RC cars have an indicator light that will blink or change color to show that it’s connected to the remote control. If you don’t see the indicator light, you may need to press a sync button on either the car or the remote control to establish a connection.
Now that your RC car is powered on and connected to your remote control, you’re ready to hit the road! You can start by slowly and carefully accelerating to get a feel for how your RC car handles. Remember to start off in a safe, open space away from obstacles or people until you feel comfortable controlling your car. Happy driving!
Importance of RC Car Setup
Proper setup of an RC car is essential for optimal performance and durability. Whether you are a beginner or a seasoned RC enthusiast, taking the time to set up your RC car correctly can make a significant difference in its performance on the track or off-road.
1. Handling and Control
One of the main reasons why RC car setup is important is its effect on handling and control. By adjusting parameters such as suspension, ride height, toe-in/toe-out, camber, and shock oil, you can tailor the car’s handling characteristics to suit different track conditions or driving styles. This allows you to maintain better control of the car and make it more responsive to your inputs.
2. Stability and Traction
The setup of an RC car also affects its stability and traction. By fine-tuning parameters like weight distribution, shock setup, and tire choice, you can maximize the car’s grip on the track or terrain. A well-balanced RC car will have better stability through corners and improved traction, allowing you to push it to its limits without sacrificing control.
3. Durability and Reliability
Properly setting up your RC car can help improve its durability and reliability. By ensuring that the suspension components are properly adjusted and the shocks are properly set up, you can reduce the risk of damaging crucial parts during jumps or hard landings. Additionally, a well-maintained and properly set up car is less likely to suffer from mechanical failures or breakdowns, ensuring a longer lifespan and more enjoyable RC experience.
4. Performance Optimization
An accurately set up RC car can help optimize its performance. By fine-tuning parameters like gear ratios, motor timing, and speed controller settings, you can extract maximum power and speed from your car. This is especially important for competitive racing, where every millisecond and ounce of power matters.
5. Learning Experience
Working on the setup of an RC car is also a valuable learning experience. It allows you to understand the different components of the car, how they interact, and how to make adjustments based on different conditions or objectives. This knowledge can be applied to future RC cars or even real cars, making you a better driver and mechanic overall.
| Reason | Description |
|---|---|
| Handling and Control | Adjusting parameters to optimize control and handling characteristics. |
| Stability and Traction | Improving stability and traction through balanced setup and tire choice. |
| Durability and Reliability | Reducing the risk of damage and mechanical failures through proper setup and maintenance. |
| Performance Optimization | Maximizing power, speed, and overall performance through accurate setup and tuning. |
| Learning Experience | Gaining knowledge and skills in RC car mechanics and driving through setup adjustments. |
Step 1: Charging the Battery
Before you can start using your RC car, it’s important to make sure that the battery is fully charged. Follow these steps to charge the battery:
- Locate the battery compartment on your RC car. This is usually found on the bottom of the car or under the body.
- Open the battery compartment by removing any screws or clips that are holding it closed.
- Take out the battery pack from the compartment.
- Identify the type of battery that your RC car uses. There are different types of batteries such as Ni-Cd (nickel-cadmium) or LiPo (lithium polymer).
- Read the instructions or consult the user manual to determine the appropriate charger for your battery.
- Connect the battery to the charger using the correct charger connector. Make sure to match the positive and negative terminals correctly.
- Plug the charger into a power source, such as a wall outlet.
- Turn on the charger and set the charging parameters according to the battery type and manufacturer’s recommendations.
- Wait for the battery to fully charge. The charging time will vary depending on the battery type and capacity. It is important not to leave the battery unattended while charging.
- Once the battery is fully charged, unplug the charger from the power source and disconnect the battery from the charger.
- Insert the fully charged battery back into the battery compartment of your RC car.
By following these steps and ensuring that your battery is fully charged, you’ll be ready to turn on your RC car and start enjoying its performance to the fullest.
Step 2: Checking the Transmitter and Receiver
After turning on the RC car, the next step is to check the transmitter and receiver. These components are crucial for controlling the car, so it’s important to ensure they are functioning properly before starting your RC adventure. Follow these steps to check the transmitter and receiver:
- Inspect the transmitter: Start by examining the transmitter for any visible damage or loose parts. Check the battery compartment to make sure the batteries are properly inserted and have enough power.
- Turn on the transmitter: Once you have inspected the transmitter, turn it on using the power switch or button. Some transmitters may have additional settings or switches that need to be set correctly, so consult the user manual if needed.
- Check the transmitter’s LED lights: Look for any LED lights on the transmitter that indicate its status. These lights can provide information about the battery level, signal strength, and other important details.
- Inspect the receiver: Now, it’s time to check the receiver on the RC car. Look for any visible damage, loose wires, or disconnected antennas. Ensure that the receiver is securely mounted and positioned properly.
- Turn on the receiver: Once you have inspected the receiver, connect the battery to the car and turn on the receiver. Most receivers have a power switch or button that needs to be activated.
- Check the receiver’s LED lights: Similar to the transmitter, the receiver may have LED lights that indicate its status. Look for any lights that confirm a successful connection between the transmitter and receiver.
If you encounter any issues during the transmitter and receiver check, consult the user manual for troubleshooting tips or contact the manufacturer for assistance. It’s crucial to ensure that both components are working properly to have a safe and enjoyable RC experience.
Step 3: Inspecting the Tires and Suspension
Before you start driving your RC car, it’s important to inspect the tires and suspension for any damage or issues. This will ensure that your car performs at its best and avoids any unnecessary accidents or breakages.
1. Check the tires:
Take a close look at the tires to make sure there are no visible cuts, tears, or excessive wear. If you notice any damage, it’s important to replace the tires before driving. Driving with damaged tires can affect the handling and performance of your RC car.
2. Check the tire pressure:
Use a tire pressure gauge to check the air pressure in each tire. Make sure the pressure is within the recommended range specified by the manufacturer. Low tire pressure can affect the stability and handling of your RC car, while too high pressure can lead to tire blowouts.
3. Inspect the suspension:
Check the suspension components, such as the shock absorbers, for any signs of damage or leaking. Ensure that all screws and nuts are securely tightened. If you notice any loose or damaged parts, it’s important to fix or replace them before driving.
4. Test the suspension:
Press down on each corner of the car to test the suspension. It should smoothly compress and then rebound. If it feels stiff or there is excessive bouncing, you may need to adjust the suspension settings to achieve optimal performance.
5. Align the tires:
Check the alignment of the tires by looking at the gaps between the tires and the body of the car. They should be evenly spaced on both sides. If the tires are misaligned, adjust the turnbuckles or camber links to align them properly.
6. Lubricate the suspension:
To ensure smooth operation, apply a small amount of lubricant to the suspension components. This will help reduce friction and prolong the lifespan of the parts.
By inspecting the tires and suspension before driving your RC car, you can ensure that it performs at its best and remains in good condition for a longer period of time. This step is essential for both the safety and longevity of your RC car.
Step 4: Adjusting the Steering and Throttle Trim
Once you have turned on your RC car and confirmed that it is responding to your controller, the next step is to adjust the steering and throttle trim. The trim settings help you fine-tune the performance of your RC car and ensure that it operates smoothly.
1. Steering Trim Adjustment
Start by adjusting the steering trim. This control affects the centering of the steering mechanism. If your RC car is veering to one side even when the controller is centered, you can correct it using the steering trim.
- Make sure your RC car is on a flat surface and not moving.
- Gradually turn the steering trim control to the right or left, depending on the direction the RC car is veering towards.
- Keep adjusting the trim until the RC car runs straight when the controller is centered.
2. Throttle Trim Adjustment
The throttle trim adjustment is used to adjust the acceleration and braking of your RC car. If the car is moving forward or backward slightly even when the throttle trigger on the controller is in the neutral position, you can use the throttle trim to fix it.
- Place your RC car on a flat surface or lift it slightly off the ground.
- Gradually turn the throttle trim control until the wheels of the RC car stop spinning when the throttle trigger on the controller is in the neutral position.
- Test the acceleration and braking to ensure they are smooth and responsive.
3. Fine-Tuning the Trims
After adjusting the steering and throttle trim, it’s important to test your RC car in different conditions to ensure its performance is optimal.
- Take your RC car for a test drive on different terrain, such as grass, asphalt, or dirt.
- Observe the behavior of the car and make note of any adjustments that need to be made.
- Fine-tune the steering and throttle trim settings as necessary to achieve the desired performance.
Remember, every RC car is unique, and finding the perfect trim settings may take some trial and error. Patience and experimentation are key to getting your RC car to perform at its best.
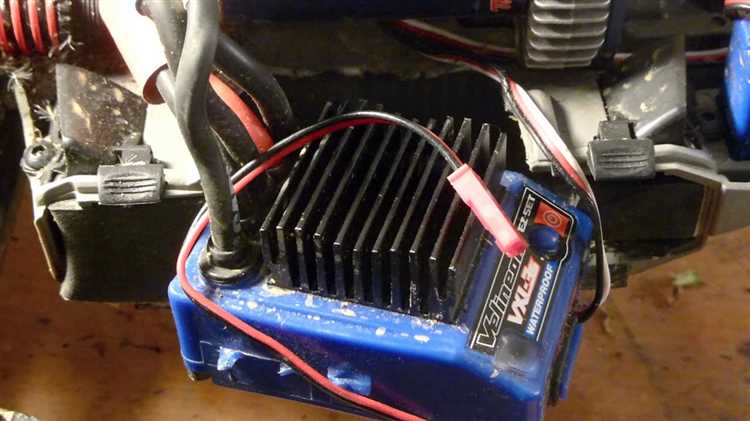
Step 5: Calibrating the Speed Controller
Calibrating the speed controller is an important step to ensure the RC car’s performance is optimized. This process is especially crucial if you have installed a new speed controller or if you want to fine-tune your car’s acceleration and braking.
Follow these steps to calibrate the speed controller:
- Begin by turning on the transmitter first. Make sure the throttle is in the neutral position, and the steering is centered.
- Next, turn on the RC car by connecting the battery or flipping the power switch. Take note of any beeps or LED indicators on the speed controller.
- Once the RC car is powered on, move the throttle trigger on the transmitter to the maximum position. The speed controller will emit a series of beeps or light indicators to indicate it has registered the maximum throttle input.
- Return the throttle trigger to the neutral position, and the speed controller should emit another set of beeps or light indicators to confirm it has registered the neutral position.
- Finally, move the throttle trigger to the minimum position, and the speed controller should respond with a confirmation of the minimum throttle input.
- At this point, the speed controller is calibrated and ready to use. You can now test the acceleration and braking performance of your RC car.
Note: The calibration process may vary slightly depending on the brand and model of your speed controller. Always refer to the manufacturer’s instructions for specific calibration steps.
Step 6: Testing the Suspension and Shocks
Once you have turned on your RC car and checked that all the electronics are functioning properly, it’s time to test the suspension and shocks. The suspension system and shocks play a crucial role in allowing your RC car to handle different terrain and absorb shocks, ensuring a smooth and stable ride.
Here are the steps to properly test the suspension and shocks:
- Find a suitable surface: Look for an area with different terrains such as grass, gravel, or even a dirt track. This will allow you to assess how well the suspension and shocks handle different surfaces.
- Drive your RC car slowly: Start by driving your RC car slowly over the chosen surface. Observe how the suspension system reacts to bumps and uneven terrain. Pay attention to any excessive bouncing or bottoming out.
- Test the shock responsiveness: Gradually increase the speed and try driving over small obstacles or jumps. Observe how the shocks absorb the impact and how quickly they return to their normal position. A well-tuned suspension and shocks should provide a balanced and controlled ride.
- Tune the suspension: If you notice any issues such as excessive bouncing or bottoming out, you may need to make adjustments to the suspension. This can be done by adjusting the preload on the springs or changing the shock oil viscosity. Consult your RC car’s manual for specific instructions on how to tune the suspension.
- Continue testing: Repeat the above steps on different terrains and obstacles to thoroughly test the suspension and shocks. This will give you a better understanding of your RC car’s capabilities and help you make any necessary adjustments.
Remember, the suspension and shocks are crucial components in ensuring optimal performance and durability of your RC car. Regular maintenance and tuning are important to keep them in top condition and provide the best possible driving experience.
Step 7: Fine-tuning the Steering and Throttle
Once you have turned on your RC car, the next step is to fine-tune the steering and throttle to ensure optimal performance. Fine-tuning these controls will help you achieve better control and responsiveness while driving your RC car.
- Start by adjusting the steering trim. The steering trim dial is located on the transmitter and is used to fine-tune the center position of the steering servo. Turn the dial clockwise or counterclockwise until the wheels are perfectly centered when the transmitter’s steering wheel is in the neutral position.
- Next, adjust the throttle trim. The throttle trim dial is also located on the transmitter and is used to set the neutral position of the throttle servo. Turn the dial clockwise or counterclockwise until the RC car remains idle when the throttle trigger is in the neutral position.
- If your RC car has adjustable endpoints, you can further fine-tune the steering and throttle by adjusting these endpoints. Adjustable endpoints allow you to limit the range of motion of the steering and throttle servos, preventing them from reaching their maximum travel. Adjust the endpoints as needed to achieve the desired steering angle and throttle response.
- After adjusting the steering and throttle trims and endpoints, it’s time to test your RC car’s performance. Take it for a spin and observe how it handles. If the car veers to one side or has poor acceleration, make further adjustments to the steering trim, throttle trim, or endpoint settings as necessary.
- Keep in mind that fine-tuning the steering and throttle is an iterative process. It may take several rounds of adjustments to find the perfect balance for your RC car. Take your time and make small changes, testing the car after each adjustment to see how it behaves.
By fine-tuning the steering and throttle, you can optimize the performance of your RC car and have a more enjoyable driving experience. Remember to always read the instruction manual that comes with your RC car, as different models may have specific tuning procedures and recommendations.
FAQ:
How do I turn on a RC car?
To turn on a RC car, you need to first insert batteries into the transmitter. Then, insert batteries into the car itself. Next, switch on the transmitter and make sure it is properly synced with the car. Finally, switch on the car and you are ready to go!
What happens if I turn on the car before the transmitter?
If you turn on the car before the transmitter, the car will not receive any commands from the transmitter and will not respond to your controls. It is important to turn on the transmitter first to establish a connection with the car.
Can I turn on the transmitter without batteries?
No, you cannot turn on the transmitter without batteries. The batteries provide power to the transmitter, allowing it to send signals to the car. Make sure to insert fresh batteries into the transmitter before turning it on.
What should I do if the car doesn’t turn on?
If the car doesn’t turn on, check the batteries in both the transmitter and the car. Make sure they are inserted correctly and have enough power. If the batteries are fine, check the power connection in the car itself. If all else fails, consult the user manual or contact the manufacturer for further assistance.
Is it possible to turn on the car without the transmitter?
No, it is not possible to turn on the car without the transmitter. The transmitter sends signals to the car, controlling its movements. Without the transmitter, the car will not receive any commands and will not function.
Why is it important to sync the transmitter with the car?
Syncing the transmitter with the car is important because it establishes a connection between the two devices. This allows the transmitter to send signals to the car, controlling its movements. Without proper syncing, the car will not respond to your controls.
Can I use rechargeable batteries for the RC car?
Yes, you can use rechargeable batteries for the RC car. In fact, using rechargeable batteries can be more cost-effective in the long run, as you won’t need to constantly buy new batteries. Just make sure to use the appropriate type and voltage for your specific RC car model.