
If you are a musician or a podcaster using Apple’s GarageBand software to create your music or podcasts, you may need to share your files with others for collaboration or feedback purposes. One common way to share your GarageBand files is through email. In this step-by-step guide, we will walk you through the process of emailing a GarageBand file so you can easily share your creative work with others.
Step 1: Save your GarageBand file
Before you can email your GarageBand file, you need to make sure it is saved and ready to be shared. Go to the “File” menu in GarageBand and click on “Save” or “Save As” to save your project. Choose a location on your computer where you can easily find the file later.
Step 2: Compress the GarageBand file
GarageBand files can be quite large, especially if you have included multiple tracks and effects. To make it easier to email, you will need to compress the GarageBand file into a smaller size. On a Mac, you can simply right-click on the file and select “Compress” to create a ZIP file. On a PC, you can use software like WinZip or WinRAR to compress the file.
Step 3: Attach the compressed file to an email
Open your email client and create a new email. In the email composition window, look for the “Attach” button or icon, and click on it. Navigate to the location where you saved the compressed GarageBand file, and select it. Once the file is attached, you are ready to send your email.
Step 4: Include a descriptive message
Before you hit the send button, it’s a good idea to include a descriptive message in your email. Let the recipient know what the file contains, any special instructions, or any other relevant information. This will make it easier for the recipient to understand the purpose of the file and provide valuable feedback or collaboration.
Step 5: Send the email
Double-check all the details of your email, including the recipient’s email address, the attached file, and the message. Once you are satisfied, click on the send button to send your email with the GarageBand file attached. Depending on the size of the file and your internet connection, it may take a few moments for the email to be sent.
By following these simple steps, you can easily email your GarageBand file to share your musical or podcast creations with others. Whether you are collaborating with fellow musicians or seeking feedback from your audience, sharing your GarageBand files through email is a convenient way to connect and collaborate with others.
How to Email a GarageBand File
Sending a GarageBand file through email is a simple and efficient way to share your music projects with others. Whether you’re collaborating with a bandmate or sharing your work with a friend, email makes it easy to transmit your GarageBand projects. Follow these step-by-step instructions to email a GarageBand file.
- Open GarageBand: Launch the GarageBand application on your Mac computer. If you don’t have GarageBand installed, you can download it from the App Store.
- Open your project: Select the GarageBand project you wish to email from the Projects window. If you haven’t created a project yet, you can start a new one by selecting “New Project” from the File menu.
- Export your project: Go to the “Share” menu option at the top of the screen and select “Export Song to Disk”.
- Choose file format: In the Export Song dialog box, choose the format you want to export your GarageBand project as. It is recommended to use the compressed audio format such as MP3 or AAC for email transmission.
- Select export location: Choose the location on your computer where you want to save the exported GarageBand file. Make sure you remember the location for later use.
- Export the file: Click the “Export” button and wait for GarageBand to export your project as an audio file. The time it takes will depend on the length and complexity of your project.
- Compose your email: Open your preferred email client and start composing a new email message.
- Attach the GarageBand file: Look for the “Attach” or “Insert” button in your email client and click on it. Locate the file you exported from GarageBand and select it.
- Write a message: Add a brief message explaining the content of the email and the attached GarageBand file. This step is optional but can be helpful for the recipient to understand what the file is.
- Send the email: Once you have finished composing your email and attaching the GarageBand file, click the “Send” button to send the email.
That’s it! You have successfully emailed a GarageBand file. Now the recipient can download and listen to your music project. Remember to use a file compression format such as MP3 or AAC to ensure smaller file sizes for quicker email transmission.
Choose the GarageBand File
- Launch GarageBand on your Mac computer.
- From the main menu, click on “File” and select “Open Recent” or “Open” to access your GarageBand project file.
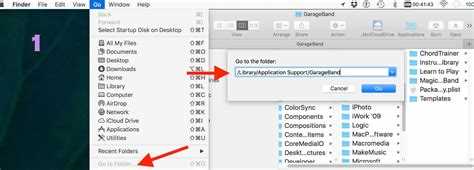
- Navigate to the location where your GarageBand project files are saved. By default, GarageBand projects are usually stored in the “Music” folder in your user directory.
- Once you have located the desired GarageBand project file, click on it to select it.
- If you can’t find the GarageBand project file you want to email, make sure to check other locations where you may have saved it, such as external hard drives or cloud storage services.
- After selecting the GarageBand project file, click on “Open” to load it in GarageBand.
Make sure to choose the correct GarageBand project file that you want to email, as GarageBand projects often contain multiple tracks and recordings.
Compress the GarageBand File
Compressing the GarageBand file before sending it via email can help to reduce the file size and make it easier and quicker to send. Here are the steps to compress the GarageBand file:
- Open the GarageBand project that you want to compress.
- Go to the “File” menu at the top of the screen and choose the “Save As…” option.
- In the dialog box that appears, choose a location where you want to save the compressed file.
- Click on the format dropdown menu and select “Compress” from the list of options.
- Click the “Save” button to save the compressed garageband file.
Once the file is compressed, you can now easily attach it to an email and send it to the intended recipient. The compressed file will be smaller in size, making it quicker to upload and download.
Create a New Email
Once you have your GarageBand file ready to be sent, you can create a new email to attach the file and send it to someone. Follow these steps to create a new email:
- Open your preferred email client or webmail application. This can be any application or website that you use to send and receive emails.
- Click on the “Compose” or “New Email” button or similar option to start creating a new email.
- In the “To” field, enter the email address of the person you want to send the GarageBand file to. Make sure you have the correct email address to avoid sending it to the wrong person.
- Enter a subject for your email. The subject should be concise and give the recipient a clear idea of what the email is about, such as “GarageBand File for Collaboration.”
- In the body of the email, you can write a message to accompany the GarageBand file. This can be a simple greeting or a more detailed explanation of the file and its purpose.
- Consider adding any necessary attachments before sending the email. To attach the GarageBand file, look for an attachment icon or a button that says “Attach” or “Add Attachment.” Click on it and browse your folders to find and select the GarageBand file.
- Once the GarageBand file is attached, you can review the email to ensure everything looks correct.
- If you’re satisfied with the email, click the “Send” or “Submit” button to send it to the recipient. Your email client or webmail application will take care of delivering the email and its attachments.
By following these steps, you can create a new email and attach your GarageBand file to send to someone. Remember to double-check the recipient’s email address and review the email before sending to ensure accuracy.
Attach the Compressed GarageBand File
Once you have finished compressing your GarageBand file, you can proceed to attach it to an email. Follow these steps:
- Open your email client such as Gmail, Outlook, or Apple Mail.
- Compose a new email by clicking on the “New Message” or “Compose” button.
- In the email composition window, navigate to the section where you can attach files. This section is usually represented by a paperclip icon or a button labeled “Attach” or “Add Attachment.”
- Click on the attachment icon or the “Attach” button to open the file selection dialog box.
- Navigate to the location where you have saved the compressed GarageBand file.
- Select the compressed GarageBand file by clicking on it, and then click on the “Open” or “Choose” button to add the file as an attachment.
After attaching the compressed GarageBand file to your email, you can proceed to fill in the email recipient, subject, and any additional message you wish to include. Once you have completed these steps, you can send the email, and the recipient will be able to download and access the GarageBand file.
Add a Subject to the Email
When sending an email with a GarageBand file attached, it’s important to include a clear and descriptive subject line. The subject line should give the recipient an idea of what the email is about and what they can expect to find in the attached file. Here are some tips on how to add a subject to the email:
- Be Specific: Try to include specific details about the GarageBand file in the subject line. For example, if you’re sending a GarageBand file for a music project, you could use a subject line like “Music Project GarageBand File”. This helps the recipient quickly understand the purpose of the email.
- Keep it Short: Try to keep the subject line concise and to the point. Long subject lines can get cut off, especially on mobile devices, so it’s best to keep it brief. Aim for a subject line that is around 50 characters or less.
- Use Keywords: Include relevant keywords in the subject line that will help the recipient easily identify the content of the email. This could include keywords like “GarageBand”, “music”, or any other specific terms related to the file you’re sending.
- Avoid Caps Lock: It’s best to avoid using all caps in the subject line, as it can come across as shouting and may be seen as unprofessional. Instead, use proper capitalization and punctuation to make the subject line easy to read.
- Be Clear and Professional: The subject line should clearly convey the purpose of the email and be professional in tone. Avoid using vague or ambiguous subject lines that could confuse the recipient.
By following these tips, you can ensure that your email’s subject line effectively communicates the content and purpose of the GarageBand file you’re sending. This will help the recipient quickly understand the email’s importance and ensure that it doesn’t get lost or overlooked in their inbox.
Add a Message to the Email
When sending a GarageBand file via email, it is helpful to include a message along with the attachment. This message allows you to provide additional context or instructions to the recipient about the file you are sending. Here are some tips on how to add a message to the email:
- Start with a greeting: Begin your email with a polite greeting, such as “Dear [Recipient’s Name],” or simply “Hi,” followed by the recipient’s name.
- Introduce the purpose: In the first paragraph, briefly explain the purpose of the email and why you are sending the GarageBand file. For example, you could say, “I’m writing to share a music composition I created using GarageBand. I thought you might be interested in listening to it.”
- Provide some background: If necessary, give some background information about the GarageBand file. Explain the inspiration behind the music, the instruments used, or any other relevant details that could enhance the recipient’s understanding and appreciation of the file.
- Include any specific instructions: If there are any specific instructions for the recipient regarding the GarageBand file, make sure to include them in a separate paragraph. For example, you might say, “Please let me know if you have any feedback or suggestions for improvement.”
- Express gratitude: Conclude your email by expressing your gratitude to the recipient for taking the time to listen to your GarageBand file. You could simply say, “Thank you for your time and consideration.”
- Closing: End the email with a closing phrase, such as “Best regards,” followed by your name.
Remember to keep your message concise and to the point. Avoid including unnecessary information that might distract the recipient from the main purpose of your email, which is to share the GarageBand file. Once you have written your message, proofread it for any grammar or spelling errors before sending.
Enter the Recipient’s Email Address
Once you have your GarageBand file ready to send, you will need to enter the recipient’s email address. This is the email address where you want to send the file.
To do this, follow these steps:
- Open your email client or web-based email service.
- Create a new email message.
- In the “To” field, enter the recipient’s email address. Make sure to double-check the email address to ensure it is correct.
If you are sending the GarageBand file to multiple recipients, you can enter multiple email addresses separated by commas or use the CC or BCC fields to send the email to additional recipients.
Once you have entered the recipient’s email address, you can proceed to the next step, which is adding a subject line and any necessary message or instructions for the recipient.
Send the Email
After attaching the GarageBand file to the email, you are ready to send it. Follow these steps:
- Double-check the recipient’s email address to ensure it is correct.
- Add a subject line that clearly describes the content of the email.
- Compose a professional and concise message explaining why you are sending the GarageBand file and any additional information the recipient needs to know.
- Proofread your email for any errors or typos.
- Click on the “Send” button to transmit the email with the attached GarageBand file.
Remember to be mindful of the file size when sending GarageBand files via email. If the file is too large, you may need to compress it or consider using a file-sharing service to send it instead.
Sending the GarageBand file via email allows the recipient to easily download and access the file on their own devices, making it a convenient method for sharing musical projects or collaborating with others on their own GarageBand projects.
FAQ:
Can GarageBand files be sent via email?
Yes, GarageBand files can be sent via email.
What file format does GarageBand use?
GarageBand uses the .band file format.
Can GarageBand files be opened on Windows?
No, GarageBand files can only be opened on Mac computers or iOS devices. However, there are ways to convert GarageBand files to other formats that can be opened on Windows.
Are there any file size limitations when emailing a GarageBand file?
Yes, most email providers have a limit on the size of attachments that can be sent. Make sure that the GarageBand file you are trying to send is within the allowable file size limit.
Can I compress a GarageBand file before sending it via email?
Yes, you can compress a GarageBand file before sending it via email to reduce its file size. You can use file compression software like WinZip or 7-Zip to compress the file into a smaller size.
Is it possible to send multiple GarageBand files in one email?
Yes, it is possible to send multiple GarageBand files in one email. You can select and attach multiple files to the email before sending them.