
If you’re a Windows user but also own an iPhone, you might be wondering if there’s a way to use iMessage on your Windows 10 PC. While iMessage is a popular messaging app exclusive to Apple devices, there are methods you can use to access iMessage on your Windows computer. In this complete guide, we’ll walk you through the steps to set up and use iMessage on Windows 10.
Method 1: Using an Emulator
One way to use iMessage on your Windows PC is by using an emulator. Emulators are software programs that simulate a different operating system on your computer. There are several emulators available that will allow you to run iOS on your Windows machine. Once you have the emulator installed, you can download and use iMessage as if you were using an iPhone.
Method 2: Using a Remote Desktop
If you have a Mac computer at home, you can use a remote desktop application to access iMessage on your Windows PC. This method requires you to have both your Windows and Mac computers connected to the same network. By using a remote desktop app like Chrome Remote Desktop or Microsoft Remote Desktop, you can log in to your Mac computer from your Windows PC and use iMessage as if you were physically using your Mac.
Method 3: Using a Third-Party App
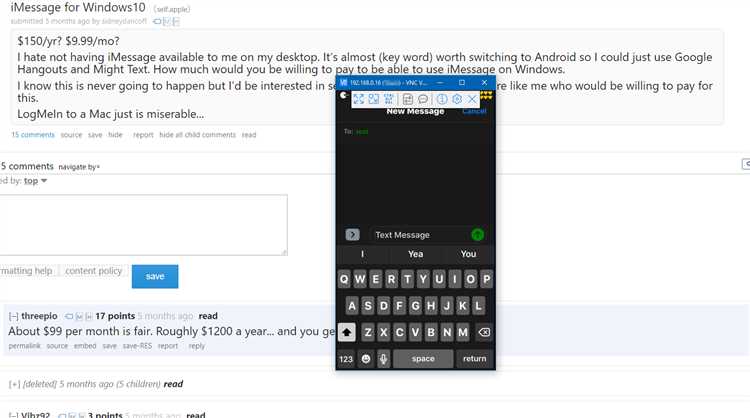
Another option is to use a third-party app that allows you to access iMessage on your Windows computer. These apps work by connecting to your iPhone and mirroring the iMessage interface on your Windows PC. Some popular third-party apps for using iMessage on Windows include AirMessage, SMS for iMessage, and iPadian.
With these methods, you can now enjoy the convenience of using iMessage on your Windows 10 PC. Whether you choose to use an emulator, a remote desktop, or a third-party app, you’ll be able to stay connected with your friends and family through iMessage, even if you’re not using an Apple device.
Overview of iMessage on Windows 10
iMessage is a messaging platform developed by Apple that allows users to send messages, photos, videos, and more to other Apple device users. It is widely used among iPhone, iPad, and Mac users but is not officially available for Windows 10. However, there are some workarounds and third-party solutions that can enable Windows 10 users to access iMessage.
Why use iMessage on Windows 10?
- iMessage offers end-to-end encryption, ensuring the privacy and security of your messages.
- The platform allows for seamless sync across all Apple devices, making it easy to start conversations on one device and continue on another.
- iMessage supports various multimedia features, such as sending photos, videos, voice memos, and even games.
- Group chats, read receipts, and typing indicators are some of the features that enhance the messaging experience on iMessage.
Methods to use iMessage on Windows 10:
- iCloud for Windows: This method requires you to have an iCloud account. Install iCloud for Windows on your PC, sign in with your Apple ID, and enable the “Messages” option to sync your iMessages with your Windows 10 device.
- Using Chrome Remote Desktop: This method involves accessing your Mac remotely from your Windows 10 PC using the Chrome Remote Desktop extension. You will need a Mac device to set up and use this method.
- Third-party solutions: There are third-party apps and services available that claim to provide access to iMessage on Windows 10. Make sure to research and choose a reliable and secure solution before installing any third-party software.
Considerations and limitations:
- The iCloud for Windows method requires an active internet connection and a compatible iCloud account.
- Using Chrome Remote Desktop method requires a Mac device that is powered on and connected to the internet.
- Third-party solutions may not offer the same level of security and privacy as the official iMessage platform.
- Compatibility and performance issues may arise when using third-party solutions.
In conclusion, while iMessage is not officially available for Windows 10, there are ways to access and use it on your PC. However, it’s important to weigh the pros and cons of each method and choose the one that suits your needs while prioritizing privacy and security.
System Requirements
Before you can use iMessage on your Windows 10 computer, you need to make sure that your system meets the following requirements:
- A Windows 10 operating system
- An active internet connection
- An Apple ID
- Your iOS device with iMessage enabled
The first and most important requirement is to have a Windows 10 computer. iMessage is not officially supported on Windows, so you need to use third-party software to enable it.
You also need to have an active internet connection as iMessage works over the internet. Make sure you have a stable and reliable internet connection to ensure smooth communication.
In order to log into iMessage on Windows, you need an Apple ID. If you don’t already have one, you can create a new Apple ID on an iPhone, iPad, or Mac, or by visiting the Apple website.
Finally, you need to have an iOS device with iMessage enabled. iMessage is primarily designed for Apple devices, so you need an iPhone, iPad, or iPod Touch with iMessage activated and set up with your Apple ID.
What You Need to Use iMessage on Windows 10
In order to use iMessage on Windows 10, you will need the following:
- A Windows computer: You will need a computer running Windows 10 operating system.
- Internet connection: Make sure your computer is connected to the internet.
- iMessage app: Download and install an iMessage app on your Windows 10 computer. There are several third-party apps available that can allow you to use iMessage on Windows.
- Apple ID: You will need an Apple ID to sign in to your iMessage account. If you don’t have one, you can create a new Apple ID for free.
- iOS device: To activate iMessage on your Windows 10 computer, you will need an iOS device (iPhone, iPad, or iPod Touch) running iOS 8.1 or later. This device will be used to set up and activate iMessage on your Windows computer.
- An Apple account with iMessage enabled: Make sure that iMessage is already enabled on your iOS device. You can check this by going to Settings > Messages and making sure that iMessage is turned on.
- Patience: Please note that using iMessage on a Windows computer may not provide the same experience as using it on an Apple device. Some features may be limited or not available.
Once you have all the required elements, you can proceed with the setup and configuration process to start using iMessage on your Windows 10 computer.
Setting Up iMessage on Windows 10
If you have a Windows 10 computer and want to use iMessage on it, you can follow these steps to set it up:
- Download an iOS emulator: Since iMessage is exclusive to Apple devices, you will need to download an iOS emulator on your Windows 10 computer. Some popular iOS emulators include iPadian, Smartface, and MobiOne Studio. Choose the emulator that best suits your needs and install it on your computer.
- Launch the iOS emulator: After installing the iOS emulator, open it on your Windows 10 computer. This will create a virtual iOS environment that will allow you to run iOS apps, including iMessage.
- Sign in with your Apple ID: Once the iOS emulator is running, you will be prompted to sign in with your Apple ID. Enter your Apple ID and password to continue.
- Download and install iMessage: After signing in with your Apple ID, locate the App Store within the iOS emulator and search for iMessage. Download and install the iMessage app onto the virtual iOS environment.
- Open iMessage: Once the installation is complete, locate the iMessage app within the iOS emulator and open it. You will now be able to use iMessage on your Windows 10 computer.
With these steps, you can set up iMessage on your Windows 10 computer using an iOS emulator. Enjoy using iMessage to communicate with your friends and family right from your Windows 10 device!
Step-by-Step Guide to Install and Configure iMessage on Windows 10
iMessage is a popular messaging service offered by Apple, but it is not officially available for Windows 10. However, with the help of a few workarounds, you can use iMessage on your Windows 10 PC. Follow the steps below to install and configure iMessage on Windows 10:
- Download and install an iOS emulator on your Windows 10 PC. An iOS emulator will simulate the iOS environment on your Windows computer and allow you to use iMessage. One popular iOS emulator is iPadian.
- Go to the iPadian website and download the emulator. Follow the on-screen instructions to install the emulator on your Windows 10 PC.
- Once the emulator is installed, launch it and sign in with your Apple ID and password. This step is necessary to access your iMessage account and messages.
- After signing in, you should see the iOS interface on your Windows 10 PC. Look for the App Store icon and click on it.
- In the App Store, search for “iMessage” and download the iMessage app to your emulator.
- Once the iMessage app is downloaded, launch it and sign in with your Apple ID and password again.
- Now you can start using iMessage on your Windows 10 PC. You will be able to send and receive iMessages, as well as use other iMessage features such as stickers and emojis.
- To configure iMessage settings, click on the Settings app on the iOS interface of iPadian. From there, you can customize settings such as notifications, privacy, and security.
It’s important to note that while using an iOS emulator allows you to use iMessage on your Windows 10 PC, it may not provide the same seamless experience as using iMessage on an actual Apple device. Some features may be limited or not fully functional.
Also, keep in mind that using third-party software to access iMessage on Windows 10 may not be officially supported by Apple, so proceed with caution and use at your own risk.
With these steps, you should now be able to install and configure iMessage on your Windows 10 PC and enjoy using the messaging service without needing an Apple device.
Using iMessage Features
iMessage is a powerful messaging platform that offers several useful features to enhance your messaging experience on Windows 10. Here are some of the key features you can take advantage of while using iMessage:
-
Text Messaging: iMessage allows you to send and receive text messages with other iMessage users. You can type out your message and send it to your contacts seamlessly.
-
Group Messaging: With iMessage, you can easily create group conversations and chat with multiple people at once. This feature is great for planning events or discussing topics with a group of friends or colleagues.
-
Attachments: iMessage allows you to share various types of attachments such as photos, videos, documents, and audio files. Simply click on the attachment icon and choose the file you want to share.
-
Emojis and Stickers: Express yourself with a wide range of emojis and stickers available in iMessage. You can add them to your messages to add a personal touch and make your conversations more engaging.
-
Read Receipts: iMessage provides read receipts, which let you know when your message has been read by the recipient. This feature is helpful to know if your message has been seen or not.
-
Tapbacks: Tapbacks allow you to quickly react to a message with a simple tap. You can choose from a set of pre-defined reactions like thumbs up, thumbs down, heart, laugh, and more.
-
Screen Effects: iMessage supports various screen effects to add a fun and dramatic touch to your messages. You can send messages with special effects like balloons, confetti, fireworks, and more.
-
Digital Touch: If you have a touch-enabled device, iMessage allows you to send sketches, heartbeats, fireballs, and other interactive elements using the Digital Touch feature.
-
Message Effects: iMessage offers message effects that allow you to emphasize your messages by adding animations. You can send messages with effects like gentle, loud, invisible ink, and more.
-
Message Reactions: You can react to a specific message within a conversation by long-pressing on the message and choosing an emoji. This allows you to quickly respond to a message without sending a separate text.
These are just a few of the many features available in iMessage for Windows 10. By exploring and utilizing these features, you can make your messaging experience more enjoyable and personalized.
Exploring the Key Features of iMessage on Windows 10
iMessage is Apple’s native messaging app that allows users to send messages, photos, videos, and more to other Apple device users. While iMessage is primarily designed for use on Apple devices, it is possible to use iMessage on Windows 10 with the help of third-party software.
Here are some key features of iMessage on Windows 10:
- Send and receive messages: With iMessage on Windows 10, you can send and receive text messages, emojis, and multimedia content like photos and videos to other iMessage users.
- Group messaging: iMessage on Windows 10 supports group messaging, allowing you to chat with multiple people at once. You can create group chats, add or remove participants, and have conversations with your friends, family, or colleagues in a single thread.
- Read receipts: iMessage shows read receipts, indicating when the recipient has read your message. This feature can be helpful to know if your message has been seen or not.
- End-to-end encryption: iMessage on Windows 10 uses end-to-end encryption, ensuring that your messages are secure and cannot be easily intercepted by hackers or third parties.
- Memoji and Animoji: iMessage on Windows 10 allows you to create and use Memoji and Animoji, animated emojis that mimic your facial expressions and gestures. You can use these fun and expressive features to add a personal touch to your messages.
- Message effects: iMessage offers various message effects like bubble effects, screen effects, and handwritten messages. These effects allow you to add visual flair and excitement to your messages.
- Integration with other Apple services: iMessage on Windows 10 integrates seamlessly with other Apple services like iCloud, FaceTime, and the App Store. You can easily access files, make FaceTime calls, and download apps directly from within the iMessage app.
In conclusion, while iMessage is primarily designed for use on Apple devices, it is possible to use iMessage on Windows 10 with the help of third-party software. By exploring the key features of iMessage on Windows 10, you can enjoy seamless messaging, group chats, and fun features like Memoji and message effects, all while keeping your conversations secure with end-to-end encryption.
Troubleshooting Common Issues
While using iMessage on Windows 10, you may encounter some common issues. Here are some troubleshooting steps to help you resolve these problems:
1. iMessage Login Issues
If you are unable to login to iMessage on Windows 10, try the following:
- Ensure that you have the correct Apple ID and password.
- Check your internet connection. Make sure you have a stable and reliable internet connection.
- Verify that your Apple ID is not locked or disabled. You can do this by visiting the Apple ID website.
- If you have enabled two-factor authentication, make sure to enter the verification code correctly.
2. iMessage Not Syncing
If your iMessage conversations are not syncing between your iPhone and Windows 10, try these steps:
- Ensure that you are signed in to the same Apple ID on both devices.
- Check your internet connection. Both devices need to be connected to the internet for syncing to work.
- Make sure that iMessage is enabled on both devices. On your iPhone, go to Settings > Messages and toggle on iMessage. On Windows 10, open the iMessage app and sign in with your Apple ID.
- Restart both devices. Sometimes a simple restart can fix syncing issues.
3. iMessage Not Sending or Receiving Messages
If you are unable to send or receive messages on iMessage, try the following steps:
- Check if the recipient has blocked you. If you are unable to send messages to a specific person, it’s possible that they have blocked your number.
- Verify your network connection. Make sure you have a stable internet connection.
- Restart your iPhone and Windows 10 device. Sometimes a restart can resolve temporary issues.
- Update your devices to the latest software. Sometimes outdated software can cause issues with iMessage.
- Contact Apple Support. If the problem persists, reach out to Apple Support for further assistance.
4. iMessage App Crashing or Freezing
If the iMessage app on Windows 10 is crashing or freezing, try these steps:
- Close and reopen the iMessage app. Sometimes a simple restart can resolve app crashes.
- Update the iMessage app. Check for updates in the Microsoft Store and install any available updates.
- Restart your Windows 10 device. This can help clear any temporary glitches that may be causing the app to crash or freeze.
- Uninstall and reinstall the iMessage app. If the problem persists, try uninstalling and reinstalling the app to resolve any underlying software issues.
By following these troubleshooting steps, you should be able to resolve common issues with using iMessage on Windows 10. If the problem persists, it’s recommended to seek further assistance from Apple Support or the app developer.
Common Problems and How to Resolve Them When Using iMessage on Windows 10
Although using iMessage on Windows 10 can be a convenient way to stay connected, there may be some common problems that users encounter. Here are some of the most common issues and steps to resolve them:
1. Unable to Sign In
If you are unable to sign in to iMessage on your Windows 10 device, try the following solutions:
- Ensure that you have a stable internet connection.
- Double-check your Apple ID and password for any typos.
- Verify that your Apple ID is working properly on other devices to rule out any account issues.
- Restart your Windows 10 device and try signing in again.
2. “Waiting for Activation” Message
If you see the “Waiting for Activation” message when trying to use iMessage on Windows 10, follow these steps:
- Make sure your Windows 10 device has a stable internet connection.
- Ensure that your Apple ID is working properly on other devices.
- Verify that your device is running the latest version of Windows 10 and the iMessage app.
- Restart your device and try activating iMessage again.
3. Messages Not Syncing
If your iMessage conversations are not syncing properly on Windows 10, try the following solutions:
- Make sure your Windows 10 device and other Apple devices are connected to the same Wi-Fi network.
- Verify that you are signed in with the same Apple ID on all devices.
- Restart both your Windows 10 device and other Apple devices.
4. Missing Messages
If you are missing messages on iMessage for Windows 10, try these steps:
- Ensure that your Apple ID is properly signed in on all devices.
- Check your iCloud settings and make sure that iMessage sync is enabled.
- Restart your Windows 10 device and other Apple devices.
- If the issue persists, contact Apple Support for further assistance.
5. “An Error Occurred During Activation” Message
If you encounter the “An Error Occurred During Activation” message when attempting to activate iMessage on Windows 10, try these troubleshooting steps:
- Verify that your Windows 10 device has a stable internet connection.
- Check if your Apple ID is working properly on other devices.
- Ensure that your device is running the latest version of Windows 10 and the iMessage app.
- Restart your device and try activating iMessage again.
If none of the above solutions resolve your problem, it is recommended to visit Apple Support or consult their online resources for further assistance.
Alternatives to iMessage on Windows 10
If you’re a Windows 10 user and want to communicate with your friends who are using iMessage on their Apple devices, there are several alternatives available that can provide similar messaging services and features. While these alternatives may not be identical to iMessage, they offer cross-platform compatibility and can be used on your Windows 10 device.
- WhatsApp: WhatsApp is a popular messaging app that is widely used across all platforms, including Windows 10. It offers end-to-end encryption, voice and video calling, and the ability to send text, images, videos, and documents. You can easily sign up with your phone number and start messaging your contacts.
- Telegram: Telegram is another messaging app available on Windows 10 that offers a wide range of features including cloud storage, self-destructing messages, secret chats, and channels. It also supports group chats, voice and video calls, and file sharing. You can sign up with your phone number or email address to start using Telegram.
- Skype: Skype is a popular communication platform that supports messaging, voice and video calling. It is available on Windows 10 and offers features like screen sharing, group video calls, and integration with Microsoft services. You can create a Skype account or sign in with your Microsoft account to start using the app.
- Facebook Messenger: Facebook Messenger is a widely used messaging app that allows you to connect with your Facebook friends. It can be accessed on Windows 10 through the web browser or by downloading the Facebook Messenger app from the Microsoft Store. It offers features like stickers, voice and video calls, group chats, and the ability to send photos and videos.
While these alternatives may not have all the same features as iMessage, they provide cross-platform compatibility and can be used on Windows 10 devices. Choose the one that best suits your needs and enjoy messaging with your friends and family.
FAQ:
Can I use iMessage on Windows 10?
Yes, you can use iMessage on Windows 10 with the help of a third-party tool called “iPadian”.
Is it safe to use third-party tools for iMessage on Windows 10?
While third-party tools like iPadian can provide access to iMessage on Windows 10, there is always a risk associated with downloading and using such tools. It is important to download from trusted sources and exercise caution when using them.
What is iPadian and how does it work?
iPadian is a software that simulates the iOS environment on a Windows computer. It creates a virtual iPad-like interface, allowing you to use iMessage and other iOS apps on your Windows 10 device.
Can I send and receive iMessage on Windows 10 using iPadian?
Yes, with iPadian installed, you can send and receive iMessages on your Windows 10 computer, just like you would on an iOS device. However, keep in mind that you need a valid Apple ID and an active internet connection to use iMessage.
Are there any alternatives to iPadian for using iMessage on Windows 10?
Yes, there are alternative methods to use iMessage on Windows 10. Some options include using a virtual machine, dual-booting with macOS, or using a remote desktop solution to access an iOS device remotely.
Can I use iMessage on Windows 10 without using any third-party tools?
No, iMessage is a proprietary messaging service developed by Apple and is only available on their devices. To use iMessage on Windows 10, you will need to use a third-party tool or alternative method.
Does using iPadian for iMessage on Windows 10 require payment?
The basic version of iPadian is available for free, but there is also a paid version with additional features. However, for the purpose of using iMessage on Windows 10, the free version should suffice.