
Keeping your Mac clean and clutter-free is essential for maintaining its performance and efficiency. One of the tools that can help you achieve this is the Disk Cleanup tool, which allows you to remove unnecessary files and free up space on your hard drive.
Locating the Disk Cleanup tool on Mac may seem daunting at first, especially if you’re new to the macOS environment. However, with this quick and easy guide, you’ll be able to find and utilize this powerful tool in no time.
First, open a Finder window by clicking on the blue smiley face icon in the Dock. Then, navigate to the “Applications” folder in the left sidebar and double-click to open it. Look for a folder named “Utilities” and open it as well.
Inside the Utilities folder, you’ll find a variety of system tools, including the Disk Cleanup tool. Look for an icon that resembles a broom or a brush, labeled “Disk Cleanup” or “Disk Utility.” Double-click on this icon to launch the tool.
Note: The Disk Cleanup tool may sometimes be named “Disk Utility” on certain versions of macOS, but its purpose remains the same – to help you clean up your hard drive and optimize its performance.
Once the Disk Cleanup tool is opened, you’ll be presented with a user-friendly interface that allows you to select which files you want to remove. You can choose to delete temporary files, caches, log files, and other unnecessary data that takes up valuable space on your Mac.
It’s important to note that when using the Disk Cleanup tool, you should exercise caution and only remove files that you are certain are not needed. Be sure to review each file category before deleting anything to avoid accidentally removing important system files.
In conclusion, locating the Disk Cleanup tool on your Mac is a simple process that involves navigating through the Finder and Utilities folder. By regularly using this tool, you can keep your Mac clean and running smoothly, allowing you to enjoy optimal performance and storage space.
How to Locate the Disk Cleanup Tool on Mac
If you want to free up disk space on your Mac and improve its performance, using the Disk Cleanup tool can be an effective solution. Here’s how to locate the Disk Cleanup tool on your Mac:
- Click on the Finder icon in the Dock to open a Finder window.
- In the menu bar at the top of the screen, click on “Go”.
- A dropdown menu will appear. From the dropdown menu, click on “Utilities”.
- In the Utilities folder, find and double-click on “Disk Utility”.
- Once the Disk Utility window opens, click on the “First Aid” tab.
- Below the “First Aid” tab, you will see a button labeled “Run” next to “Disk Cleanup”. Click on this button.
- The Disk Cleanup tool will then start scanning your Mac’s hard drive for unnecessary files that can be safely deleted.
- Once the scanning process is complete, you will see a list of files that can be deleted. Review the list and select the files you want to remove.
- Click on the “Delete” button to delete the selected files.
- Confirm your selection when prompted.
- Wait for the Disk Cleanup tool to finish deleting the selected files.
- Close the Disk Utility window and you’re done!
By following these steps, you can easily locate and use the Disk Cleanup tool on your Mac to free up valuable disk space and optimize your Mac’s performance.
Locating the Disk Cleanup Tool in Finder
If you’re trying to locate the Disk Cleanup tool on your Mac, you can easily find it using Finder. Follow these simple steps:
- Open a Finder window by clicking on the Finder icon in your dock or by selecting “Finder” from the top menu.
- In the top menu, click on “Go” and then select “Utilities”.
- A new window will open with various utilities.
- Scroll down until you find the “Disk Cleanup” tool.

The Disk Cleanup tool is represented by a broom icon. Once you locate it, you can double-click on it to open the tool.
Alternatively, you can also use the search function in Finder to quickly locate the Disk Cleanup tool. Simply click on the magnifying glass icon in the top-right corner of the Finder window and type in “Disk Cleanup”. The search results will show you the location of the tool, and you can open it by double-clicking on it.
Now that you know how to locate the Disk Cleanup tool in Finder, you can easily access it whenever you need to free up disk space on your Mac.
Navigating to the “Applications” Folder
In order to locate the Disk Cleanup tool on your Mac, you will need to navigate to the “Applications” folder. The Applications folder is where all of the installed applications on your Mac are stored. Follow the steps below to find it:
- Click on the Finder icon in your Mac’s dock. The Finder is represented by a blue smiley face icon.
- In the Finder window that opens, click on “Go” in the menu bar at the top of the screen.
- A dropdown menu will appear. Select “Applications” from the dropdown menu.
- A new Finder window will open, displaying the contents of your Applications folder. This folder contains all of the applications installed on your Mac.
Alternatively, you can also access the Applications folder by using the keyboard shortcut “Command + Shift + A”. This will open the Applications folder directly.
Once you have successfully navigated to the Applications folder, you will be able to locate the Disk Cleanup tool along with any other applications installed on your Mac. The Applications folder is organized alphabetically, so you can easily find the Disk Cleanup tool by scrolling through the list or using the search bar at the top right corner of the window.
Searching for the Disk Cleanup Tool
The Disk Cleanup Tool is a built-in utility on Mac that allows you to free up valuable disk space by removing unnecessary files and temporary data. It can help improve your Mac’s performance and make it run more efficiently. Follow the steps below to locate the Disk Cleanup Tool on your Mac:
- Click on the “Finder” icon located in the Dock at the bottom of your screen.
- In the menu bar at the top of the screen, click on “Go”.
- From the drop-down menu, click on “Utilities”.
- A new Finder window will open, showing a list of utilities available on your Mac.
- Scroll down and locate the “Disk Utility” application.
- Double-click on “Disk Utility” to launch the application.
Once you have opened Disk Utility, you will see a list of drives and volumes connected to your Mac. To perform a disk cleanup, follow these steps:
- Select the volume you want to clean up from the list on the left-hand side of the Disk Utility window.
- Click on the “First Aid” tab located at the top of the window.
- Click on the “Run” button to start verifying and repairing any errors on the selected volume.
- After the verification and repair process is complete, click on the “Cleanup” tab.
- Click on the “Scan” button to start scanning for unnecessary files on the selected volume.
- Once the scan is complete, click on the “Clean” button to remove the identified unnecessary files and free up disk space.
By using the Disk Cleanup Tool on your Mac, you can ensure that your system remains clean, organized, and optimized for better performance.
Opening the Disk Cleanup Tool
To open the Disk Cleanup Tool on your Mac, follow these simple steps:
- Click on the “Finder” icon in the dock to open the Finder.
- In the menu bar at the top of the screen, click on the “Go” menu.
- From the drop-down menu, select “Utilities”.
- In the “Utilities” folder, find and double-click on the “Disk Utility” icon to open it.
- In the left sidebar of the Disk Utility window, locate and select the disk you want to clean up.
- Once you’ve selected the disk, click on the “First Aid” tab at the top of the window.
- Click on the “Run” button to start the disk verification and repair process.
- After the verification and repair process is complete, click on the “Done” button.
- In the menu bar at the top of the screen, click on the “Go” menu again.
- From the drop-down menu, select “Utilities” once more.
- In the “Utilities” folder, find and double-click on the “Terminal” icon to open it.
- In the Terminal window, type “diskutil resetuserpermissions / `id -u`” and press Enter.
- Wait for the command to complete and then close the Terminal window.
Once you have completed these steps, you have successfully opened the Disk Cleanup Tool on your Mac and performed a disk verification and repair process. Now you can enjoy a cleaner and more optimized system!
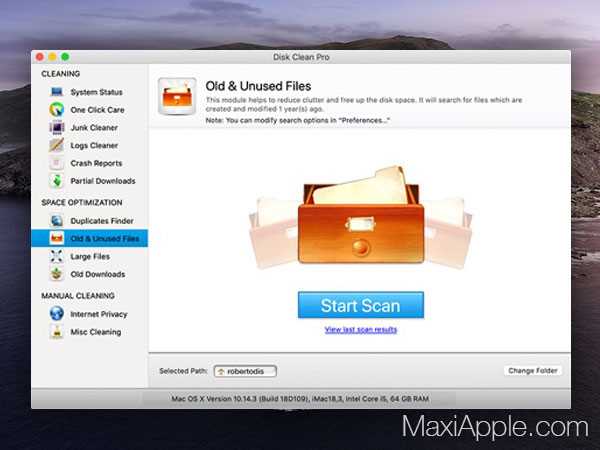
Understanding the Disk Cleanup Tool Interface
The Disk Cleanup tool on Mac provides a user-friendly interface that allows you to easily manage and optimize the storage space on your computer. When you open the Disk Cleanup tool, you will see several options and settings that you can customize.
Main Window: The main window of the Disk Cleanup tool displays a summary of the current storage usage on your Mac. It shows you the total size of your storage, the amount of space used, and the amount of space available. This overview gives you a quick snapshot of how much space you can potentially free up.
Categories: The Disk Cleanup tool categorizes the different types of files that can be deleted to free up space. These categories include system junk, user cache files, application cache files, logs, and more. Each category lists the amount of space occupied by these files, allowing you to identify which categories are taking up the most storage.
Scan Options: Before cleaning up your disk, the Disk Cleanup tool offers scan options that determine the scope of the cleaning process. You can choose to perform a quick scan, which targets the most common types of junk files, or a deep scan, which thoroughly examines your storage for all types of junk files. The deep scan may take longer but provides a more comprehensive cleaning.
File Preview: The Disk Cleanup tool allows you to preview the files within each category before deleting them. This feature is useful if you want to verify the contents of a particular category or ensure that you don’t accidentally delete any important files. You can expand each category to view the individual files and select or deselect items for deletion.
Customize Cleaning: The Disk Cleanup tool allows you to customize the cleaning process by selecting or deselecting specific categories. This customization gives you control over which types of files are deleted, allowing you to prioritize certain categories or exclude files that you want to keep. It’s important to review the categories and their contents before performing the cleanup to avoid unintended data loss.
Cleanup Confirmation: After you have selected the categories and files you want to delete, the Disk Cleanup tool prompts you to confirm the cleanup. This step serves as a final confirmation before permanently removing the selected files from your storage. Take a moment to review your selections and ensure that you don’t delete any necessary files.
| Key Elements of the Disk Cleanup Tool Interface: |
|---|
| 1. Main window |
| 2. Categories |
| 3. Scan options |
| 4. File preview |
| 5. Customize cleaning |
| 6. Cleanup confirmation |
Overall, the Disk Cleanup tool interface provides an intuitive way to manage and clean up your storage on Mac. By understanding its different elements and options, you can effectively optimize your disk space and improve the performance of your computer.
Selecting the Disk to Clean Up
Before you can start using the Disk Cleanup tool on your Mac, you need to select the disk that you want to clean up. The Disk Cleanup tool allows you to choose between cleaning up your main startup disk or cleaning up an external disk.
Here are the steps to select the disk to clean up:
- Open the Disk Cleanup tool on your Mac.
- In the main interface of the Disk Cleanup tool, you will see a list of available disks.
- Identify the disk that you want to clean up.
- If you want to clean up your main startup disk, select it from the list.
- If you want to clean up an external disk, connect the disk to your Mac and wait for it to appear in the list. Once it appears, select it.
Note: It’s important to select the correct disk to clean up to avoid accidental deletion of important files or data.
Once you have selected the disk to clean up, you can proceed to the next step of using the Disk Cleanup tool on your Mac.
Choosing the Cleanup Options
When using the Disk Cleanup tool on your Mac, you have several options to choose from to determine what files or data you want to remove. Here are the main cleanup options:
- System Files: This option allows you to remove unnecessary system files on your Mac. These files may include logs, caches, and temporary system files.
- Applications: Selecting this option will enable you to remove unused or outdated applications from your Mac. This can help free up disk space and improve system performance.
- Downloads: By choosing this option, you can delete files that you have downloaded from the internet. This can be useful if your Downloads folder is cluttered with files you no longer need.
- Trash: Selecting this option will empty your Trash bin and permanently remove any files stored in it. Keep in mind that once you empty the Trash, the files cannot be recovered.
- Other: The “Other” option allows you to manually select specific file types or folders to remove. This gives you more control over the cleanup process and allows you to target specific areas that may be taking up unnecessary space.
To choose the cleanup options that best suit your needs, simply check the corresponding boxes next to each option. You can select multiple options if desired. Once you have made your selections, click the “Cleanup” or “Delete” button to initiate the cleanup process.
It is important to note that before performing any cleanup, you should review the selected options and make sure you do not accidentally delete any files or data that you still need. Always double-check your selections to avoid any unintended data loss.
Initiating the Disk Cleanup Process
Once you have located the Disk Cleanup tool on your Mac, you can begin the process of cleaning up your disk space. Follow the steps below to initiate the disk cleanup:
- Double-click on the Disk Cleanup tool icon to open it. The tool will launch and display a list of available cleaning options.
- Review the list of options and select the ones you wish to clean. These options may include cache files, system logs, temporary files, and other types of data that can be safely deleted to free up disk space.
- Before proceeding with the cleanup process, it is always recommended to make a backup of any important files or data that you do not want to lose. This ensures that you can restore them if necessary.
- Once you have selected the cleaning options and backed up your important files, click on the “Clean” or “Start” button to initiate the disk cleanup process.
- The tool will start cleaning the selected files and display a progress bar or status indicator. The time it takes to complete the cleanup process will depend on the amount of data to be cleaned and the performance of your Mac.
- Once the cleanup process is complete, you will receive a notification or a summary report indicating the amount of disk space that has been freed up.
- After the disk cleanup process, it is a good practice to restart your Mac to ensure that all changes take effect and to optimize its performance.
By following these steps, you can easily initiate the disk cleanup process and free up valuable disk space on your Mac. Regularly performing disk cleanup can help improve the overall performance and efficiency of your Mac.
FAQ:
What is the Disk Cleanup Tool on Mac?
The Disk Cleanup Tool on Mac is a utility that allows you to free up space on your hard drive by removing unnecessary files and data.
Where can I find the Disk Cleanup Tool on Mac?
The Disk Cleanup Tool on Mac can be found in the Utilities folder, which is located within the Applications folder.
How do I use the Disk Cleanup Tool on Mac?
To use the Disk Cleanup Tool on Mac, you need to open the application and select the drive or partition that you want to clean up. Then, click on the “Scan” button to scan for unnecessary files, and finally, click on the “Clean” button to remove the selected files.
Can the Disk Cleanup Tool on Mac help improve my computer’s performance?
Yes, using the Disk Cleanup Tool on Mac can help improve your computer’s performance by freeing up space on your hard drive and removing unnecessary files that may be slowing down your system.