
CD players are still a popular way to enjoy music and other audio in a physical format. However, over time, the lens of your CD player can become dirty or dusty, leading to issues with playback. Cleaning the lens of your CD player is a simple process that can help to improve the quality of your audio and ensure that your CDs are properly played.
Before starting the cleaning process, it is important to remember that CD players are delicate electronic devices and should be treated with care. To avoid damaging the player or the lens, it is recommended to follow the manufacturer’s instructions or consult the user manual before attempting any cleaning.
The first step in cleaning your CD player lens is to gather the necessary materials. You will need a clean, lint-free cloth or a CD lens cleaning kit, which can be purchased at most electronics stores. It is important to use a lint-free cloth to avoid leaving any fibers on the lens that could further hinder the playback.
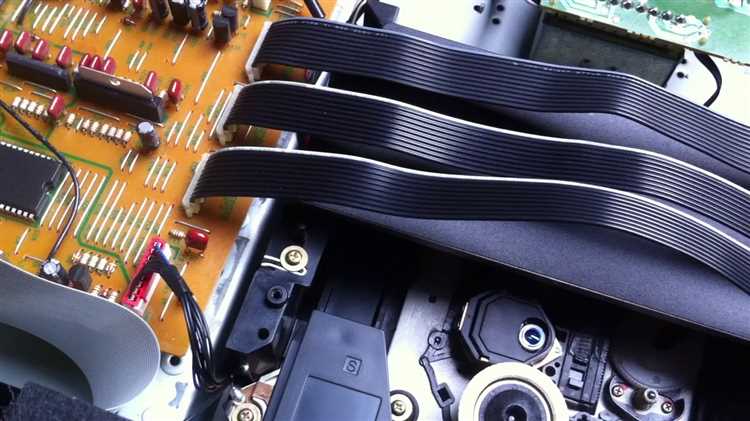
Once you have the necessary materials, turn off the CD player and unplug it from the power source. This will help to prevent any accidental damage and ensure your safety during the cleaning process. Next, open the CD player and locate the lens. The lens is typically a small, clear, or amber-colored glass or plastic located in the center of the player.
Using the lint-free cloth or the cleaning solution from the lens cleaning kit, gently wipe the lens in a circular motion. Avoid applying too much pressure, as this could cause damage. Continue wiping until the lens is clean and free of any dust or dirt particles. It may be necessary to use multiple wipes to achieve the desired result.
The Importance of Maintaining Your CD Player Lens
Keeping your CD player lens clean is essential for maintaining optimal audio quality and preventing playback issues. Over time, dust, dirt, and debris can accumulate on the lens, affecting the player’s ability to read the CD properly. This can result in skipping tracks, freezing, or even the CD not playing at all.
Regular maintenance of your CD player lens is crucial for ensuring smooth playback and preserving the lifespan of your CDs. Here are a few reasons why maintaining your CD player lens is important:
- Improved sound quality: A clean lens allows the CD player to accurately read the data stored on the disc, resulting in better sound quality. Dirt or debris on the lens can lead to distortion, background noise, or a muffled sound.
- Prevents skipping: A dirty lens can cause the CD player to skip tracks or stop playing altogether. Cleaning the lens removes any obstruction, ensuring smooth and uninterrupted playback.
- Extends CD lifespan: When the CD player’s lens is clean and properly maintained, it reduces the risk of scratching or damaging the CDs. Scratched CDs not only affect playback quality but also shorten the lifespan of the disc.
- Preserves the CD player’s lifespan: Regularly cleaning the lens helps prolong the lifespan of your CD player. Dust and dirt can accumulate inside the player and cause mechanical issues or even permanent damage if not addressed in a timely manner.
Maintaining your CD player lens is a simple and cost-effective way to ensure optimal audio quality and longevity of both your CDs and the player itself. By following a regular cleaning routine, you can enjoy uninterrupted playback and preserve your music collection for years to come.
Step 1: Gather the necessary cleaning supplies
Before you clean your CD player lens, you will need to gather a few cleaning supplies. Here is a list of the items you will need:
- A can of compressed air
- A soft microfiber cloth
- A CD/DVD lens cleaning solution
- A cotton swab or a soft-bristled brush
Make sure to have all these supplies ready before you begin cleaning your CD player lens. Having the right tools will help ensure a thorough and safe cleaning process.
Step 2: Power off and unplug your CD player
Before you begin cleaning the lens of your CD player, it is important to power off the device and unplug it from the wall outlet. This precautionary step ensures your safety while working with electrical appliances.
To power off your CD player, locate the power button on the front or top panel of the device. Press it once to turn off the player.
Next, unplug the power cord from the wall outlet. Simply pull the plug out of the socket, making sure not to yank or pull on the cord excessively.
By cutting off the power source, you eliminate the risk of electrical shock and protect both yourself and the device.
Step 3: Locate the CD player lens
Once you have gathered all the necessary tools, it’s time to locate the CD player lens. This is usually straightforward, as the lens is typically located near the center of the CD player.
Keep in mind that the exact location of the lens may vary depending on the make and model of your CD player. You can refer to the user manual or do a quick online search to find the specific location for your CD player.
When you have found the lens, take a moment to inspect it visually. Look for any visible dust or dirt particles that may be obstructing the lens. If you notice any debris, make a mental note of its location so you can clean it later.
It’s important to handle the CD player lens with care, as it is a delicate component. Avoid touching the lens with your bare hands, as the natural oils on your fingertips can leave smudges or damage the lens. If you do accidentally touch the lens, use a clean, lint-free cloth to gently wipe away any fingerprints or smudges.
Step 4: Use a can of compressed air to remove dust and debris
After cleaning the lens with the cotton swab and rubbing alcohol, you can use a can of compressed air to remove any remaining dust or debris from the CD player lens.
Make sure the CD player is turned off before using the compressed air to prevent any damage to the device.
- Hold the can of compressed air upright and point the nozzle towards the lens of the CD player.
- Gently press the trigger of the can to release short bursts of air.
- Move the nozzle around to cover the entire lens, ensuring that all areas are free from dust and debris.
- You may also use the compressed air to clean other parts of the CD player, such as the tray and the exterior.
Be careful not to hold the can too close to the lens or use too much force with the bursts of air, as this can cause damage to the CD player.
Once you have finished using the compressed air, allow the CD player to sit for a few minutes to ensure that any remaining moisture from the rubbing alcohol or compressed air evaporates before using it again.
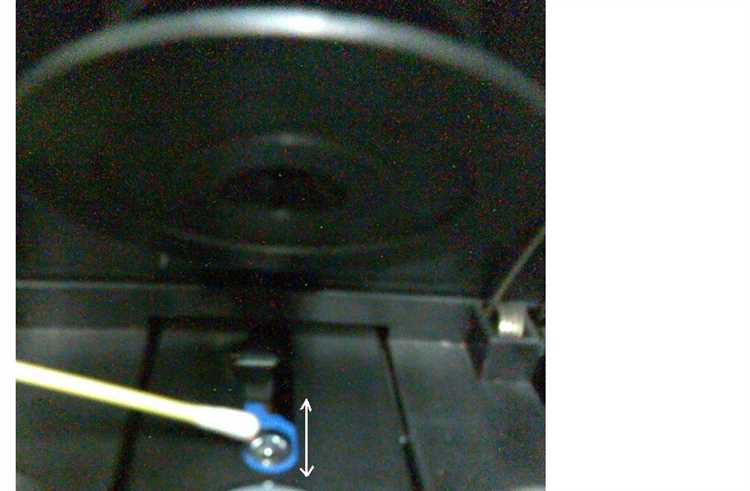
Step 5: Dampen a cotton swab with isopropyl alcohol
To clean the lens of your CD player, you will need to dampen a cotton swab with isopropyl alcohol. Isopropyl alcohol is an effective cleaner for removing dirt and debris from delicate electronic components.
First, ensure that your CD player is turned off and unplugged from any power source. Then, locate the lens of your CD player, which is typically a small circular component near the center of the player.
Take a cotton swab and dampen it with a small amount of isopropyl alcohol. It is important to use a small amount to avoid excess liquid dripping into the CD player. A few drops should be sufficient.
Gently rub the dampened cotton swab over the lens in a circular motion. Be careful not to apply too much pressure, as this could damage the lens. The isopropyl alcohol will help to dissolve any dirt or grime that may be on the lens.
Once you have cleaned the lens with the dampened cotton swab, use a dry cotton swab or lint-free cloth to gently remove any remaining moisture. Make sure the lens is completely dry before closing the CD player.
Remember to handle the CD player with care throughout the cleaning process to avoid causing any damage.
Step 6: Gently clean the lens using the dampened cotton swab
Once you have prepared your cleaning solution and gathered your supplies, it’s time to clean the lens of your CD player. Remember to always handle the lens with care as it is delicate and can easily be damaged.
Follow these easy steps to clean the lens:
- Take the dampened cotton swab and gently rub it over the lens in a circular motion. Be careful not to press too hard or scrub aggressively as this may cause damage to the lens.
- Continue to gently clean the lens until any dust or dirt is removed. You may need to use a fresh cotton swab or turn it to a clean section to avoid spreading dirt around.
- If there are any stubborn stains or residues on the lens, you can use a little bit of isopropyl alcohol on the cotton swab to help dissolve them. However, be cautious when using alcohol as it may damage some types of lenses.
- Once you are satisfied with the cleaning, use a clean cotton swab or a soft cloth to remove any excess moisture from the lens.
Remember to be patient and gentle when cleaning the lens. Rushing or using excessive force can cause permanent damage.
After cleaning the lens, you can reassemble the CD player and reconnect it to your audio system. With a clean lens, you should notice improved performance and fewer skipping or audio playback issues.
Step 7: Allow the lens to air dry completely
After cleaning the lens, it’s important to allow it to air dry completely before reassembling your CD player. This step is crucial to ensure that no moisture or cleaning solution remains on the lens, as it could cause damage or malfunctions.
To air dry the lens:
- Gently shake the CD player to remove any excess moisture.
- Place the CD player in a dry and well-ventilated area.
- Avoid direct exposure to sunlight or heat sources, as they can lead to discoloration or warping.
- Leave the CD player undisturbed for at least 1-2 hours, or until the lens is completely dry.
It’s important to note that using a hairdryer or any other source of heat to speed up the drying process is not recommended as it can cause damage to the lens or other components of the CD player.
Once the lens is completely dry, you can safely reassemble your CD player and enjoy your favorite discs without any issues.
Step 8: Power on and test your CD player
After cleaning the lens and reassembling your CD player, it’s time to power it on and test its functionality. Here’s how you can do it:
- Make sure the CD player is plugged into a power source.
- Press the power button to turn on the CD player.
- Wait for the CD player to initialize and read the disc.
- Insert a clean and undamaged CD into the player.
- Close the CD tray or slot properly.
- Press the play button to start playing the CD.
If the CD player successfully plays the CD without any issues, congratulations! Your cleaning process was successful, and your CD player is ready to use again.
However, if the CD player still experiences problems, such as skipping, freezing, or not recognizing the discs, you may need to repeat the cleaning process or consult a professional for further assistance. It’s also possible that your CD player may have a mechanical or electronic problem that requires repair or replacement.
Remember to avoid using damaged or scratched CDs that may cause issues with playback. Additionally, regularly cleaning your CD player and its lens can help prevent dirt and dust buildup, ensuring optimal performance and longevity.
FAQ:
What is the best way to clean the lens on a CD player?
The best way to clean the lens on a CD player is to use a CD lens cleaning kit. These kits usually come with a cleaning disc and a cleaning fluid. Simply follow the instructions provided with the kit to properly clean the lens.
Can I use a regular cleaning cloth to clean the lens on my CD player?
No, it is not recommended to use a regular cleaning cloth to clean the lens on a CD player. Regular cleaning cloths can leave behind lint or other particles which can further damage the lens. It is best to use a CD lens cleaning kit for proper cleaning.
How often should I clean the lens on my CD player?
The frequency of cleaning the lens on a CD player depends on how often you use it and the environment it is in. If you notice that the player is not reading discs properly or if there are visible dirt or smudges on the lens, then it is a good indication that it needs to be cleaned.
What should I do if my CD player is not reading discs properly?
If your CD player is not reading discs properly, it may be due to a dirty lens. In this case, you can try cleaning the lens using a CD lens cleaning kit. If cleaning the lens does not solve the issue, then there may be a problem with the player itself and it may require professional repair.
Can I use alcohol or water to clean the lens on my CD player?
No, it is not recommended to use alcohol or water to clean the lens on a CD player. These liquids can damage the lens and other internal components of the player. It is best to use a CD lens cleaning kit specifically designed for this purpose.
Is it necessary to open up the CD player to clean the lens?
No, it is not necessary to open up the CD player to clean the lens. Cleaning the lens can be done using a CD lens cleaning kit, which is a safer and easier method. Opening up the player can be complicated and may void any warranties or cause further damage if not done correctly.