
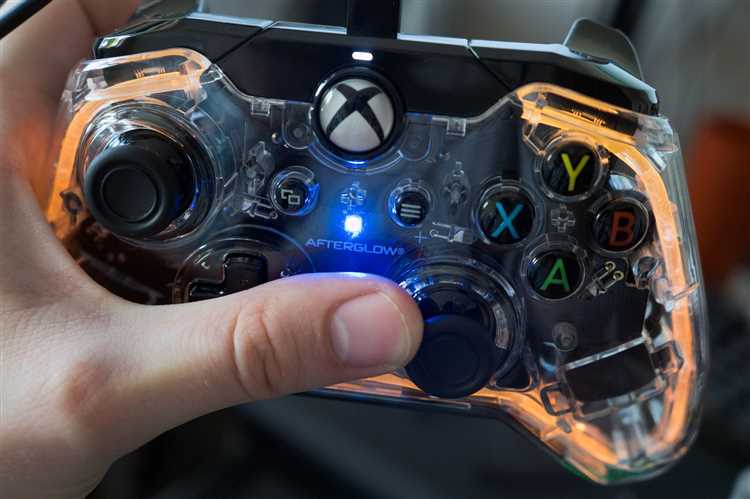
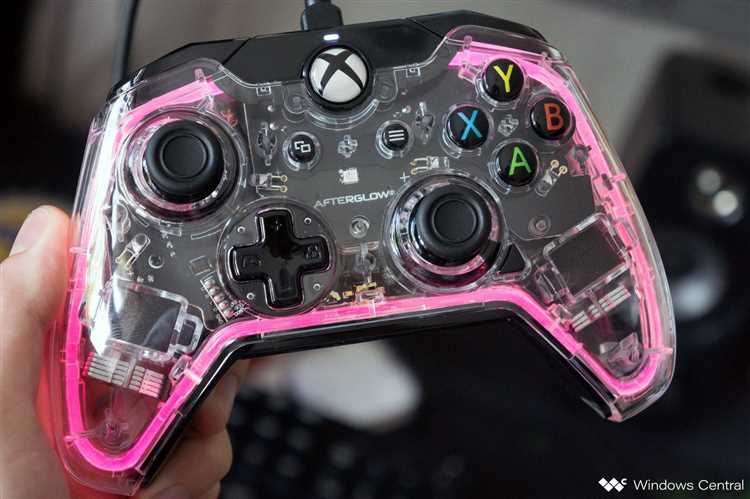
Do you want to make your Afterglow Xbox One controller stand out from the rest? One simple way to do that is by changing its color. With the rise of customization options in gaming, changing the color of your controller has become a popular trend. In this step-by-step guide, we will walk you through the process of changing the color of your Afterglow Xbox One controller.
Step 1: Gather the necessary tools and materials.
Before you start, make sure you have all the tools and materials you need. You will need a small screwdriver set, a plastic opening tool, a heat gun or hairdryer, a replacement shell in your desired color, and a clean workspace. You can find replacement shells online or at gaming accessory stores.
Step 2: Prepare your workspace.
Choose a clean and well-lit workspace where you can comfortably work on your controller. Clear any clutter and make sure you have enough space to lay out the parts of your controller without them getting lost or damaged.
Step 3: Disassemble the controller.
Using the small screwdriver set, carefully remove the screws on the back of the controller. Take your time and keep track of the screws as you remove them. Once the screws are removed, use the plastic opening tool to carefully pry the controller open. Be gentle to avoid damaging any internal components.
TIP: Take note of how the controller is assembled as you disassemble it. This will make it easier to put it back together later.
Step 4: Remove the old shell.
Once the controller is open, you will see the old shell. Use the plastic opening tool to carefully lift and remove the old shell from the controller. Be cautious of any ribbons or cables that may be attached to the shell, and gently disconnect them if necessary.
Step 5: Install the new shell.
Take the replacement shell in your desired color and carefully align it with the controller. Gently press it in place, making sure all the buttons and ports line up properly. If any ribbons or cables were disconnected in the previous step, reconnect them to the new shell.
Step 6: Reassemble the controller.
Carefully put the controller back together, following the same steps you took to disassemble it. Make sure all the screws are tightened securely but not too tight to avoid damaging the plastic. Double-check that everything is aligned properly before moving on to the next step.
Congratulations! You have successfully changed the color of your Afterglow Xbox One controller. Now you can enjoy gaming with a personalized and eye-catching controller that reflects your unique style and personality.
Preparation for Changing the Controller Color
Before you begin the process of changing the color of your Afterglow Xbox One controller, you will need to gather a few materials and make sure you have a clean workspace. Follow these steps to ensure you are prepared:
- Materials: Gather the following materials before you begin:
- A new controller shell in your desired color
- A small screwdriver
- A clean cloth
- Isopropyl alcohol or any other suitable cleaner
- Tweezers (optional)
- Clean workspace: Find a well-lit and clean space where you can work comfortably. It is important to have ample space to lay out all the components of your controller and avoid losing any small parts during the process.
- Backup your controller: If you have any saved files or profiles on your controller, it is advisable to back them up on your Xbox One console or PC. This will prevent any loss of data in case anything goes wrong during the color-changing process.
- Disconnect the controller: Disconnect the controller from any power source, such as the Xbox One console or PC, and remove any batteries or power packs. This will ensure your safety and prevent any accidental damage to the controller or the color-changing process.
- Prepare the controller: Lay out the controller and remove any extra accessories, such as thumbsticks, D-pads, or adhesive button covers. This will make it easier to work on the controller’s shell without any interference.
By following these steps and preparing properly, you will ensure a smooth and efficient process of changing the color of your Afterglow Xbox One controller.
Gathering the Necessary Equipment
Before you start changing the color of your Afterglow Xbox One controller, you will need to gather the necessary equipment. Here’s a list of what you’ll need:
- Afterglow Xbox One controller
- Screwdriver
- Replacement faceplate
- Replacement buttons
- Plastic prying tool
- Cotton swabs
- Rubbing alcohol
Make sure you have all of these items before you begin the process. Having everything prepared will make the color-changing process smoother and more efficient.
Disassembling Your Xbox One Controller
To change the color of your Afterglow Xbox One controller, you will need to disassemble it first. Follow these steps to take apart your controller:
- Prepare a clean and spacious working area. A clutter-free table or desk is ideal for this task.
- Unplug your Xbox One controller from any connected devices or cables.
- Turn the controller over and locate the battery pack on the back.
- Remove the battery pack by sliding it downwards and pulling it away from the controller.
- Use a small Phillips-head screwdriver to remove the five small screws on the back of the controller. Set the screws aside in a safe place.
- Once the screws are removed, carefully take off the back cover of the controller. Start from the battery pack area and gently pry the cover off using your fingers or a plastic opening tool.
- You will now have access to the inner components of the controller. Take note of the placement of the buttons, triggers, and other features to ensure correct reassembly.
- Remove any additional screws securing the circuit board or other components.
- Disconnect any cables or connectors linking the circuit board to the front housing of the controller.
- After disconnecting all components, lift the circuit board out of the front housing. Be gentle to avoid damaging any fragile parts.
With the controller disassembled, you can now proceed with customizing the color of your Afterglow Xbox One controller. Remember to keep track of all the screws and components you remove to ensure a successful reassembly process.
Removing the Shell from the Controller
To change the color of your Afterglow Xbox One controller, you’ll need to remove the shell. Follow these steps to safely remove the shell from your controller:
- Turn off your Xbox One console and unplug the controller from any power source.
- Flip the controller over so that the back is facing up.
- Locate the small screw on the back of the controller near the top. Use a small Phillips-head screwdriver to unscrew it.
- Once the screw is removed, gently pry the back panel away from the front panel of the controller. Start at one corner and work your way around, using a plastic opening tool or your fingers. Be careful not to force or bend the plastic.
- As you separate the back panel, you may need to disconnect the battery connector cable and any other cables that may be attached to the back panel. Use a plastic opening tool or your fingers to carefully disconnect them.
- Once all the cables are disconnected, the back panel should come off easily.
With the shell removed, you can now proceed to customize your controller by changing the color of the different components. Make sure to handle the internal components with care and follow any additional steps or safety precautions provided by the manufacturer.
Choosing and Applying the New Color
Once you have gathered all the necessary tools and materials and familiarized yourself with the disassembly process, it is time to choose and apply the new color for your Afterglow Xbox One controller. Here is a step-by-step guide:
- Research and choose the color you want. There are various options available, ranging from solid colors to patterns and designs. Consider your personal preferences and the desired aesthetic for your controller.
- Prepare the controller’s parts for painting. Make sure all surfaces are clean and free from any dirt, grease, or dust. Use isopropyl alcohol and a microfiber cloth to thoroughly clean the surfaces. This step is crucial to ensure proper adherence of the new paint.
- Apply a primer coat to the controller’s parts. Using a spray primer specifically designed for plastic surfaces, evenly coat all the parts that will be painted. Allow the primer to dry completely according to the manufacturer’s instructions. This will help the new color adhere better and provide a smoother finish.
- Choose your paint type. Depending on your preferences and the desired outcome, you can choose between acrylic paint or spray paint. Acrylic paint provides more control and precision but may require multiple coats, while spray paint offers quicker and more even coverage.
- Apply the first coat of paint. If using acrylic paint, use a small brush or sponge to apply an even coat to the controller’s parts. If using spray paint, hold the can about 6-8 inches away from the parts and apply the paint in light, sweeping motions. Allow the first coat to dry completely before applying additional coats.
- Apply additional coats if needed. Depending on the color and coverage you want to achieve, you may need to apply multiple coats of paint. Follow the manufacturer’s instructions for drying times between coats.
- Allow the final coat to dry completely. Once you are satisfied with the color and coverage, allow the final coat to dry for the recommended time period stated by the paint manufacturer. This will ensure that the paint is fully cured and will not easily chip or peel.
- Reassemble the controller. Once the paint is dry, carefully reassemble all the parts using the guide you created during the disassembly process. Make sure all screws and components are securely fastened.
Once you have completed these steps, you should have an Afterglow Xbox One controller with a new color of your choosing. Enjoy your personalized gaming experience!
Reassembling Your Xbox One Controller
Once you have finished painting and allowing the paint to dry, it’s time to reassemble your Xbox One controller. Follow the steps below to ensure it is properly put back together:
- Take the front and back shell of the controller and align them together.
- Gently press the two shells together, making sure that all the buttons and components fit into their respective slots.
- Once the shells are aligned, start by tightening the screws in a diagonal pattern to ensure even pressure across the controller.
- Continue tightening the screws until they are all securely fastened. Be careful not to over-tighten, as this can strip the threads.
- Next, replace the battery pack into its compartment. Make sure it is properly aligned and securely in place.
- Reattach the battery cover, sliding it into place and pressing down until it clicks into position.
- Now, take the thumbsticks and align them with their corresponding slots on the controller.
- Push down on each thumbstick until it clicks into place.
- Finally, reconnect the Xbox One controller to your console using the USB cable and test that all buttons and functions are working properly.
Congratulations, you have successfully reassembled your Xbox One controller after changing its color! Enjoy your new customized controller for your gaming sessions.
Testing the Newly Colored Controller
Now that you have successfully changed the color of your Afterglow Xbox One controller, it’s time to test it out! Follow the steps below to ensure that the controller is working properly with your Xbox One console:
- Connect the newly colored controller to your Xbox One console using a micro USB cable.
- Press the Xbox button on the controller to turn it on.
- The Xbox button should light up, indicating that the controller is connected.
- Using the buttons and joysticks on the controller, navigate through the Xbox One dashboard and menus.
- Test the buttons and joysticks to make sure they are functioning correctly.
- If any buttons or joysticks are not working properly, double-check the color change process to ensure that everything was done correctly.
If the controller is working as expected, congratulations! You have successfully changed the color of your Afterglow Xbox One controller and it is now ready to use. Enjoy gaming with your custom-colored controller!
Final Tips and Recommendations
Changing the color of your Afterglow Xbox One controller can be a fun and rewarding project. Here are some final tips and recommendations to ensure a successful modification:
- Prepare your workspace: Set up a clean, well-lit area to work in. Make sure you have all the necessary tools and supplies within reach.
- Read the instructions: Before starting the modification, thoroughly read the instructions provided with the color kit. Familiarize yourself with the process and any safety precautions.
- Take your time: Changing the color of your controller requires patience. Rushing through the process can lead to mistakes or a less-than-desirable result. Take breaks if needed to maintain focus and accuracy.
- Follow the steps: Carefully follow the step-by-step guide provided with the color kit. Each instruction is important for achieving the desired outcome.
- Test the buttons and triggers: After completing the modification, test all the buttons, triggers, and joysticks to ensure they are functioning correctly. Make any necessary adjustments or refinements if needed.
- Show off your creation: Once you’ve successfully changed the color of your Afterglow Xbox One controller, show it off to your friends and fellow gamers! Enjoy the personalized look and feel of your unique controller.
Remember, modifying your controller may void any warranties, so proceed with caution. If you’re unsure or uncomfortable with the process, consider seeking assistance from a professional or experienced modder.
FAQ:
Can I change the color of my Afterglow Xbox One controller?
Yes, you can change the color of your Afterglow Xbox One controller using a variety of methods.
What are the different methods of changing the color of the Afterglow Xbox One controller?
There are several methods you can use to change the color of your Afterglow Xbox One controller. These include using vinyl decals, painting the controller, or using colored LED lights.
How do I change the color of my Afterglow Xbox One controller using vinyl decals?
To change the color of your Afterglow Xbox One controller using vinyl decals, you will need to purchase a set of decals in the color or design you want. Then, carefully apply the decals to the different parts of the controller, following the instructions provided with the decals.
Can I paint my Afterglow Xbox One controller to change its color?
Yes, you can paint your Afterglow Xbox One controller to change its color. However, it is important to take precautions and follow the proper steps to ensure a smooth and long-lasting paint job. This includes thoroughly cleaning the controller, sanding it to create a smooth surface, applying a primer, and using quality spray paint designed for plastic surfaces.
How can I change the color of the LED lights on my Afterglow Xbox One controller?
To change the color of the LED lights on your Afterglow Xbox One controller, you will need to disassemble the controller and locate the LED lights. Depending on the specific model of your controller, the LED lights may be located on the front or back of the controller. Once you have located the LED lights, you can either replace them with lights of a different color or use colored film or gel covers to change their color.