
If you are looking to uninstall CyberLink PowerDirector from your computer, you have come to the right place. Whether you no longer need the program or you want to free up space on your device, the process can be done in just a few simple steps. In this article, we will guide you through the process of uninstalling CyberLink PowerDirector, ensuring a smooth and hassle-free experience.
Step 1: To begin, navigate to the Control Panel on your computer. You can do this by clicking on the Start menu and then selecting Control Panel from the list.
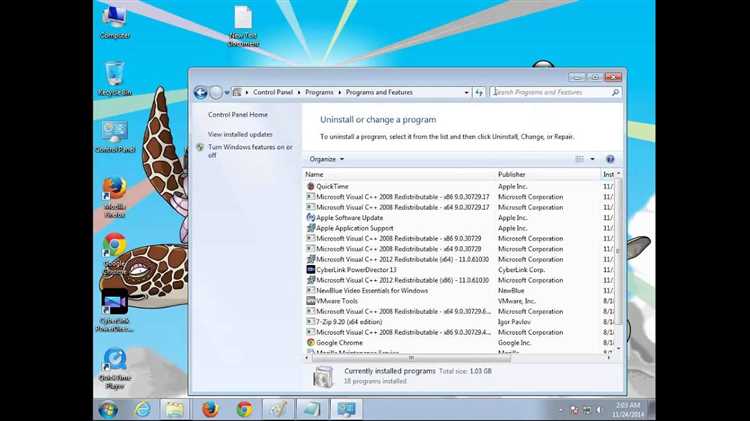
Step 2: Once in the Control Panel, locate the Programs or Programs and Features option. Click on this option to open the list of installed programs on your computer.
Step 3: In the list of installed programs, find and select CyberLink PowerDirector. You can use the search bar at the top of the list to quickly locate the program. Once you have found it, click on it to select it.
Step 4: With CyberLink PowerDirector selected, click on the Uninstall or Remove button. This will initiate the uninstallation process.
Step 5: Follow the on-screen prompts to complete the uninstallation of CyberLink PowerDirector. You may be asked to confirm your decision or provide additional information during this process.
Once the uninstallation process is complete, CyberLink PowerDirector will be removed from your computer. Make sure to restart your device to fully remove any remaining files or configurations related to the program. Now you can enjoy the extra space on your computer and use it for other purposes.
Step 1: Prepare for Uninstalling
Before you begin the uninstallation process for CyberLink PowerDirector, it is important to make sure you have everything prepared. Follow the steps below to ensure a smooth uninstallation process:
- Close CyberLink PowerDirector: Make sure that the program is not running in the background. Close all instances of CyberLink PowerDirector before proceeding with the uninstallation.
- Backup your projects: If you have any ongoing projects or files saved in CyberLink PowerDirector, it is recommended to create a backup before uninstalling the software. This way, you can restore your projects later if needed. You can simply copy the project files to a separate folder or an external storage device.
- Save any custom settings: If you have customized any settings or preferences within CyberLink PowerDirector, take note of them or take screenshots for reference later. This will allow you to easily restore your settings after reinstalling the software, if desired.
- Check for updates: Visit the CyberLink website or use the program’s built-in update checker to ensure that you have the latest version of CyberLink PowerDirector installed. Updating to the latest version before uninstallation can help avoid potential issues during the process.
By following these steps, you will be well-prepared for the uninstallation process of CyberLink PowerDirector. Taking the time to close the program, backup your projects, save your custom settings, and check for updates will make the overall process smoother and more efficient.
Step 2: Close CyberLink PowerDirector
Before you uninstall CyberLink PowerDirector, it is important to make sure that the program is not running. Closing the software will ensure that all its processes are terminated and any associated files can be removed during the uninstallation process.
Follow these steps to close CyberLink PowerDirector:
- Open the CyberLink PowerDirector program if it is currently running.
- Click on the “File” menu located at the top left corner of the program’s window.
- From the drop-down menu, select “Exit” or “Close” to close the program.
Alternatively, you can use the keyboard shortcut Alt + F4 to close the active program window.
Once you have closed CyberLink PowerDirector, you can proceed to the next step to uninstall the software from your computer.
Step 3: Access Control Panel
Accessing the Control Panel on your Windows computer is an essential step in uninstalling CyberLink PowerDirector. The Control Panel provides you with the necessary tools to manage and remove software from your system. Follow the steps below to access the Control Panel:
- Click on the Start Menu located at the bottom-left corner of your screen.
- Type “Control Panel” in the search bar and click on the Control Panel app when it appears in the search results.
- Alternatively, you can access the Control Panel by clicking on the Start Menu, then navigating to the “Settings” icon (which looks like a gear), and finally clicking on “Control Panel” from the dropdown menu.
Once you have accessed the Control Panel, you are ready to proceed to the next step of uninstalling CyberLink PowerDirector.
Step 4: Locate CyberLink PowerDirector
Once you have accessed the Windows Control Panel, you will need to locate CyberLink PowerDirector in the list of installed programs. Here’s how:
- Scroll through the list of programs until you find “CyberLink PowerDirector”.
- If the list is long, you can use the search bar at the top right corner of the Control Panel window to search for “CyberLink PowerDirector”.
- Click on “CyberLink PowerDirector” to select it.
Make sure to double-check that you have selected the correct program before proceeding to uninstall it. It’s always a good idea to verify the program’s name and publisher to ensure you are removing the right application.
Step 5: Uninstall CyberLink PowerDirector
Uninstalling CyberLink PowerDirector is a straightforward process. Follow the steps below to remove the software from your computer:
- Close the CyberLink PowerDirector program if it is currently open.
- Click on the “Start” button in the bottom left corner of your screen.
- Select “Control Panel” from the list of options.
- In the Control Panel window, click on “Uninstall a program” or “Programs and Features,” depending on your version of Windows.
- A list of installed programs will appear. Locate and click on “CyberLink PowerDirector.”
- Click on the “Uninstall” button at the top of the list, or right-click on “CyberLink PowerDirector” and select “Uninstall.”
- Follow the on-screen prompts to uninstall the software. You may be asked to confirm the uninstallation and/or provide administrator permissions.
- Wait for the uninstallation process to complete. This may take a few moments.
- Once the uninstallation is finished, you may be prompted to restart your computer. If so, go ahead and restart to complete the removal process.
Congratulations! You have successfully uninstalled CyberLink PowerDirector from your computer.
Step 6: Remove Leftover Files and Folders
After completing the uninstallation process of CyberLink PowerDirector, it is important to remove any leftover files and folders to ensure a clean and complete removal of the software. Failure to remove these leftovers may lead to issues or conflicts with other programs in the future.
Here are the steps to remove leftover files and folders:
- Open the File Explorer: Right-click the “Start” button and select “File Explorer” from the context menu.
- Navigate to the installation directory: In the File Explorer window, go to the location where CyberLink PowerDirector was installed. The default installation directory is usually “C:\Program Files\CyberLink\PowerDirector”.
- Delete the PowerDirector folder: Right-click the “PowerDirector” folder and select “Delete” from the context menu. Confirm the deletion when prompted.
- Delete any remaining files: Look for any leftover files related to CyberLink PowerDirector in the installation directory. These files might include executables, DLLs, or configuration files. Select the files and press the “Delete” key or right-click and choose “Delete” from the context menu.
- Empty the Recycle Bin: After deleting the files and folders, empty the Recycle Bin to permanently remove them from your computer.
By following these steps, you can ensure that all the leftover files and folders of CyberLink PowerDirector have been removed, leaving your system clean and free from any remnants of the software.
Step 7: Clean Up Registry Entries
After uninstalling CyberLink PowerDirector, there may still be some leftover registry entries in your Windows Registry. These entries can take up space and potentially cause errors or conflicts with other software.
To clean up the registry entries related to CyberLink PowerDirector, follow these steps:
- Open the Registry Editor: Press the Windows key + R on your keyboard to open the Run dialog. Type “regedit” and press Enter.
- Backup the registry: Before making any changes to the registry, it is recommended to back it up. To do this, click on “File” in the Registry Editor toolbar, then select “Export”. Choose a location to save the backup file and provide a name for it.
- Navigate to the PowerDirector registry entries: In the Registry Editor, navigate to the following location: HKEY_LOCAL_MACHINE\SOFTWARE\CyberLink.
- Delete the PowerDirector registry entries: Right-click on the “CyberLink” folder and select “Delete”. Confirm the deletion if prompted.
- Perform a search: Click on “Edit” in the Registry Editor toolbar, then select “Find”. Type “PowerDirector” and click “Find Next”. Delete any registry entries related to PowerDirector that are found. Press F3 to continue searching for more entries, and repeat the deletion process until no more entries are found.
- Close the Registry Editor: Once you have deleted all the PowerDirector registry entries and performed the necessary searches, close the Registry Editor.
By following these steps, you can ensure that all registry entries related to CyberLink PowerDirector are removed, leaving your system clean and free of any leftover traces of the software.
Step 8: Restart Your Computer
After successfully uninstalling CyberLink PowerDirector, it is recommended to restart your computer. Restarting your computer will ensure that any remaining files or configurations related to the software are completely removed and will help maintain the overall stability of your system.
To restart your computer, follow these steps:
- Click on the “Start” button in the bottom left corner of your screen.
- Select the “Power” option.
- Click on “Restart”.
Once your computer has restarted, it is always a good idea to check if the software has been successfully uninstalled and there are no leftover files or settings. You can do this by checking the list of installed programs in the Control Panel or using a reliable uninstaller software. If you still find any remnants of CyberLink PowerDirector, you may need to repeat the previous steps or consider using a dedicated uninstaller tool to ensure complete removal.
FAQ:
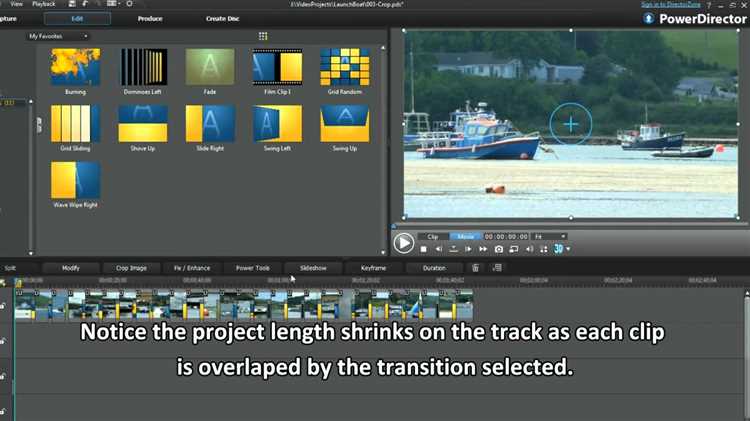
What is CyberLink PowerDirector?
CyberLink PowerDirector is a video editing software that allows users to create and edit professional-quality videos.
Can I uninstall CyberLink PowerDirector without any issues?
Uninstalling CyberLink PowerDirector should not cause any issues with your computer. However, make sure to save any unfinished projects or important files before uninstalling, as they may be deleted during the process.
Is there an alternative video editing software I can use instead of CyberLink PowerDirector?
Yes, there are several alternative video editing software options available. Some popular ones include Adobe Premiere Pro, Final Cut Pro, and Sony Vegas Pro. You can choose a software based on your specific needs and preferences.
Can I reinstall CyberLink PowerDirector after uninstalling it?
Yes, you can reinstall CyberLink PowerDirector after uninstalling it. You can download the software from the official CyberLink website or use the installation disc if you have it. Make sure to follow the installation instructions provided to properly reinstall the software.
Will uninstalling CyberLink PowerDirector remove all of my video projects?
Uninstalling CyberLink PowerDirector will not automatically remove your video projects. However, it is recommended to manually back up your projects before uninstalling, as they may be deleted if they are saved within the program’s folder.