
Sending a fax may seem outdated in today’s digital age, but there are still many situations where faxing is a necessity. Whether you need to send important documents, sign contracts, or communicate with businesses that prefer fax, it’s essential to know how to fax from a Mac.
In this step-by-step guide, we’ll show you how to fax from your Mac for free, using just your computer and an internet connection. You won’t need to invest in a fax machine or pay for a fax service. With the right tools and knowledge, you can easily send faxes from the comfort of your own home or office.
First, we’ll explore the software options available for faxing on a Mac. There are several faxing apps and services that offer different features and capabilities. We’ll discuss their pros and cons, as well as how to set them up and use them effectively.
Next, we’ll guide you through the process of sending a fax using your Mac. We’ll explain how to scan your documents, convert them into a compatible format, and attach them to your fax. We’ll also provide tips and tricks for ensuring that your fax is sent successfully and received by the intended recipient.
By the end of this guide, you’ll have all the information you need to fax from your Mac for free. You’ll save time, money, and resources by eliminating the need for a physical fax machine or expensive faxing services. So, let’s get started and learn how to fax from your Mac with ease!
Choosing the Right Fax App for Mac
When it comes to faxing from a Mac, there are several fax apps to choose from. Here are some key factors to consider when selecting the right fax app for your needs:
- Compatibility: Ensure that the fax app you choose is compatible with your Mac’s operating system version.
- Features: Look for essential features such as the ability to send and receive faxes, cover page options, file format support, and document signing capabilities.
- User-Friendliness: Opt for a fax app that has an intuitive interface and easy-to-use features, allowing for a smooth faxing experience.
- Security: Prioritize a fax app that offers secure transmission and storage of your faxed documents, protecting sensitive information.
- Customer Support: Check if the fax app provides reliable customer support, including troubleshooting assistance and response times.
- Pricing: Consider the cost and pricing structure of the fax app, including any additional charges for extra features or sending faxes internationally.
To narrow down your options, you can research and read reviews about different fax apps for Mac. Additionally, you can try out free trial versions of various apps to test their features and usability before committing to a specific one.
| Fax App | Compatibility | Features | User-Friendliness | Security | Customer Support | Pricing |
|---|---|---|---|---|---|---|
| FaxZero | Compatible with Mac OS X and macOS | Send faxes for free with some limitations | Simple and straightforward | Not specified | Online support only | Free with ad options or pay per fax |
| Microsoft Fax | Compatible with macOS | Send faxes using a Microsoft account with a subscription plan | Integration with Microsoft Office apps | Transmitted faxes secured with encryption | Online and phone support | Monthly subscription starting at $1.99 |
| Efax | Compatible with macOS | Send and receive faxes with a virtual fax number | User-friendly interface | Secure online storage and transmission | 24/7 phone and online support | Plans starting at $16.95 per month |
By considering these factors and reviewing different fax app options, you can choose the right fax app for your Mac that meets your specific needs and preferences.
Setting Up Your Fax Account
Before you can start faxing from your Mac for free, you’ll need to set up a fax account. Follow these steps to get started:
- Choose a Fax Service Provider: There are several online fax service providers that offer free faxing options. Research and compare different providers to find the one that best fits your needs.
- Create an Account: Once you’ve selected a fax service provider, visit their website and sign up for an account. You may need to provide some personal information, such as your name, email address, and phone number.
- Verify Your Account: After signing up, you may be required to verify your account. This could involve clicking a verification link sent to your email address or entering a verification code sent to your phone number.
- Choose a Fax Number: Some fax service providers allow you to choose your own fax number, while others assign one to you. Consider whether you need a local or toll-free number and select accordingly.
- Set up Payment: Depending on the service provider, you may need to set up a payment method for additional features or services. Check the pricing plans and choose the one that suits your budget.
Once you have completed these steps, you will have a fully set-up fax account ready to send and receive faxes from your Mac.
Scanning Documents for Faxing
Scanning paper documents is an essential step in faxing them from your Mac. By converting physical documents into digital files, you can easily send them through a fax service. Here is a step-by-step guide to help you scan your documents for faxing.
- Prepare your documents: Remove any staples, clips, or bindings from your documents. Make sure they are clean and free from any wrinkles or folds that may affect the quality of the scanned images.
- Connect your scanner: Ensure that your scanner is properly connected to your Mac. Use a USB cable or connect via Wi-Fi if your scanner supports wireless connection.
- Open the scanning software: Launch the scanning software on your Mac. This software typically comes pre-installed with your scanner or can be downloaded from the manufacturer’s website.
- Adjust scanning settings: Depending on the scanning software, you may need to adjust various settings such as resolution, color mode, and file format. For faxing, it is recommended to use a black and white or grayscale mode to reduce file size.
- Place documents in the scanner: Position the documents face-down on the scanner bed. Align them properly and ensure they are straight to avoid skewed or distorted scans.
- Preview the scan: Use the scanning software to preview the scanned image. Make any necessary adjustments to cropping or orientation as needed.
- Scan the documents: Once you are satisfied with the preview, initiate the scan process. The scanner will capture the image and save it as a digital file on your Mac.
- Save the scanned files: Choose a location on your Mac to save the scanned files. It is recommended to create a dedicated folder for scanned documents to keep them organized.
- Repeat for multiple pages: If you have multiple pages to scan, repeat the process for each page. Ensure that the scanned files are named and saved sequentially for easy identification.
Once you have scanned all the necessary documents, you can proceed to send them through a fax service using the steps outlined in the previous sections.
Creating a Fax Cover Sheet
When sending a fax, it is important to include a cover sheet that provides important information about the recipient and the nature of the fax. Follow these steps to create a professional fax cover sheet:
- Open a blank document using a word processing program such as Microsoft Word or Pages.
- Add a header to your cover sheet by typing the word “Fax” followed by a colon and the recipient’s name or organization. Make sure to use a bold font to make it stand out.
- Include your contact information by adding your name, job title, company name, phone number, and email address. This makes it easy for the recipient to contact you if needed.
- Add the recipient’s contact information below your contact information. Include their name, job title, company name, phone number, and fax number. Make sure to double-check that the fax number is correct.
- Write a subject line that briefly describes the content of the fax. This helps the recipient quickly understand the purpose of the fax.
- Include a date and time stamp to indicate when the fax is being sent. This is helpful for record-keeping purposes.
- Write a brief message introducing the fax and explaining any important details. Keep it concise and to the point.
- Add any additional notes or instructions that may be necessary. For example, if the recipient needs to sign and return a document, make sure to include instructions for doing so.
- Proofread the cover sheet to ensure there are no errors or typos. This helps to maintain a professional image.
- Print the cover sheet and attach it to the front of your fax document. Make sure it is aligned properly and clearly visible.
Following these steps will help you create a comprehensive and professional fax cover sheet that includes all the necessary information for the recipient. Remember to tailor the cover sheet to fit your specific needs and the requirements of the recipient.
Composing Your Fax
Once you have downloaded and installed the fax software on your Mac, you are ready to start composing your fax:
- Open the fax software: Launch the fax software on your Mac.
- Create a new fax: Click on the “New Fax” button or go to the “File” menu and select “New Fax” to start composing a new fax.
- Enter the recipient’s information: In the recipient field, enter the fax number or the contact details of the recipient. Make sure to include the country code if applicable.
- Compose your message: Type your fax message in the body section of the software. You can use the formatting options to customize the font, size, and alignment of the text.
- Add attachments (if necessary): If you need to send any attachments, click on the “Add Attachment” button or go to the “File” menu and select “Attach File.” Choose the file you want to include with your fax.
- Review and edit: Before sending the fax, review your message and attachments to ensure everything is accurate and complete. Make any necessary edits.
- Send the fax: Once you are satisfied with your fax, click on the “Send” button to initiate the sending process. Depending on the software you are using, you may need to confirm the sending of the fax.
Following these steps will help you compose and send your fax from your Mac for free using fax software. Make sure to check the status of your fax to ensure it was successfully delivered. Remember to double-check the recipient’s fax number and other details to minimize the risk of errors.
Adding Attachments to Your Fax
When sending a fax, it may be necessary to include additional documents or files as attachments. Follow these steps to add attachments to your fax:
- Choose your preferred file format: Before attaching any files to your fax, it’s important to consider the file format. Most fax services support common file formats such as PDF, DOC, XLS, and JPG. Ensure that the file you want to attach is in one of these formats.
- Locate the file you want to attach: Open the folder or application where the file is stored. You can usually find files in your “Documents” or “Downloads” folder. If the file is located in a cloud storage service like Dropbox or Google Drive, make sure it’s synced to your computer.
- Prepare the file for attachment: If your file contains multiple pages or documents, consider merging them into a single file to simplify the faxing process. You can use software like Adobe Acrobat or online tools to combine files into one PDF.
- Click on the “Attach” or “Choose File” button: In the fax software or online service you’re using, look for an “Attach” or “Choose File” button. This button is usually located in the compose or attach section of the fax interface.
- Select the file you want to attach: A file explorer window will open, allowing you to navigate to the location where your file is stored. Select the file and click “Open” to attach it to your fax.
- Verify the attachment: After attaching the file, double-check to ensure that it appears correctly in the list of attachments. Some fax services allow you to preview the attached file before sending the fax.
- Proceed with the faxing process: Once you have attached all the necessary files, proceed with the rest of the faxing process as usual. Enter the recipient’s fax number, fill in any required fields, and review the contents of your fax before sending it.
By following these steps, you can easily add attachments to your fax and ensure that all the necessary files are delivered to the recipient as intended.
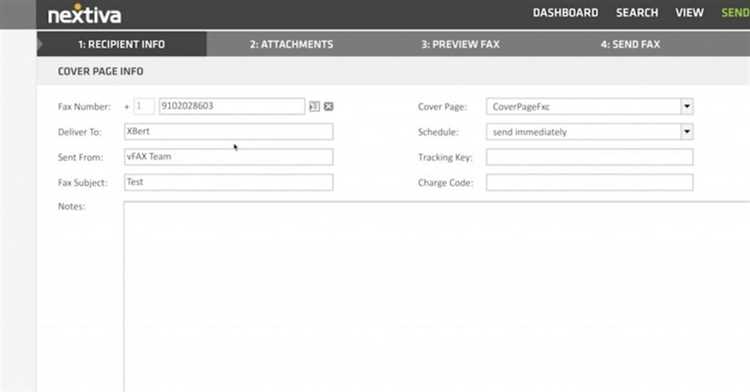
Sending Your Fax
Once you have prepared your fax document on your Mac, you can now proceed to send the fax using the Fax software. Follow these steps:
- Open the Fax software on your Mac.
- Click on the “New Fax” or “Send Fax” button to start a new fax.
- Enter the recipient’s fax number in the designated field. Make sure to include the country code if sending internationally.
- Attach the document you want to fax. You can do this by either dragging and dropping the file into the Fax software or by clicking on the “Attach” or “Choose File” button.
- Review the fax details and make any necessary changes, such as the sender name or subject.
- If needed, add additional documents to the fax by clicking on the “Attach” or “Choose File” button again.
- Once you are satisfied with the fax details, click on the “Send” or “Start” button to send the fax.
- Wait for the Fax software to send the fax. You may see a progress bar indicating the status of the fax transmission.
- After the fax has been successfully sent, you can close the Fax software or continue sending additional faxes if needed.
Note: It is recommended to double-check the recipient’s fax number before sending to avoid any errors or delays in fax delivery. Additionally, some Fax software may offer options to schedule the fax for a later date or time, so be sure to explore these features if necessary.
Checking the Status of Your Sent Fax
After you have successfully sent a fax from your Mac, you may want to check the status to ensure it was delivered successfully. Here’s how you can do it:
- Open the faxing application or service that you used to send the fax.
- Locate the “Sent” or “Outbox” folder within the application interface.
- Look for the sent fax in the folder and select it.
- Check for any status or delivery confirmation information provided by the application. This may include details such as the time and date the fax was sent, the recipient’s number, and whether the fax was successfully delivered or not.
- If there is no explicit status information available, you can try contacting the recipient directly to confirm if they received the fax.
It’s important to keep in mind that not all faxing services or applications provide detailed status information. In such cases, reaching out to the recipient can help ensure the successful transmission of the fax.
FAQ:
Can I fax from a Mac for free?
Yes, you can fax from a Mac for free. There are several methods available, including using online fax services or connecting your Mac to a fax machine.
What do I need to fax from my Mac?
To fax from your Mac, you will typically need a Mac computer with an internet connection, a scanner or compatible software for scanning documents, and an online fax service or a fax machine with Mac compatibility.
How do I fax from my Mac using an online fax service?
To fax from your Mac using an online fax service, you first need to sign up for a free account with the service. Then, upload the document you want to fax, enter the recipient’s fax number, and click send. The online fax service will convert your document into a fax and send it on your behalf.
Can I fax from my Mac without an internet connection?
No, faxing from a Mac typically requires an internet connection. However, if you have a fax machine connected to your Mac, you can send faxes without an internet connection, as long as the fax machine is compatible with your Mac.